Archives

Super Simple Crochet Thanksgiving Napkin Ring

For this Thanksgiving napkin ring, I used a size 3 crochet thread with an F hook for the actual ring portion and used Sugar ‘n Cream size 4 cotton yarn with a G hook  for the actual pumpkin design and stem.  By doing this, it made the pumpkin the focal point.  It also gave me a rustic looking design.


For the ring portion directions, refer to the HDC napkin ring design that I posted earlier making sure you leave yourself about a 10″ yarn tail to use to attach your pumpkin design.  Here are the directions for the pumpkin and stem:

CH, SC and DC stitches are used.  Begin by doing the “magic loop” with 8 SC within the circle, join with a SL stitch to beginning SC.

Round 2:  CH 2, then complete 2 DC within each SC,  join with SL in top of 2nd CH.  You now have 16 DC stitches.

Round 3:  CH 1, complete 1 SC in first DC stitch, complete 2 SC in next DC stitch, complete 1 SC in next DC stitch, complete 2 SC in next DC stitch, continue this pattern around and SL into top of beginning CH 1 stitch.  You should have 24 stitches.  Change colors.

Round 4:  CH 1, complete 4 SC in next 4 stitches, CH 1 turn.

Round 5:  Complete 1 SC, do 1 SC decrease, complete 1 SC, CH 1 turn.

Round 6:  Complete 1 SC decrease, complete 1 SC.  Fasten off.

Weave in your ends and prepare to attach your pumpkin to your napkin ring.  Thread the tail that you left on the napkin ring and using your darning needle, sew the pumpkin design onto the napkin ring.

IMPORTANT:  Keep in mind your placement direction of the pumpkin, do you want it to face horizontally with the napkin as in my picture or do you want the napkin ring to lay vertically.

These little pumpkins make up quickly and really add a personal touch to your dinner table.  Enjoy!!

HAPPY CREATING!!

TIP:  Feel free to use a finished design for your own personal use or make them to sell.  However, I asked that you not sell my patterns but would greatly appreciate it if you sell a completed design to give recognition by referencing this blog site.  Thank you!!

Disclaimer:  This post contains affiliate links – “small commission earned”


A Quick ‘n Cozy Crocheted Fun Winter Beanie

There is nothing like a cozy crocheted beanie hat for winter, especially to hide those “bad hair” days!!  This pattern is super simple and can be crocheted to your own designs very easily too.  You can make one of these cute beanies in an evening while watching TV!

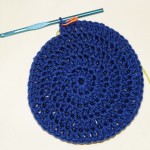
I begin the beanie by “working in the round” to create the crown piece for the hat using a double crochet (DC) stitch and continue working  in the round until I fasten off.  For an adult beanie, I use a crochet hook (Size I), crocheting in the round completing through the fifth round.  Please refer to blog post Crochet Designing Tips – Working in the Round for complete instructions on how to create your circle.Example of DC crown piece

Once I have completed the fifth round of increases for my crown piece circle, I join with a slip stitch, CH 2 and continue making my DC rounds (no more increases) until I get to the finished length that works for me, which is an additional 13-15 rounds.  NOTE:  At the end of each DC round, I join with a SL stitch and CH 2 and then proceed with my DC.  This helps to keep the shape intact.   I like to be able to fold up my beanie a couple of inches on itself for extra warmth for my ears.  You have creativity here based on your desires and likes, if you don’t want to be able to fold up your beanie than only crochet an additional 12-13 rounds and if you want a deeper fold maybe crochet 16-17 extra rounds.  It really is a personal preference.

After completing my DC rounds, I like to give a finished look to the beanie by crocheting another 3 rounds of single crochet (SC) stitches. Sample beanie

Just remember when working in the round to be sure to place a marker to indicate a row/round so you know where you are in the pattern and to help with counting your rows/rounds.

This is a very easy pattern that can be adjusted to fit many different sizes for babies, children and adults.  Just change your crochet hook size and the number of rounds after making your crown piece circle.  Hook size recommendations and suggested rounds for different sizes  once you have your crown piece circle completed are:

  • Size F for newborn (maybe D or E if you’re making for a preemie) and  7 DC rounds plus 3 rounds of SC
  • Size G for toddlers and  10 DC rounds plus 3 rounds of SC
  • Size H for children and 12-13 DC rounds plus 3 rounds of SC
  • Size I for adults and 13-15 DC rounds plus 3 rounds of SC

Again, the rounds are a personal preference thing depending upon what look you want from the finished beanie.  Once you have made one or two, you will know what works best for your needs.

Have fun with this pattern and experiment with different stitches too.  You could crochet this pattern is all half double crochet (HDC) stitches if you want.  Just remember it is a shorter length stitch and you might need to increase your rows/rounds to get the length desired.

Another look would be to complete  your crown circle piece in DC and then alternate your rounds between DC and HDC finishing off with a couple of rows of SC.  Adding crochet motifs to your beanie will give it a truly custom look too.

This is a truly wonderful beanie pattern for making extras to donate to schools, hospitals, etc.

FYI:  I like to use a 4 ply worsted weight yarn that has some lamb wool blended in for good warmth.  One skein will complete an adult beanie easily.

 HAPPY CREATING!! 

Disclaimer:  This post contains affiliate links – “small commission earned”

Beginning Crochet – You have to start somewhere!!

The definition of crochet, according to Wikipedia, is:  “Crochet is a process of creating fabric from yarn or thread using a crochet hook.” And truly that is really what you are doing when you crochet, knit, tat, or spool knit.  You can take the simplest crochet stitches and just make a flat piece of yarned fabric and let the imagination go wild. Even if you don’t want to do anything in particular with that flat piece of intersecting yarn loops, you have already created something useful.  A child will take that flat piece and use it as a baby blanket for their baby doll; place that crocheted piece on a chair for your cat to curl up on or depending upon the size, someone would surely love to have it placed on their lap for some warmth.  Anyways, you get the idea, you don’t have to get elaborate with crocheting if you don’t want to.  BUT, those creative juices will want you to explore further and challenge yourself to try to make something a little more intricate. Back to basics though, a simple chain stitch *(ch) combined with a single crochet  *(sc) will give you a lovely piece of yarn fabric to do with as your heart desires.  You say this doesn’t really appeal to you, well part of my goal here is to keep stitches going forever, so maybe your child or niece/nephew or students might have the interest in trying crochet.  You both could learn and practice together or show the younger generation what can be created out of a skein of yarn and one crochet hook. As a beginner, I would recommend using a larger crochet hook, say a size J and a 4 ply worsted weight skein of yarn.  There is a lot out there to chose from but stay simple in the beginning to minimize any frustration especially if you are working with a child.  Probably be helpful to roll your skein into a ball and then place that ball into a small bin or basket to keep it from rolling away from you.  As a side thought, you could probably use a square tissue box, gently open from the bottom, place your ball of yarn inside, then seal closed and have your yarn pull from the top.  Viola, you are ready to start crocheting.   Begin your project with the chain stitch (ch) making it as long as you want but probably 18″ – 24″ is a very workable width.  Here’s a link to a very informative YouTube video for the beginner crocheter to show you exactly how to do the chain stitch and single crochet.

After completing your chain stitches (ch), you will begin to do single crochet (sc) stitches beginning in the second chain stitch from your crochet hook. So, if you chained 50 chain loops, you will be doing 49 single crochet loops.   At the end of each row of single crochet (sc) you will do one chain stitch (ch), turn your work and then single crochet (sc) back through each previous single crochet (sc), which means you will always be doing 49 single crochet stitches for each row.  When you have your fabric as long as you want it or just used up your entire skein of yarn, you will then fasten off.  Very easy to fasten off, you have one loop on your crochet hook, wiggle your hook back and forth to enlarge that loop, take your yarn and cut it off leaving about a 4″ tail.  Pull that tail through your enlarged loop, remove your hook and then pull that tail very tight.  Basically, you are making a knot, then weave that tail through your stitches to complete your work.

Now you have a wonderful, flat piece of yarn/fabric to do with as you please bringing a smile to your face as well as your child’s face.  To me, there is nothing more satisfying than to have made something with your own hands and to pass along this art skill to someone else.


HAPPY CREATING!!

  *ABBREVIATIONS used in crochet patterns:   (ch) chain stitch    (sc) single crochet

Disclaimer:  This post contains affiliate links – “small commission earned”