Placemats are so versatile and making them reversible just doubles their use!! Not only do they serve the great purpose of collecting those crumbs and spills when eating but they can be used as custom decor on your table for a beautiful centerpiece or to add some sparkle if hosting a buffet to use under the various food items that are being served.
In addition, they are extremely easy to make and you can customize or embellish them to match your decor. You really don’t even need to purchase a pattern. You can use a placemat that you already have as your pattern or cut out a template from lightweight, unfusible pellon as a pattern. You can even just use a good ruler to design the style of placemat you want to make. Probably a good rule of thumb would be to make your rectangular style finished placemat size to be 18″ wide x 13″ long.
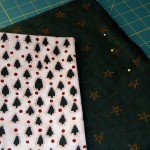
So let’s begin. First select what two fabrics that you want for your placemat. Keep in mind how you want to clean them. Are they going to be used as an everyday item, which means you want fabric that can be washed and dried often or just for special occasions. Cotton fabrics are a super choice, but check out those home dec fabrics too and some non-traditional fabrics like corduroy or faux suede. Maybe you want a holiday theme for one side and a solid look for the other!! Anyways, give some good thought to this process.
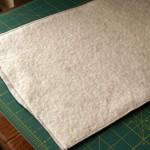
Cut out your fabric to be 1/2″ larger on all sides, so for a finished 18″ x 13″ size, you would cut your pattern to be 19″ wide x 14″ long. I always use a thin batting to be placed in the middle of my fabrics, such as bleached Warm ‘n Natural or Hobbs Heirloom. Depending upon your fabric, you can add your batting to the wrong side of each piece or maybe you only need batting on one side. I personally prefer to use non-fusible batting for this project because I feel it will hold up better especially if laundering a lot.
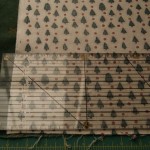
Preparing to cut fabrics
Another pic showing how to cut using a ruler
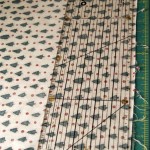
Cut your batting the same size as your cut fabric pieces and baste the batting to the wrong side of your fabric using a 1/4″ seam allowance.
Sewn batting to wrong sides of fabric
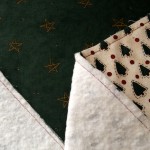
Pinned with right sides together leaving opening for turning
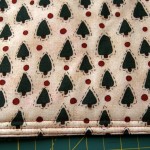
Now, line up your two fabric pieces, right sides together and leave about a 4″ – 5″ opening for turning. Stitch entire piece in a 1/2″ seam allowance. You can trim close to the stitching or serge/overlock stitch your edge to have a nice clean seam and again to help eliminate some bulkiness.
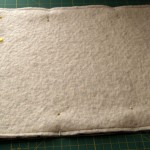
Sewn and trimmed, ready to turn
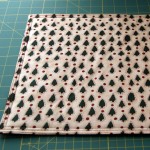
Turned, pressed and ready to do top-stitching
Once turned, fold your opening seams to the inside and press the entire placemat smooth. Now top-stitch around the entire placemat close to the edge, approximately 1/8″ from finished edge. Use a good pressure foot that maybe has a marking that you can follow to help keep your stitching line even or use a 1/4″ pressure foot as your stitching guide. If you decide to use a 1/4″ pressure foot or marking, you might need to do a blind stitch only along the turn opening so it doesn’t separate at that spot.
I always like to make another top-stitching line around the placemat edge about 1/4″ from the first top-stitching line. Mainly for decorative purposes – gives a sort of picture frame effect. Sometimes it is cool looking to even add another top-stitching line 1/4″ from the second stitching line.
Completed top-stitching
Another pic showing three rows of top-stitching

Using this placemat on table under floral arrangement
Press again and your placemat is ready for use!!
This project is perfect for a beginner sewer or a young child who is familiar with a sewing machine and has adult supervision especially using an iron and rotary cutter. Wonderful gift giving project too.
HAPPY CREATING!!
Disclaimer: This post contains affiliate links – “small commission earned”


