With cooler weather somewhere around the corner, you might be thinking of sewing some pj’s for the little ones or maybe a pair of “comfy” pants to lounge around in the house. Adding ribbed knit cuffs to a pattern or even to an already made piece of clothing is not too difficult.
I particularly like to add them to pajamas to help keep you warmer and I think they are a lot more comfortable than elastic around the wrist or ankle. You can convert any pattern that calls for elastic at the wrist and make yourself a ribbed cuff in its place.
Measure your wrist and/or ankle and add 1″ to that figure. That calculation will be your width measurement when cutting out your ribbed knit fabric. The length measurement is kind of a personal preference thing – I like to have a finished cuff measure 3″ long, so I will cut my length measurement 7″ long. This 7″ allows for my cuff to be folded in half ( 3 1/2″) and then allows for a 1/2″ seam allowance. So whatever your desired finished cuff length is, double that measurement and add 1″ to it for a 1/2″ seam allowance.
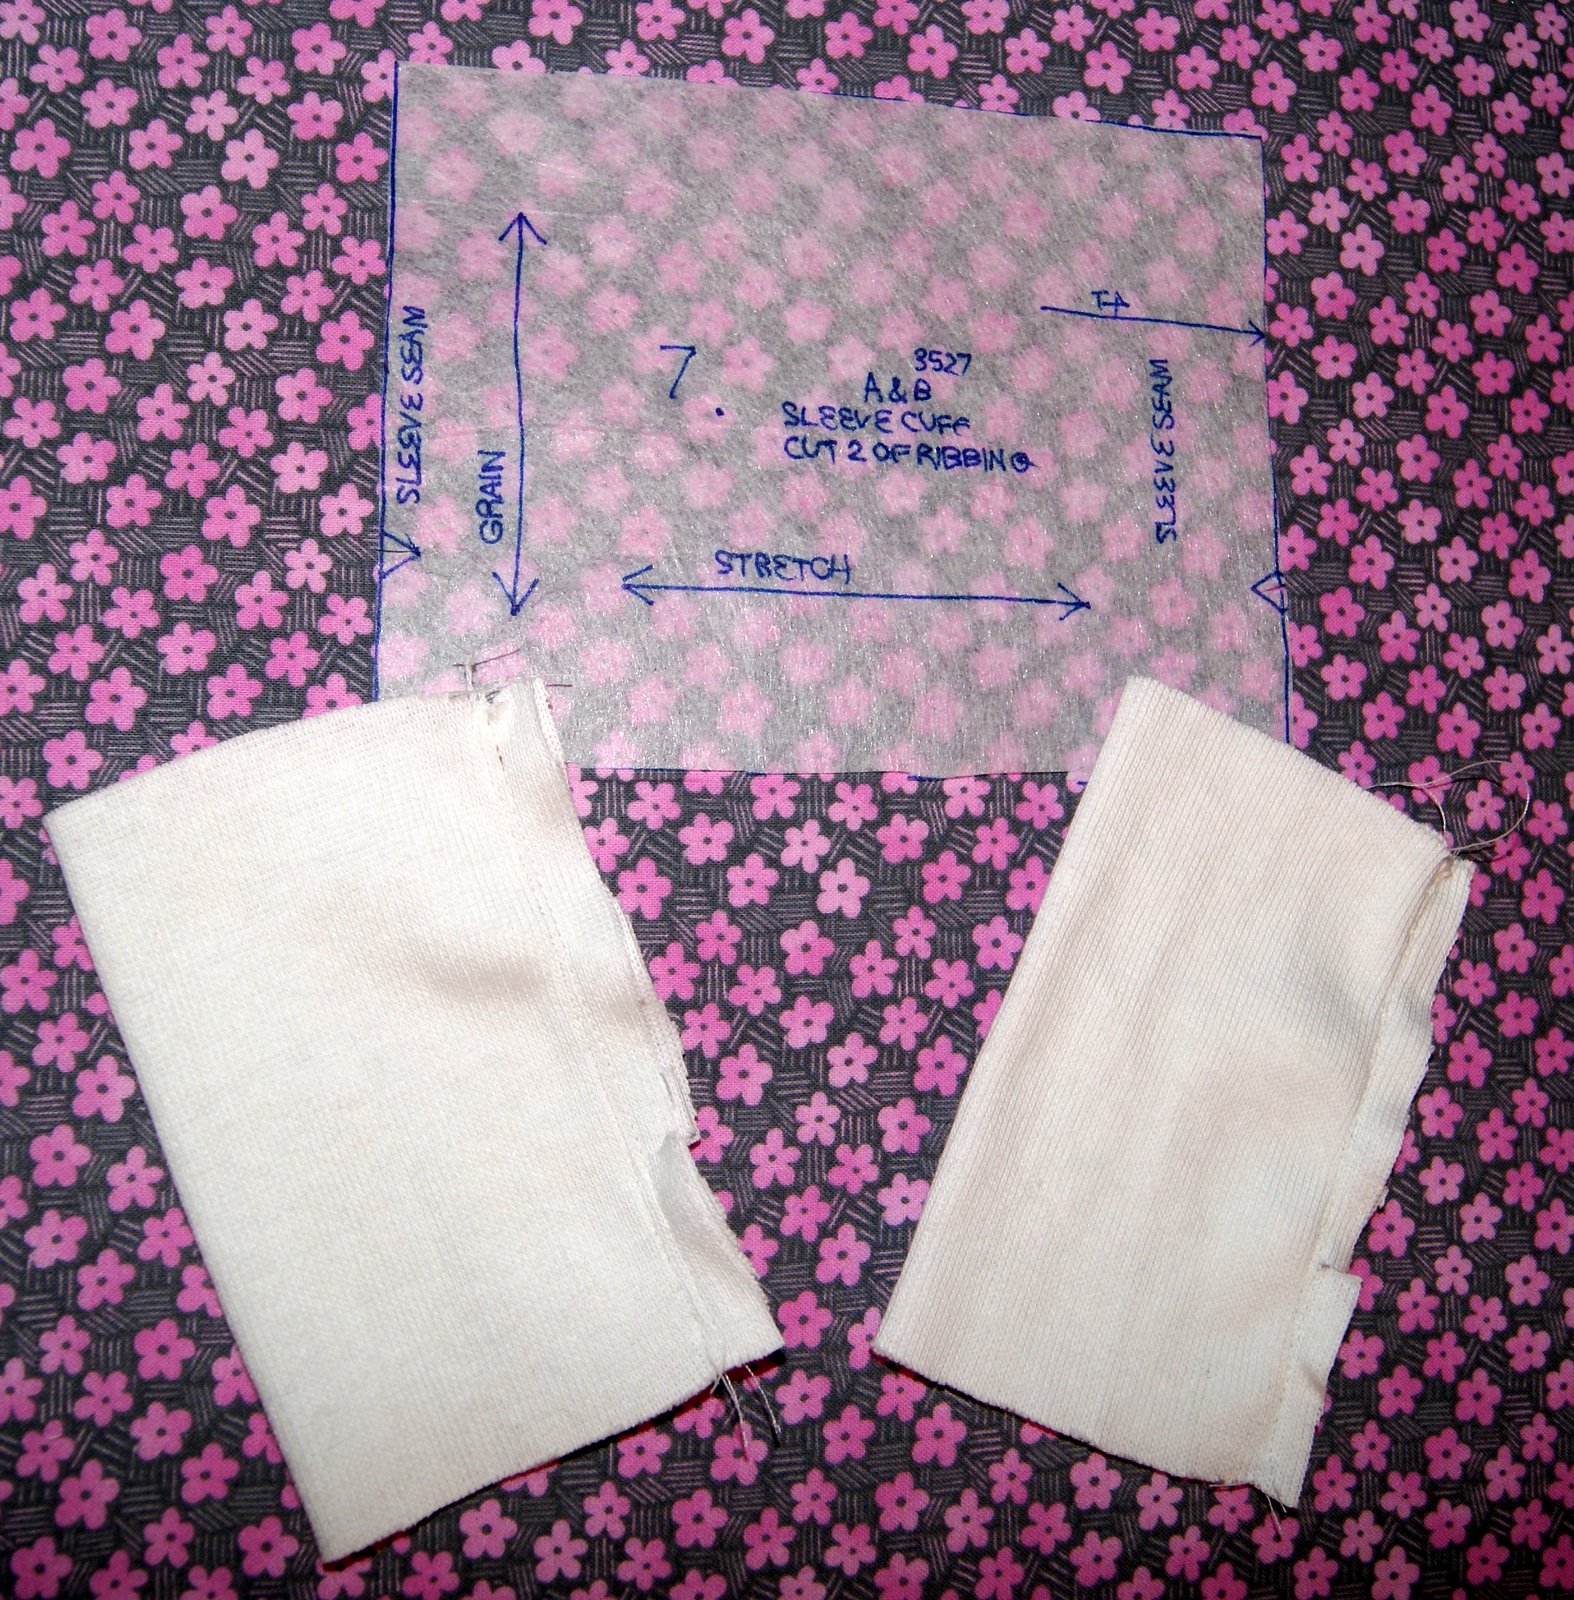
Now that you have your width and length measurements, cut out a paper or pellon pattern to use on the ribbing fabric. You want the fabric ribs to be going vertical on the cuff with the stretchiest part going horizontal which will be placed along the sleeve or pant edge. You will need one fabric pattern piece per sleeve or pant leg and cut out 2 of each.

With right sides together, fold your cuff pattern together with the width end measurements touching. Sew a narrow 1/4″ seam using a stretch stitch. Now serge along that same seam or use a narrow zigzag stitch or overcast stitch if you don’t have a serger. Fold in half, wrong sides together (seam lines matching). You actually have a cuff ready to be sewn to your garment.

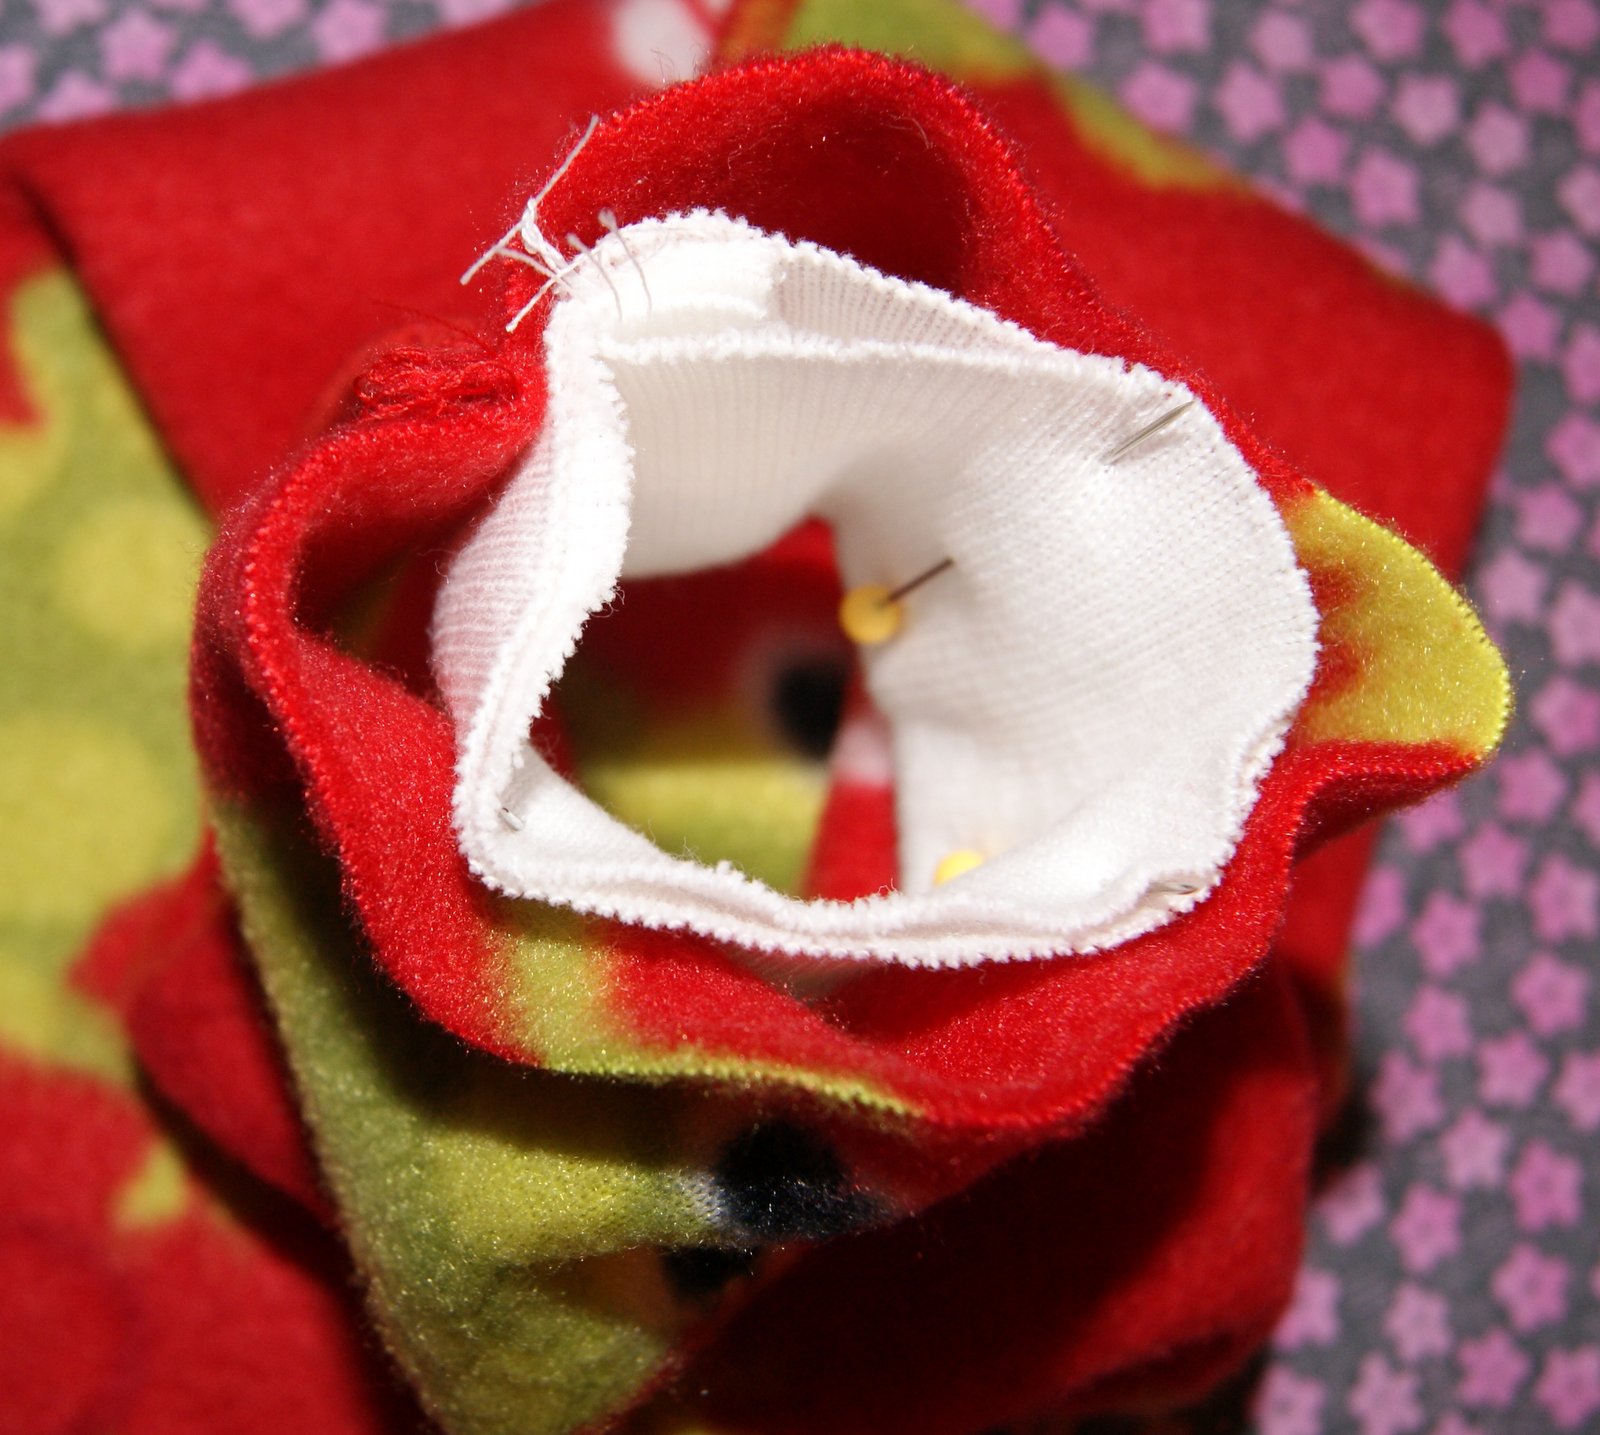
Sew your sleeve or pants together according to your pattern directions, no need for hems or elastic if you are adding the cuffs. To insure your cuff is evenly spaced around, you will want to mark off your sleeve/pant as well as the cuff into fourths. Place a pin at the sleeve/pant seam, place another pin at the opposite side of the sleeve/pant, then find center between those two spots and place two more pins one on the top and one on the bottom of the sleeve/pant. You now have four evenly spaced pin placements to use to match your cuff. You will do the same thing on the cuff, place a pin at the seam, one directly across from it and then find center on top and bottom of cuff. Place right sides together matching your pins. Now you are ready to sew the cuff to your sleeve or pant leg.

Sewing the cuff to the sleeve/pant itself can be a little tricky because you will need to stretch the cuff but not the sleeve/pant fabric. You will keep your sleeve/pant wrong side of fabric against your sewing machine. The right side will be inside and you will place your cuff inside the sleeve/pant garment for stretching the cuff while your sew. Match your pin placements with right sides together.


Beginning at one of the matching pin placements, begin sewing a 1/2″ seam allowance. Stretch the cuff while you sew so that the second pin placement on the cuff matches to the second pin placement on the sleeve and continue around matching all four pin placements with each other and joining stitching line. To give your seam a clean finished look, you can serge the seam or stitch with a narrow zigzag or overcast stitch on the edge.
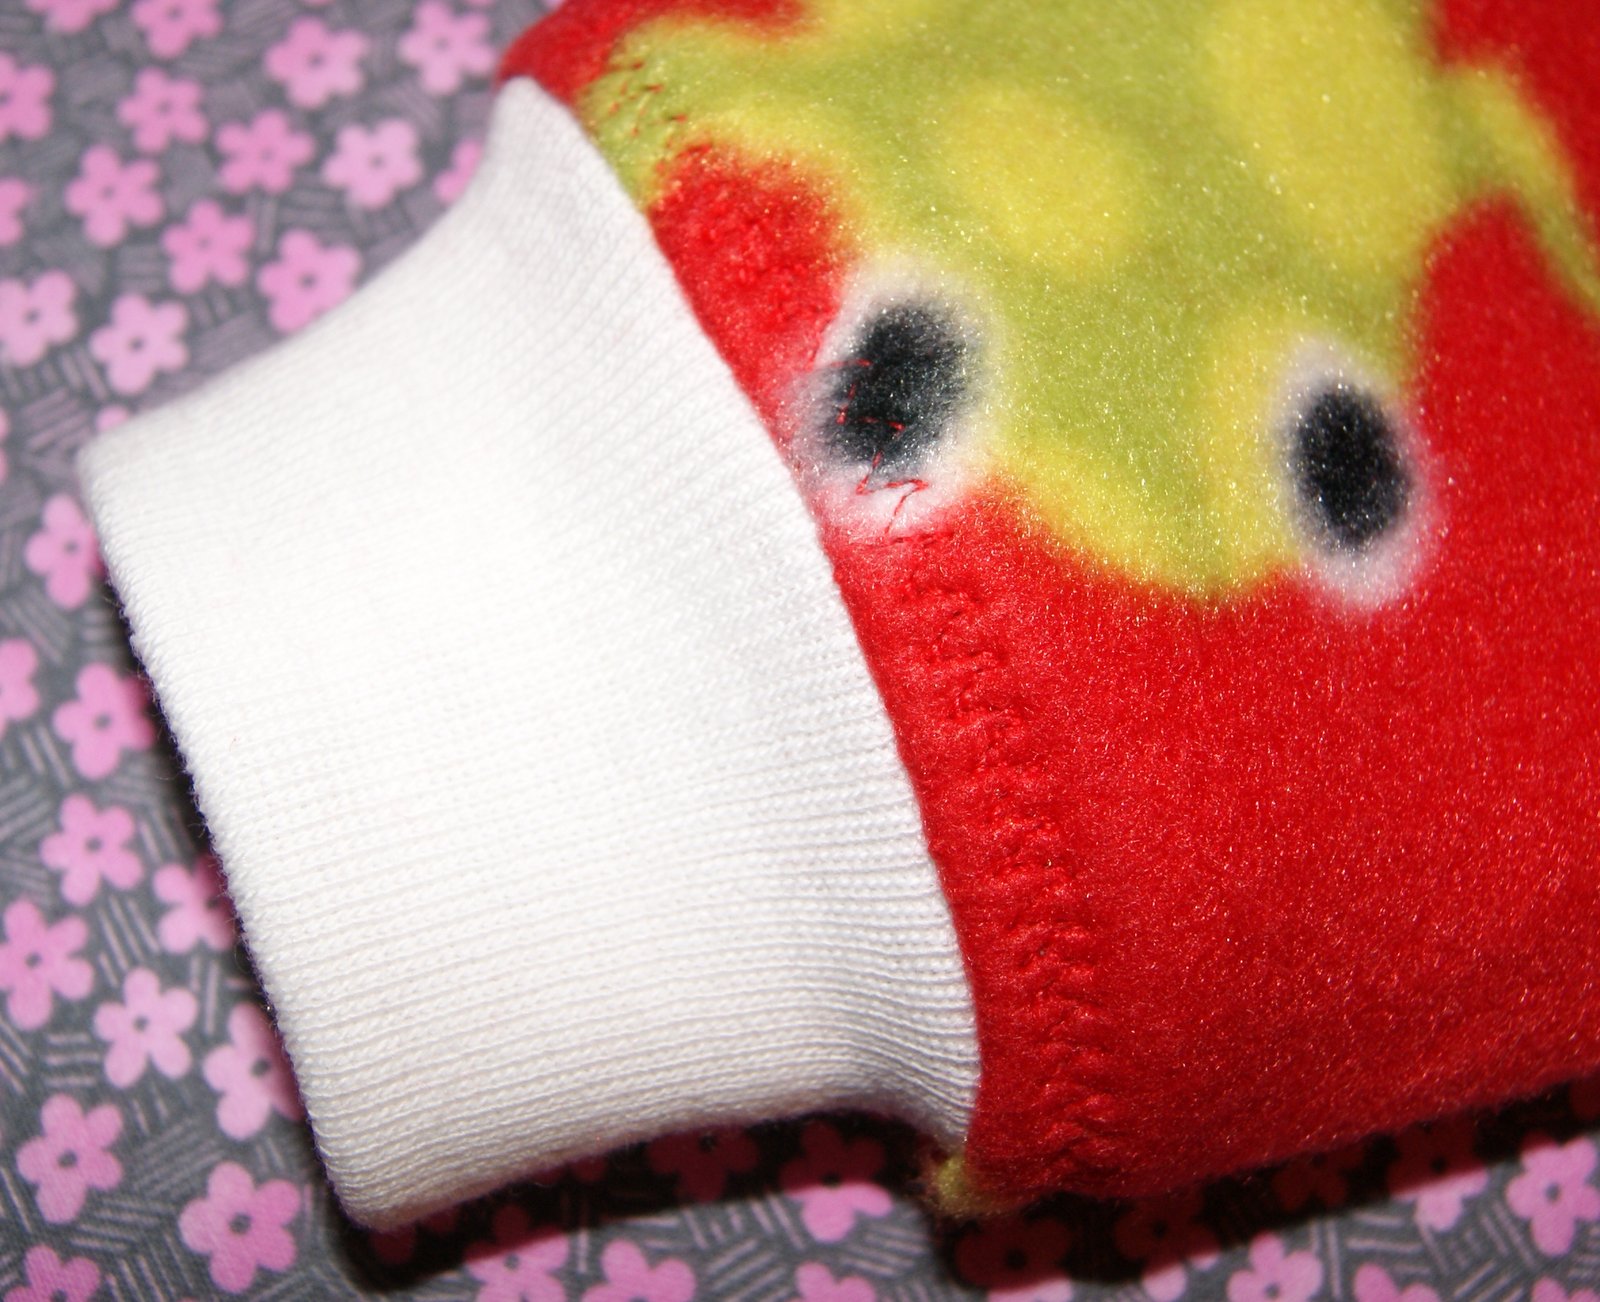
After you have sewn in your cuff, I like to add a decorative stitching on the outside to help hold the serged seam in place. I sew from the wrong side, holding down the seam and making sure the fabric underneath is smooth and flat.

Turn your sleeve right side out and you now have a wonderful cuff attached that will keep cool air out and help sleeve to stay in its place and not fall down over your hand. I like to add cuffs to pant bottoms too for the same reasons. If sewing for a child, you can add a little extra length to your pant pattern to allow for growth and the cuff will help to keep that extra length from dragging on the floor.
HAPPY CREATING!!
Disclaimer: This post contains affiliate links – “small commission earned”
Pingback: Welcome 2015 | Stitch4eveR