Archives

OoLaLa Self-Healing Cutting Mats

FINALLY, after 12 years of almost everyday use,  I disposed of my old self-healing mat by Olfa and purchased a brand new smooth, shiny one!!!  So now my pictures will have a pretty background.  Still has that new “stinky” smell, which I will help alleviate by rubbing it down with 1 part water to 1 part white vinegar.

I just love having ready access to this mat.  The one I use consistently is the 18″ x 24″ size.  My serger table, designed by me and built by my talented hubby, has an extended side which this mat fits on perfectly.  So I have it readily available for trimming seams, cutting out fabric, designing patterns, working on crafts, whatever is happening in my sewing room.

I have the small version and the extra-large mat too.  Can you tell that I just love using these mats.  The smaller size is great for any sewing/quilting classes, fits easily into a tote for commuting and doesn’t take up a large space when sharing a table with other people in your class.

The extra-large mat is a good to use for actually cutting out your fabric and patterns.  Works great on a kitchen table, especially if you have limited space for preparing sewing projects.

These mats store away easily but you do want to insure that you don’t fold or bend them.  They will stand nicely behind a storage bin or slid easily behind a bookcase.  You don’t want them to come into direct contact with the hot sun or a heating vent.  If left in a car, for example, the hot sun can actually distort the mat causing it to bend out of shape and you can never, I mean never, get it back flat again!!

If you have the space, there is a very, very large self-healing mat that is wonderful for doing drapery treatments or cutting out several patterns at once.  The measurement size on the mat itself is 44″w  x  92″ long, marked off in 1 inch block increments on the entire face of the mat.  The actual mat itself measures 48″ x 96″.  Feel free to check out Megamat Pro and Sew Fit Cutting Mat for these very special mats.

Off now to cut out a new tote on my new mat!!

HAPPY CREATING!!

Disclaimer:  This post contains affiliate links – “small commission earned”
Best Marking Tool

You know when you are sewing or quilting,  you sometimes have to mark your fabric so that you can stitch an accurate line.  There are many different tools available for you to use that can be found at your local sewing store.  However, I have found that the best thing to use to mark your fabric is a bar of soap.

You know how you always end up with those little remnants of soap pieces!!  Well, they are perfect to use for marking on your fabric.   The soap makes a nice, white line which is simple to follow and easy on your needle and sewing machine too.   And best of all, once you have completed the stitching along your soap line, all you have to do is steam is out of your fabric.

I would not recommend using a soap that has lotion within its contents but just about everything else works get.  When the edge of the soap gets rounded, just go wash your hands with it to give yourself a sharper edge to work with.

A perfect use for all those little “hotel” soaps that you collect too.   This is truly a sewing notion that you will always want to keep within your sewing basket!

HAPPY CREATING!!

Disclaimer:  This post contains affiliate links – “small commission earned”

Sewing Must Haves

Having the right tool for the right job is always a plus even for sewing projects.  I’m sure anyone who does crafting or sewing, even the very casual sewer, has the very basic items readily available; like a good pair of scissors, needle and thread.

Here are some worthwhile tools that I’m sure you will find helpful to give your sewing projects that professional look and feel.   A well equipped sewing room always has a seam ripper at hand, maybe even two.  You will just have those moments when it will be necessary to utilize the seam ripper and this tool does make fast work of taking out thread.

Another great tool to have at your disposal is a knit picker.   You know how your favorite sweater will get a snag and you end up with a pulled thread, well the knit picker makes fast work of pulling that loop to the wrong side of the material and you cannot tell that there was ever a snag.

Fray check is another one of my personal favorite sewing aids.  The name says it all!!  This liquid, when dry, helps to keep fabric and/or threads from fraying.   Easy to use and is machine washable and dry cleanable.

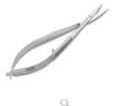
Sewing snips are a convenient item to have for cutting threads.  They are lighter than a pair of scissors and  you use only one motion for snipping those threads.

A needle threader, tweezers and a soft measuring tape are very useful items to have readily available too.  A turning/stuffing tool is super nice to have when you have to turn a corner to the right side or getting batting into small areas.  Actually, I have had success using a knitting needle or a chop stick to help make a crisp corner or pushing that little bit of batting into place.

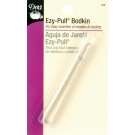
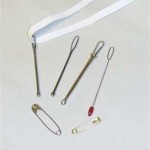
Elastic  threaders or a bodkin are great to use to help pull elastic through a casing.   Safety pins are a must too and can also be attached to the end of elastic for threading through a casing.

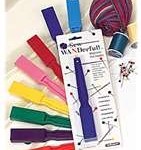
A couple of more unusual items to have in your sewing basket are a telescopic magnet and a magnifying glass. The magnet is a great tool to help pick up those pins that you know are going to spill or to find that one illusive pin that dropped onto the rug and you can’t see it.  Speaking of can’t seeing, the magnifying glass gives you that extra oomph when looking at very small, detailed work.

These little sewing aids are not only perfect for the seamstress/crafter but also having them available in a little bin in your closet or desk drawer at work for those times when a clothing mishap presents itself would be an unexpected pleasure!!

HAPPY CREATING!!

Disclaimer:  This post contains affiliate links – “small commission earned”
The Scoop on Cotton Fabrics

For me, the best part of sewing is going to a fabric store and touching, looking at and then selecting my fabric needed for the project that I am planning. I have found over the years that some cotton fabrics have succumb to that new marketing of same old container but actually less product inside.

You use to always pick up your bolt of cotton fabric and it was 44″-45″ wide, however, now look closely because most of the time your cotton widths are now 42″-43″ wide.  Unfortunately, patterns still give yardage requirements for the 44″-45″ wide fabrics and depending upon your project, you might need to purchase more yardage than what is recommended.  It can be a little frustrating but knowing this fact, always check the end of the bolt to verify your fabric width size.

As a rule of thumb, if making clothing you might need to purchase about an extra 1/4 of a yard of your selected cotton fabric to insure you have enough for all your pattern pieces.  Before I cut out any pattern pieces, I always wash my cotton fabrics in cold water and place in the dryer at a medium temperature.  This way I feel I have reached the maximum shrinkage of that piece of fabric, especially if you are making children’s clothing because busy moms just want to through that item into the washer and dryer without any worries.  You really don’t want to spend the time and effort making a wonderful piece of clothing and wash/dry it and have it shrink a couple of inches.

Surprisingly, some cotton fabrics could shrink 2 – 3 inches after completing the washing and drying process.  That’s why I usually purchase a little extra to allow for the narrower width and possible shrinkage.  Nothing more upsetting than to find out you don’t have enough fabric when laying out your pattern pieces.  Even for quilting, because I solely use cotton fabric, I will buy a little extra for that same purpose of shrinkage and narrower fabric widths.

In rare instances, a 1/4 of yard extra might not be enough especially if you are using a one-way design fabric, which means all your pattern pieces need to go in the same direction.  Pattern design and size requirement of the finished item are specific measurements to look at when determining  your yardage needed.  Be sure to check with the individual who is cutting your fabric if you have any questions about the yardage requirements needed for your specific project.

I still LOVE to sew with cottons.  It makes up wonderfully in clothing, crafts, home deco projects and more.   There are many wonderful colors and designs available in cottons fabrics too.  Because it really has a great weave to it, you can just make a small clip and rip your  fabric to get a true straight of grain edge to work with.  Cottons are really a great fabric to work with too especially if you are a first-time sewer or helping a child sew a project.

You don’t just have to go to the big box fabric store either to purchase great cottons.  A couple of my favorite on-line fabric stores are fabric, thousands of bolts and fabric shack.  I still find it fun and amazing to be able to purchase fabric in my pjs!!!!

HAPPY CREATING!!

Disclaimer:  This post contains affiliate links – “small commission earned”