Ironing as you Sew

Your iron is one of your best friends when it comes to sewing, quilting and sometimes even crochet projects.   Sometimes you actually need to iron with it (gliding it back and forth); then there are those times you only want to press with it (holding it in one place); and often times you just want to steam with your iron (holding it above your piece and using the steam feature).   It really is such a versatile tool!!

It is always best to use your iron according to the directions stated within your specific project and make sure your settings are accurate for the type of fabric/material that you are using.   Make sure you have a nice pressing cloth readily available to use with those fabrics that you don’t want to place your iron directly on to.   Also, it is good for you physically to get up and move around, get the old blood following and not sit forever behind your sewing machine.

Using a tailor’s ham with your iron will give your sleeves, shoulders  and/or necklines a very professional finished look.  Depending upon what you are sewing, sometimes just a finger press will do the trick.  I use the side of my thumb nail and rub back and forth along the seam to help hold it in place.  There are some very nice little tools that will give you the same results as your nail too.

I always have my iron and ironing board set up in my sewing/craft room.  You can even set up one of those little ironing boards and place it on your dining room table if that is where you sew.  Most importantly, don’t overlook the importance of pressing seams, facings, hems, etc., your project will love you for it.

Once in a while, be sure to use a good iron cleaner to keep your sole plate clean to help with smooth gliding and insuring nothing yucky gets transferred onto your project!!   I personally like a product called Ez-Off because you can use it directly onto your hot iron and it removes all kinds of residue that I seem to get onto the bottom of my iron.

Enjoy your creating moments but remember too that sometimes those small processes like pressing will really make a big difference within your finished item.

  • TIP:  I use an inexpensive tablecloth as my pressing cloth.  It gives me the options of using a single layer or folding it many times for a thicker pressing cloth.  Also, if using a single layer, I can see through it to my project.

HAPPY CREATING!!

Disclaimer:  This post contains affiliate links – “small commission earned”

Foundation Stitch – No Chain Stitch Necessary

The foundation stitch is another way in which you can begin your crochet project.  All crochet projects start off by doing the chain stitch (ch) so that you have a base in order to complete the next row of stitches according to your pattern directions.

Doing a foundation stitch is a little different than just crocheting a long row of chain stitches.  It is basically a way of doing the single crochet (sc) to form your first row of stitches.  One of the main reasons I will begin a project using the foundation stitch is that it doesn’t seem to end up as tight as a long string of regular chain stitches.  I find that after I have crochet for just a couple of rows, my beginning chain row actually is a little tighter than my other rows, even when I am consciously making an effort to keep my chain stitches loose.

The foundation stitch is great for any project  but I find it is especially great  for afghan patterns when your directions call for you to crochet 100 or more chain stitches.  It is easy to count your stitches and keeps an even tension with your other rows of crochet stitches.

You just crochet the foundation stitch and count it like a regular chain stitch and when you have reached the number of stitches necessary for your project, just add a regular chain stitch (ch) for turning purposes.  Then proceed with your next row according to your pattern directions.

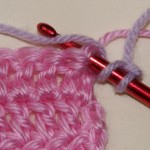
To make a foundation chain, begin by making 2 chain stitches (ch), then insert your hook under the top 2 loops of the 2nd chain, yarn over and pull the loop through (2 loops on your hook), yarn over again and pull the loop through ONLY the top loop on your hook (still 2 loops on your hook), then yarn over and pulling through both loops on your hook (now only 1 loop left on hook).  You have just completed one (1) foundation stitch.

Now, you will insert your hook through both strands of the foundation stitch that you just completed, yarn over and pull through those two strands only (2 single loops on hook), yarn over again pulling only through the top loop on hook (2 loops still on hook), yarn over and pull through both of  those loops (1 loop remaining on hook).  Another stitch completed.  Continue in this fashion until you have made all the necessary chain stitches required for your pattern.  Again, be sure to end your row making one or more regular chain stitches for turning purposes.

  • TIP:  Your pattern directions should tell you how many turning chains you need to complete to have the required height for the new row of stitches.  For example, you will need (1) chain stitch, turn and continue with a single crochet; will need (2) turning chain stitches to continue with half-double crochet; need (3)  turning chain stitches for double crochet; (4) turning chain stitches for triple crochet, etc.

Have fun with the foundation stitch because you will discover what a great stitch it is!!  Be sure to click on photos to zoom in for larger image.

HAPPY CREATING!!

Disclaimer:  This post contains affiliate links – “small commission earned”

Insert in top two loops of 2nd chain – Step 1

Completed after 1st yarn over pulling through chain stitch – Step 2


Yarn over and pull through top loop only on hook – Step 3


Last yarn over pulling thru both loops – Step 4 – Completed 1st foundation stitch

Insert into top 2 threads of completed foundation stitch – Repeat Steps 2 thru 4


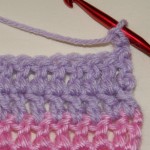
Added 2 turning chain stitches for second row of double crochet

Example of how nice and flat the foundation stitch lays as you continue your crocheting

Blocking your Crochet Piece

I am always debating whether to block my finished crochet piece??  For me, it all depends upon the type of yarn I have used and what my completed project is — a doily or clothing or afghan.

It is very important to always read what the manufacturer of the yarn recommends when it comes to washing and/or dry cleaning suggestions.  If using a cotton yarn/thread, I like to hand wash my completed project and lay if flat to dry.  When it is almost dry but still slightly damp, I will place it onto my ironing board, cover it with a towel and then use the steam feature on my iron.  Holding the iron very close to the towel without actually placing the iron on the item.  This will give you a smooth finished look without stretching the yarn and eliminate any curling that might have occurred.

One concern with cotton yarn that I always seem to dwell upon is the question of shrinkage.  I haven’t experienced any problems with shrinkage as long as I use cold water and air dry.  Then block the piece as mentioned above.

When using a wool blend yarn, again follow the manufacturer’s washing/dry cleaning directions, and then, if needed, you can block the piece the same way as described above.   A lot of times, however, when I have completed a project,  I will lay it out flat on a padded surface, spray it lightly with water, and just pat it into shape and let air dry.

I find too that if I am crocheting a sweater, it is a little easier to block or shape your pieces as you crochet them.  Again, laying them out on a padded surface, spray lightly with water and just pat them into their shape and air dry.  Then everything is ready to be joined according to your pattern directions.

You will find there are those projects that really need to be a certain size when completed, i.e., socks, mittens, hats,  some sweaters, and blocking your piece helps you to shape your work to those measurements.   Most importantly, your crocheting GAUGE must be accurate too for the completed project to be the size you need.    Blocking tools are available that you can put your damp project over to assist you in this shaping process.

My daughter and I are presently experimenting with blocking a rather large afghan that seems to curl on the edges.  We are laying it out flat onto a carpeted area that we have laid several towels down first.  Then we will be spritzing it with water, covering it with more large towels and then running a floor steamer over the top of everything.  Again, not touching the project with the steamer itself, just shooting the steam through everything.  Then we will  take the top towels off, pat into shape and let air dry.   We feel confident that this will work and will be much easier to shape since the afghan is a comforter size.

Always trying to keep those “creative juices” flowing!!

HAPPY CREATING!!

Disclaimer:  This post contains affiliate links – “small commission earned”