Archives

Keeping your Sewing Foot Pedal in place

If you are like me, I do a TON of sewing especially this time of the year!!  One thing that always seems to happen to me is that I am forever chasing my sewing machine foot pedal all around because it is ALWAYS moving out of my comfort zone for sewing!! I have tried placing self-adhesive felt pads on the bottom of my pedal without much success and have even used sandpaper stickers on the underneath side of the pedal and I am still always having to move it back into place.  However, these sandpaper stickers work super on your quilting rulers to help keep them from sliding around!!  Sorry, I digress. Anyways, I have designed a platform that I place my sewing machine foot pedal on and it really seems to help keep it from moving all around.  Believe you me it is nothing fancy and you probably have these items around your house so NO COST which is right up my alley.  This is what I presently use: SONY DSCSONY DSC         
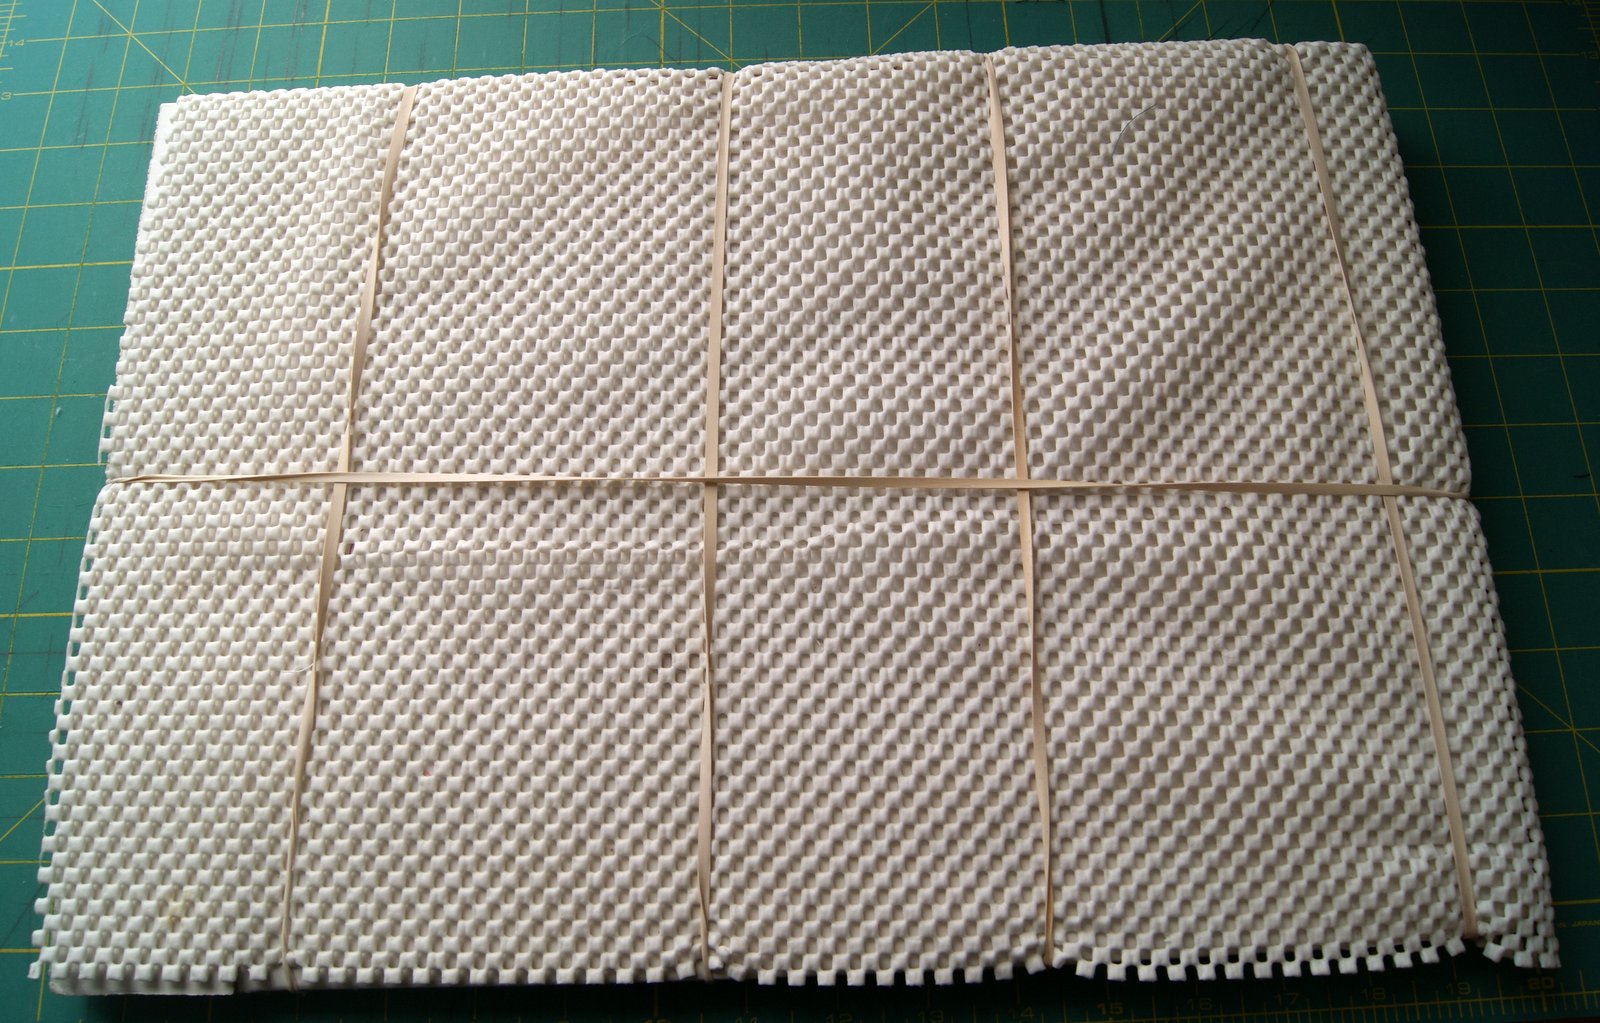
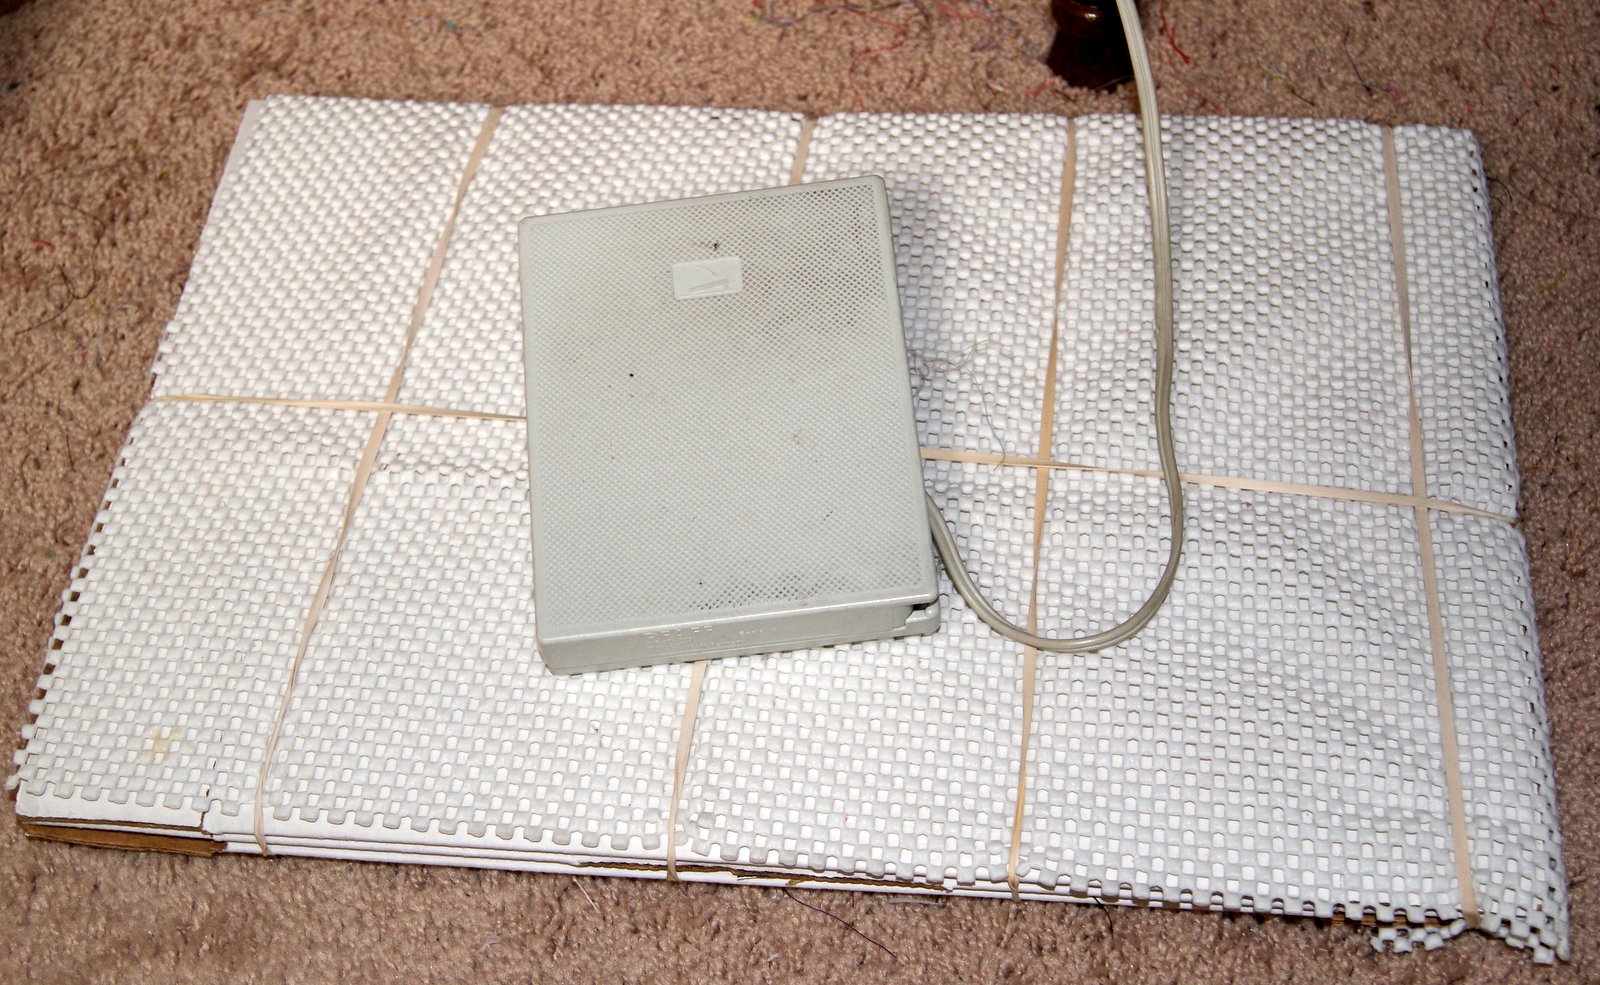
See I told you it is nothing fancy  ~ ooooh and pardon all my thread explosions LOL!!  I have taken a couple of card board mailing boxes and covered them in the rubberized shelf lining material with some extra-large rubber bands to hold it all together.  The boxes I used are about 16″ wide by 11″ long and I covered three of them for some thickness and height.  You see I am also vertically challenged so it works better for me to have my foot pedal raised up a little bit. My foot pedal will still move around ever so slightly but it doesn’t travel way out of reach. This works for me and keeps me from getting frustrated 🙂 It would be great if you could share your ideas that you use to help with this issue!!

HAPPY CREATING!!

Disclaimer:  This post contains affiliate links – “Commissions Earned”


Storing Bobbins

Came across this super inexpensive and clever idea on Pinterest showing an easy and neat way to store your bobbins using pedicure forms.  So I went to the blog site, Manoa Road, to get further information. Myself I have these plastic snap cases that I use and I do really like them because the bobbins are quick and easy to pull out and put back away ~~ especially since I seem to do this procedure one-handed.  However, they tend to get messy with the threads having a mind of their own and they get stringy even in the case.  So I thought I would give the pedicure forms a try!! SONY DSCSONY DSC Now I didn’t actually go and buy anything at this point just used a couple of pedicure forms that I had on hand.  Voila, it seems to work nicely and threads are all tucked away neatly but not sure if it is the way to go for me. As I mentioned earlier, I tend to grab and replace my bobbins using only one hand (probably why my threads get unruly but is a timesaving process for me and my sewing needs). This solution needs two hands to replace the bobbin back into the pedicure form.  Also,  my bobbins seem to make the form curve a bit ~~ not sure if my bobbins are larger/smaller or my forms are not new and maybe too soft and flexible.  Brand new forms are probably a little sturdier and might not curve. SONY DSCSONY DSCSONY DSC For me I’m not sure if I will change my current bobbin storage system, however, I still think this is a grand idea worth looking into and maybe will work for you and how you sew with your tools. Hmm ~~ probably next time I am shopping I just might have to pick up a couple of new pedicure forms though!!  Let me know if you have success with this idea 🙂

HAPPY CREATING!!

Disclaimer:  This post contains affiliate links – “Commissions Earned”      

Magnetic Clasp Sewing Tips

As I have mentioned in my previous post, I like using the magnetic clasps for many projects.  Recently was sewing a very small tab closure and used the tab for one part of the magnetic clasp.  Because I was doing top stitching for a nice finished edge, the metal clasp was on the bottom and would catch on the feed dogs and would slip a little.

SONY DSCSo had to get the creative juices flowing and figure out what I could do to prevent that clasp catching on the feed dogs.  After rummaging through my sewing drawers to see what I had on hand,  I decided to use repositionable scotch tape to place over the magnetic clasp.  Made for a very smooth underside of my tab closure and the clasp slid along the feed dogs without catching!!  Because I used repositionable or removable scotch tape, it left no residue on the clasp or my fabric.

SONY DSCSONY DSC
SONY DSC


Another little tip I find helpful, is to use some iron-on pellon fleece on the wrong side of the fabric that doesn’t hold the magnetic clasp.  It gives a little cushion so that your clasp outline doesn’t show on the right side of your finished work.

Also, because of the small size of the tab, using my zipper foot kept the pressure foot from resting on the tab too so that my top stitching came out perfect every time!!

SONY DSC

Hope these additional little tips or suggestions will help you too when you are using magnetic clasps for your projects.  🙂

HAPPY CREATING!! 

Disclaimer:  This post contains affiliate links – “small commission earned”


Ironing as you Sew

Your iron is one of your best friends when it comes to sewing, quilting and sometimes even crochet projects.   Sometimes you actually need to iron with it (gliding it back and forth); then there are those times you only want to press with it (holding it in one place); and often times you just want to steam with your iron (holding it above your piece and using the steam feature).   It really is such a versatile tool!!

It is always best to use your iron according to the directions stated within your specific project and make sure your settings are accurate for the type of fabric/material that you are using.   Make sure you have a nice pressing cloth readily available to use with those fabrics that you don’t want to place your iron directly on to.   Also, it is good for you physically to get up and move around, get the old blood following and not sit forever behind your sewing machine.

Using a tailor’s ham with your iron will give your sleeves, shoulders  and/or necklines a very professional finished look.  Depending upon what you are sewing, sometimes just a finger press will do the trick.  I use the side of my thumb nail and rub back and forth along the seam to help hold it in place.  There are some very nice little tools that will give you the same results as your nail too.

I always have my iron and ironing board set up in my sewing/craft room.  You can even set up one of those little ironing boards and place it on your dining room table if that is where you sew.  Most importantly, don’t overlook the importance of pressing seams, facings, hems, etc., your project will love you for it.

Once in a while, be sure to use a good iron cleaner to keep your sole plate clean to help with smooth gliding and insuring nothing yucky gets transferred onto your project!!   I personally like a product called Ez-Off because you can use it directly onto your hot iron and it removes all kinds of residue that I seem to get onto the bottom of my iron.

Enjoy your creating moments but remember too that sometimes those small processes like pressing will really make a big difference within your finished item.

  • TIP:  I use an inexpensive tablecloth as my pressing cloth.  It gives me the options of using a single layer or folding it many times for a thicker pressing cloth.  Also, if using a single layer, I can see through it to my project.

HAPPY CREATING!!

Disclaimer:  This post contains affiliate links – “small commission earned”

Using those Multi-Sized Children’s Patterns Again!!

I guess I am always looking for ways to get the most “bang for my bucks”!!  Here’s another way in which I utilize the most out of a multi-sized child’s pattern.

If you have a rather simplistic pattern (one without a lot of curves or very small details) this procedure works nicely.  Great for shorts, pants, pjs, etc.

What I do is cut out the largest size on the pattern and make some small cuts along the curved edges of the pattern.  For example, if I am cutting out a short pattern, I would make a few cuts/clips  into the pattern piece itself right along the crotch line area.

Next I have my iron hot (cotton setting) and ready.  Then all I do is fold over the edges to the size I want to cut out and iron in place.  As my child grows and I need the next size on the pattern piece, I repress it out completely and then fold over the edges again to the new size and press in place.

This also works great if the pattern is two designs, say for  long pants and shorts.  Again,  just press up the extra pattern piece for the pants and iron in place and cut out for the shorts.  Then press out again for the full size if you decide to make the long pants.  Curved edges are the most tricky, that is why I suggest making a few clips/cuts along that edge so you can fold over that part of the pattern smoothly.

The tissue paper that patterns are made from is pretty durable and will handle multiple ironing and resizing as long as you are somewhat careful especially around those places where you have made clips to accommodate for the curves.

You will get a lot of mileage out of your multi-sized patterns and really be able to use all the different sizes that come with that one pattern!!

Multi-sized pattern piece (1-2-3) – I’ve cut out size 3, long pants


Showing how I clipped along curved area

Another picture showing how I clipped curved area

Ironed pattern piece, now ready to cut size 2 shorts

  • TIP:  When cutting out patterns, use scissors that are meant for paper, not your good, sharp fabric scissors.  The paper will eventually dull your scissor blades and make it difficult when cutting fabric.

HAPPY CREATING!!

Disclaimer:  This post contains affiliate links – “small commission earned”