Using a knitting nancy or spool knitting is a great tool/technique to introduce a youngster to the wonders of yarn. It is a very easy yarn method to create a nice knitted or braided cord that could be designed for bracelets, trivets, coasters, etc. It is really an awesome technique that anyone would find fun to do!! 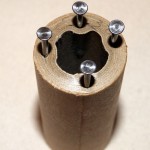
I have actually recycled a thick cardboard thread spool that formally held 1200 yards of mercerized cotton thread for machine quilting by Coats and Clark. The spool is 1″ in diameter with the opening being 1/2″ in diameter. The length of the spool is 2 3/4″ long. I like this size because it fits a child’s small hand really well. You can purchase knitting spools too.
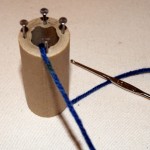
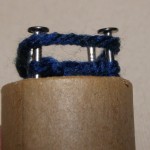
I hammered in four brads using ones that had a large flat head to them. It helps to keep the yarn from sliding off the brad when making your loops. Once you have your spool ready, select your yarn. I would recommend using a 4 ply worsted weight yarn and a metal crochet hook size 5 (1.90mm).
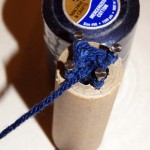
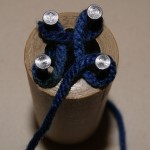
To begin, take your yarn and drop it through the hole and let it hang out about 2 or 3 inches from the bottom. Now to “cast” on your loops, you will be turning the spool in a clockwise direction but going around each brad in a counter-clockwise direction one at a time.
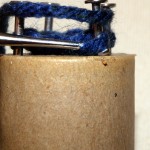
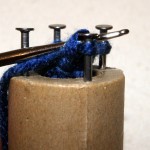
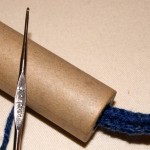
After you have made your loop on each brad, you take your yarn and place it right above the first loop made and with your crochet hook, lift the bottom loop up and over the yarn and brad. Leaving one loop on the brad. Spin your spool in your hand slightly and do that same thing again on the next brad. Keep turning the spool in your hand, make another yarn wrap and continue lifting the bottom loop up and over the top yarn on each brad. Before you know it, you will have a great icord, braided loop or “cattail” coming out of your spool at the bottom.
Now just keep making your loops until you have your “tail” as long as you want it to be. Once you have reached the desired length, you will need to bind off your work from the knitting spool.
When you are ready to “cast off” don’t make a yarn wrap, just grab the loop of the last stitch made and lift it onto the brad to its immediate left. Lift the bottom loop over that loop, now grab the remaining loop left on that brad and lift it onto the brad to its immediate left. Continue doing this until you only have one loop left on the last brad. Cut your yarn and carefully lift the last loop off the brad and place your cut yarn through the last loop and pull snuggly securing all your stitches. Now you have a wonderful knitted tube that can be used for a wide variety of creative projects!!
I have discussed this technique before but have updated my pictures to help you see the process better!! 🙂
HAPPY CREATING!!
Disclaimer: This post contains affiliate links – “small commission earned”
,,,

I’d love to know more about the ‘wide variety of creative projects!’ I remember making these as a kid – my son (6, 1st grade) is now into Rainbow Loom, so I was telling him about cattails – but for the life of me don’t remember doing anything beyond creating them of all different yarn.
Janice,
Here are a couple of ideas to create from your “cat’s tail” as I like to call it. From just one tail, coil it up in a circle and make coasters, trivets, even placemats. Just need to sew (whip stitch) your coils together. If you don’t want a circle, you could coil an oval shape. Also, make three tails and stitch together at the top and braid them together. Makes for great bracelets, headbands, or belts. You could also make several tails and weave them together for potholders, like the looms with the loops. Again just whip stitch your tails together or maybe even glue them in place with a good Fabri-Tac glue. Tie your tails into a knotted ball, becomes a fun paper weight or pin cushion or cat toy. Or even glue googley eyes onto your knotted ball and make a fun “monster”. Hope this gives you some ideas that you and your son can create together!! 🙂
Thank you! That all makes sense and sounds fun!
Pingback: Knitting Nancy Project | Stitch4eveR
Pingback: Spool Knitting Finished Project | Stitch4eveR