Archives

Crochet / Knit Cotton DishCloths

Welted Leaf Pattern

I really enjoy using a handmade cotton dishcloth for my kitchen and I thoroughly enjoy making them for myself, family, friends and as gifts.  Dishcloths are an ideal way to practice various crocheting or knitting techniques. I’m still trying to better my knitting skills and making dishcloths is a great way to practice.

My preference is about a 9″ or 9 1/2″ square dishcloth. I also like a little texture not only for the scrubbing aspect but I want something that is fun and pretty!! I also prefer to make mine from 100% cotton yarn or a 50/50 blend of cotton and acrylic as it makes a pretty durable and machine washable / tumble dry cloth. I find too that if I block my dishcloth, even with tumble drying, it will hold its shape better.

For my examples, I used LionBrand Cotton Ease, which unfortunately has been discontinued. The yarn was a Category 4, medium and was a 50% cotton and 50% acrylic blend using a little over 100 yards. My crochet hook was a Size I and knitting needles Size 7.

Here are a few patterns that I have really enjoyed crocheting and/or knitting. If the pattern was a little smaller than my 9″ size, I would adjust by adding a few more chains to get to the width I wanted. Sometimes I used a larger needle size too.

CopyCat DishCloth

The Copycat Dishcloth by Leah Michelle Designs (knit) http://leahmichelledesigns.com/free-patterns/copycat-dishcloth/

 A great pattern for the beginner knitter as it is 2 basic stitches – knit and purl. As stated “this pattern mimics a traditional dishcloth” but I like the squishy feel of the garter stitch.

Double Bump

Double Bump Dishcloth by My Jewel Thief (knit) https://myjewelthief.typepad.com/myjewelthief_knits/2008/12/doubel-bump-scarves.html

Again, a lovely pattern for practicing your knitting skills. Just basic stitches (knit and purl) but an interesting combo to create the unique bumps and squares. The texture of this pattern makes for a nice scrubbing dishcloth.

Welted Leaf Pattern

Welted Leaf Dishcloth by Faith Schmidt (knit) https://www.knitpicks.com/patterns/Welted_Leaf_Dishcloth__D56132220.html

I love the look that the knit and purl stitches give to this design.  I thought instructions were easy to follow and the finished product has a good workable feel to it.

Ocean Waves

Ocean Waves Dishcloth by Highland Hickory Designs (crochet) https://www.highlandhickorydesigns.com/ocean-waves-washcloth/

This was an interesting crochet pattern and makes a nice wavy texture for a unique look and good feel.

Arruga Stitch

Arruga Stitch Dishcloth (crochet) my design using this stitch https://www.youtube.com/watch?v=3_qotdhVeMk

I really, really like this stitch technique, either side looks awesome. Made up in a super dishcloth, with very good texture, scrubbing abilities and pretty too. For my pattern, I did 36 single crochet (SC) foundation stitches, turned work – made a chainless starting double crochet (DC) https://www.youtube.com/watch?v=aduDzuchP6c, DC in the remaining stitches to continue with 36 stitches, then began the pattern repeat for the Arruga stitch https://www.youtube.com/watch?v=3_qotdhVeMk – crocheting 7 pattern repeats and ending with last row of just SC.

I use blocking wires to shape and block my dishcloths. These are great in the sense I can block about 3 at one time on one set of wires. Now I have to block all the new ones I just made 🙂

Blocking Wires
Blocking Pins

I think some of these patterns would make lovely wash cloths too, paired up with a beautiful handmade soap to be a super thank you gift!! Again, these small items work up quickly and are a perfect way to practice your crocheting or knitting skills or new stitch techniques. These are great patterns for a youngster just learning how to work with yarn too!!!

HAPPY CREATING!!

Disclaimer:  This post contains affiliate links – “Commissions Earned”

,

,

,


Knitting Seed Stitch or Moss Stitch

  Okay, I know how to knit but it has been many years since I’ve actually knitted anything and not really sure I ever really completed a project in knitting – maybe in my yarn nightmares. Well, my daughter and my yarn partner, gave me as a gift 2 skeins of a beautiful Malabrigo Mecha (color Jupiter) about 260 yards and challenged me to knit something with it versus crochet.  And it sat on my computer desk looking at me and oh how I wanted to crochet an awesome cowl for myself, but I finally picked up a pair of bamboo needles and a skein of that yarn and started to cast on stitches. I did some internet surfing about knitting the seed stitch and the moss stitch.  I like the idea of the textured look they provide and the fact that there is really no right or wrong side to your finished item. So I decided upon a nice long scarf as my knitted project.  I cast on an even number of stitches (28) and away I went.  I elected to knit 2, purl 2, knit 2, purl 2 through my first row.  Second row was purl 2, knit 2, purl 2, knit 2 to the end of that row.  Third row was purl 2, knit 2 again and finally the Fourth row started out as a knit 2, purl 2, knit 2 purl 2 to the end of the row. So I was knitting with an even number of stitches, like the seed stitch but my design was in a 4 row increment of knit/purl, purl/knit,  purl/knit,  knit/purl like the moss stitch.  And doing the same stitch in 2 stitches before alternating to the opposite stitch for 2 times.  Hopefully, I haven’t lost you yet but I really “love” the pattern created with just knitting 2 stitches then purling 2 stitches using the 4 row moss stitch design. It makes up with a very nice edge, looks the same on either side, which will be perfect for a scarf, and the texture is just what I was looking for. I have already added on my second skein of yarn and I expect the finished scarf to be about 7″ wide x 60″ long when completed.  I used a size 7 bamboo needle for this project too. This is a design that I’m sure can be made with a wide variety of different yarn types with appropriate sized needles.  You can cast on whatever stitch count gives you the width you are looking for but remember my pattern was an even number of cast on stitches.  I think most moss stitch designs cast on an odd number of stitches. Has been fun to share this “knitting” project with my daughter as well as venturing out with some new yarn techniques.  A great way to start off the new year.

HAPPY CREATING!!

Disclaimer:  This post contains affiliate links – “Commissions Earned”      

Knitted Cowl

Still perfecting my knitting skills but am very pleased with my completed light weight cowl, which I added a ruffled flower with a very nice decorative button to give it some pizzazz. SONY DSC I used a wonderful Madeleine Tosh DK yarn (Optic) for a cool black and white design. My needles were a size #8 and I completed the entire cowl using the Seed stitch. I’m sure a more experienced knitter would know how to do this in the round but I was more comfortable doing a provisional cast-on http://www.knittinghelp.com/video/play/invisible-provisional-cast-on   and then completing a three needle bind-off. http://www.knitty.com/ISSUEfall06/FEATfall06TT.html Once I had completed my bind off and had joined my two ends together,  I gathered the cowl (using a long running stitch out of the same yarn) along the bind-off edge, tied if off with a square knot and then sewed on flower and button. SONY DSC 
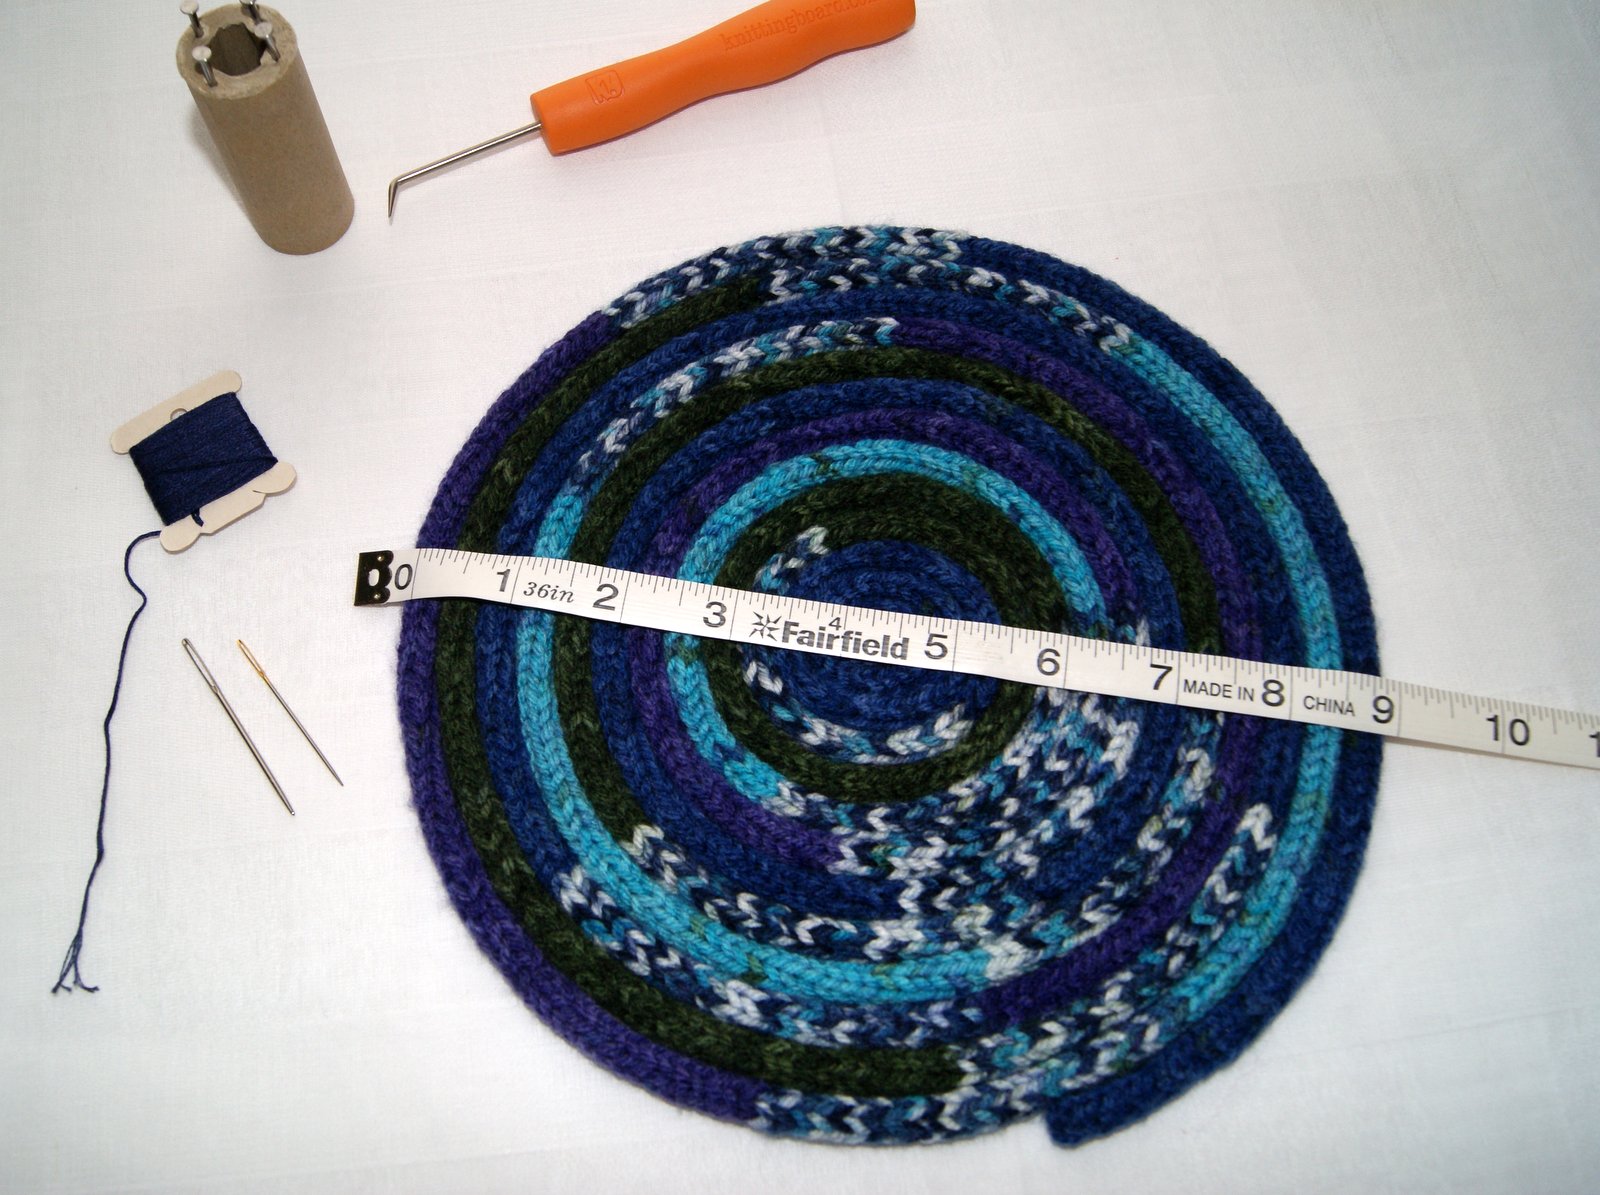
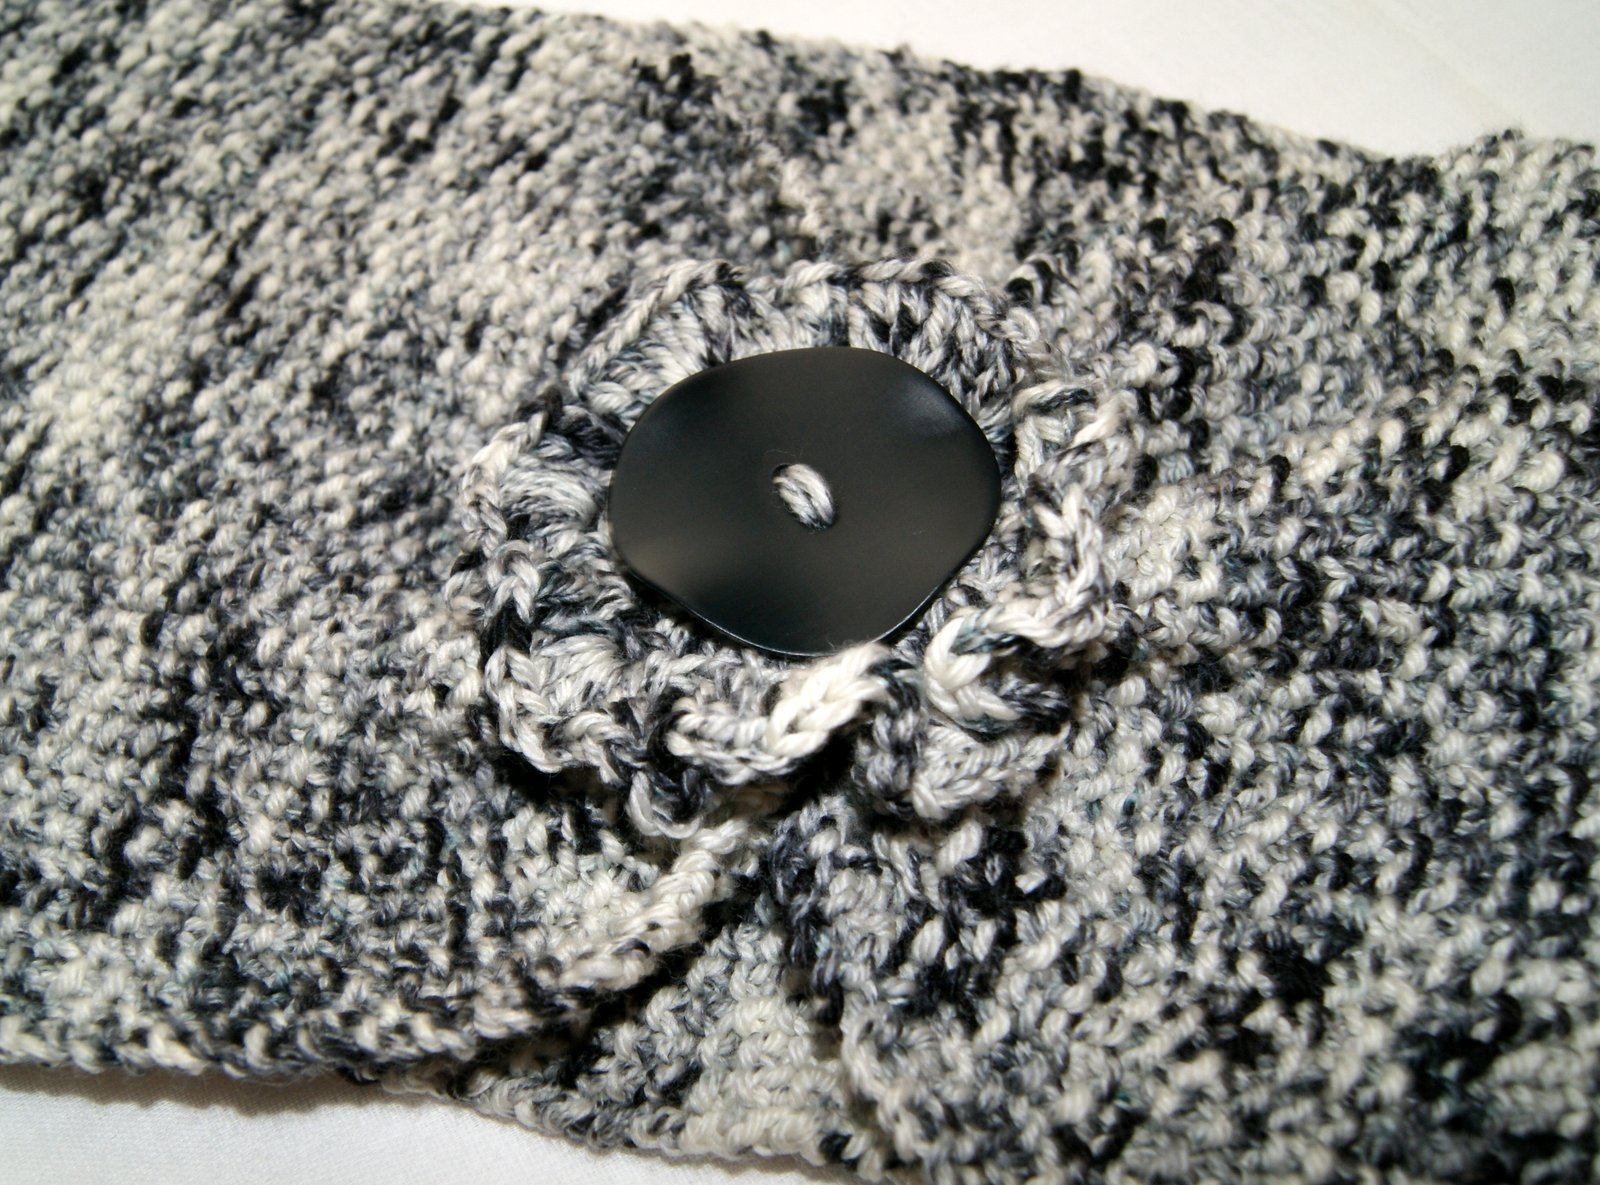
My finished cowl was approximately 7 1/2″ wide X 26″ long. I just knit until I had used up the entire skein of yarn (225 yards). Now as a somewhat beginner knitter, I really enjoyed the seed stitch but took me a little bit to figure out the pattern. Directions for the seed stitch just say, knit the purls, and purl the knits and I had to learn what a knit stitch and purl stitch looked like when I began my second row. Actually, it is a good thing to learn because if for some reason you have to put your knitting down in the middle of a row to make yourself that cup of awesome vanilla tea, you can pick it back up and know by looking at your stitch shapes what stitch you need to do next. Check out this site for good pictures of what a knit stitch and purl stitch looks like.  http://www.craftsy.com/blog/2013/04/how-to-knit-seed-stitch/ SONY DSC Will definitely do another seed stitch pattern again 🙂

HAPPY CREATING!!

Disclaimer:  This post contains affiliate links – “Commissions Earned”    

Happy Mother’s Day

Wishing everyone a Happy Mother’s Day and hope your day has been extra special too!!
SONY DSC

SONY DSC

Just wanted to share this awesome “yarn bouquet” that I received as a gift.  As much as I love to have fresh flowers around, this bouquet is just as special as I get to look at it and decide what do I want to create!! This bouquet was shipped through Jimmy Beans Wool website and I received 3 gorgeous skeins of a beautiful Madeleine Tosh DK yarn with two different sizes of knitting needles.  It came with a lovely pattern that I downloaded through Ravelry called Sylkie Cowl by Gudrum Johnson.
SONY DSC

SONY DSC

I also downloaded 2 other “free” patterns from Ravelry:  one is called Mara by Amy Hendrix which is a triangle shawl and the other is called Honey Cowl by Ann Maria.  Both of these patterns are really cool too!! However, I think I am going to give the Sylkie Cowl a try.  As I have mentioned before, my real yarn love is crocheting but I am adventuring out in the knitting world and this pattern does offer some new techniques for me to try. If you are looking for a unique gift to get your favorite yarning person, then check out JB’s website, I don’t think you will be disappointed. Wish me luck as I attempt this new pattern.  Hey, if I think it looks horrible, I can just frog it and find another “crochet” pattern~~ ha, ha, ha!!

HAPPY CREATING!!

Disclaimer:  This post contains affiliate links – “Commissions Earned”

Spool Knitting Finished Project

Well, I finally finished my “cattail” and bound it off from my 4 pronged spool.  My cord is 195″ long or almost 5  1/2 yards.  I am planning to roll my cord into a circle and use it as a trivet for my kitchen. SONY DSC When rolled, the trivet will measure 9″ across which will be a perfect size for plates or bowls to keep the heat directly off my table.  It will also look great as a decorated piece under my kitchen centerpiece. SONY DSC SONY DSC       Because I used up all the thread that I had to make the cord, I am going to whip stitch it together using all 6 strands of a coordinating DMC floss.  Beginning in the center and rolling as I go, I will whip stitch it together using a cross stitch type needle which has a little bit of a blunt tip so that I don’t snag any of my threads. SONY DSC This is a wonderful activity for a child to do and a super way to use up all those “little balls” of yarn leftover from other knit or crochet projects.  As you collect your bits and pieces of leftover yarn, just tie them together with a secure square knot (right over left and left over right) and keep adding to make a big multi-colored skein.  I would try to keep your category of yarn about the same; that is, I wouldn’t tie a chunky (category 5) to a sock weight (category 2).  How fun to see all the different colors come together!! SONY DSC Enjoy making your own “cattail” ~~ you can find more information on using knitting Nancy’s here.  FYI: I did purchase a super little tool from my local big box store (knittingboard.com) which worked great to lift my lower loops easily over the upper loops on my spool.  🙂

HAPPY CREATING!!

Disclaimer:  This post contains affiliate links – “Commissions Earned”