Archives

MATTRESS/WEAVING STITCH

The MATTRESS STITCH or WEAVING STITCH is a very nice joining method especially for garments because it is virtually invisible.  When joining with this stitch, you  have your right sides facing you, side by side. Insert your needle through both loops on both pieces at the bottom edge, leaving about a 4″ tail, repeat again in the same stitch to help secure your thread.  Push your needle through both edge loops on the right side of the seam.  Pull the yarn through loosely.  Now insert the needle through both edge loops of the matching stitch on the left side.  Remember, to always keep your tapestry needle facing to the top of your piece and not to the side.  Continue alternating the joining stitches until you get to the end of your seam.  After completing about 3 stitches, pull your yarn snug and continue joining.

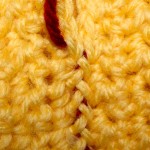
This stitch is a little harder to do with crochet stitches because you don’t have a cross-bar stitch like in knitting.  It is similar to doing a blind stitch in sewing.  As you can see from my pictures though, you form little “x’s” when you pull up your joining stitch snuggly and it is virtually invisible.  I used a very dark contrasting yarn for demonstration purposes but using your matching yarn, the joining seam will disappear.

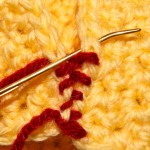
Inserting needle from left to right under both loops on both sides


Pulling mattress stitch snuggly to join


Joining seams for your crochet projects is really a simple procedure.  Take your time and decide upon which joining method you prefer and will work the best for your finished piece.  Remember to weave in all your loose yarn tails too!

Spend some time with a youngster who might be interested in making crochet squares, and work together joining them into a cute baby doll blanket or a small coverlet to curl up with in the car or for reading books.  Who doesn’t like something handmade!!

HAPPY CREATING!!

Disclaimer:  This post contains affiliate links – “small commission earned”
Doing the BACK STITCH

Doing the BACK  STITCH is another method for joining seams as well as for adding decorative appliques or pockets to your crochet project.  This is also a great opportunity to use a contrasting color of yarn to make your applique or pocket designs really stand out.  

To do the Back Stitch for a seam, you will need to place your two pieces that need joining with the right sides together and hold it with one side (called the front) facing you and the other side (called the back) facing away from you.  Thread your yarning needle and pull the needle through both loops on both pieces leaving about a 4″ tail, I like to insert my needle again in that first stitch to help secure my thread.  Stitching from the front of your joining seam that would be facing you, insert your needle into the next stitch going through both loops on both pieces, pull snuggly. Skip the next stitch and insert from the back to the front through both loops on both pieces and pull your needle to the front.  Now, insert your needle from the front to the back through both loops on both pieces through the skipped stitch.  Continue this pattern until you have completed your joining seam.

Preparing your crochet project for a decorative applique or outer pocket remember to place your applique/pocket with the wrong side down onto the right side of your crochet project.   Figure out where you would like the applique/pocket to be placed or follow recommended directions from your pattern and pin your applique/pocket into place.  I use long-stemmed quilting pins with the round, glass ball ends (not with the flower end because the flower design will catch onto your yarn and maybe pull it).  Of course, if you have a very small item you are attaching to your piece, use smaller stemmed pins with the round ball tops.

Once you have your applique/pocket pinned to your project, you can begin doing the back stitch but this time you will need to insert from the back of your project leaving a 4″ tail, coming out the front of your applique/pocket.  Insert your needle from the front to the back in the very next stitch.  Now you will skip the next stitch, insert needle from the back to the front.  Now insert again from the front going through the stitch that you just skipped.  Continue with this process until you are done.  Don’t knot, leave a tail and weave both beginning tail and ending tail through your crochet stitches.

You can always attach your applique/pocket with a straight running stitch or whip stitch too.  It all depends upon the look you are achieving and how durable your item needs to be held in place.


*TIP:  Update an old sweater or hat with a funky crochet applique.  Teach a simple crochet motif to a youngster and let them update a piece of clothing or attach to a headband or barrette.  Adding your own personal touches to a store-bought item definitely makes it uniquely yours.

HAPPY CREATING!!!

Disclaimer:  This post contains affiliate links – “small commission earned”


WHIP STITCH

After completing your crochet piece, you have several options available as to how you want to join the seams of your project.  Probably the most common method of joining is the WHIP STITCH.   This joining method is not too bulky and creates a nice seam.

To begin, place your completed pieces right sides down and side by side.  Now you need to thread your tapestry/yarn needle.  I found this site that gives you a couple of different suggestions on how crafters thread a needle with yarn.  Myself, I fold my yarn in half and pinch that folded edge tight while holding the yarn very close to the edges of my index finger and thumb.  Now I  just slide or work the eye of the needle onto the yarn and pull through the edge of the loop.  You never knot the end of your yarn as you will just weave your tail through you stitches once you have completed your joining process.

Once your needle is threaded, leave about a 4″ tail for weaving and starting at one end, push the needle through both loops of your crochet stitches on both pieces that you are joining.  Some patterns might tell you to join by only going through one loop on each side of your seam.  Of course this is fine but take into consideration your finished project and if it needs to withstand heavy usage, I would recommend that you always insert through two loops on both pieces of your seam.  Pull the yarn snug but not too tight (you don’t want puckering) so that the two pieces fit closely against each other.  Draw your needle up and over and insert it into the next stitch. You will always be inserting your needle on the same side.  For example, if you begin joining by inserting your needle from the right side to the left (or vice versa) , that is how you would continue whip stitching until you reached the end of your seam.

*TIP:   Keep some practice swatches among your yarn stash so you can try out different joining stitches.  For a more dramatic look, you could use a contrasting color of yarn for your piece, just make sure your joining yarn is the same type and ply as your finished crochet project.

HAPPY CREATING!!

Disclaimer:  This post contains affiliate links – “small commission earned”
Abbreviations in Crochet Patterns


I know from experience that reading a crochet pattern can be intimidating but with practice, it definitely becomes easier.  For starters, I’ve listed below some of the more commonly used abbreviations that you will find within a crochet pattern’s directions.  About.com Crochet is a wonderful site to find good demonstrations on these various stitches:

  • alt           –      alternate
  • beg         –      begin/beginning
  • BLO       –      back loop only
  • bls          –      boucle loop stitch
  • BPdc      –      back post double crochet
  • BPsc      –      back post single crochet
  • C             –      crossed stitch
  • CC          –      contrasting color
  • Cdc         –      crossed double crochet
  • ch           –      chain stitch
  • ch-sp     –      chain-space
  • CL          –      cluster
  • cont       –      continue
  • dc           –      double crochet
  • dc2tog  –      double crochet two together
  • dec        –      decrease
  • dsc        –      double single crochet
  • dtr         –      double treble
  • ea          –      each
  • Els        –      extended loop stitch
  • Esc        –      extended single crochet
  • FLO      –      front loop only
  • FPdc     –      front post double crochet
  • FPsc     –      front post single crochet
  • FPtr      –      front post treble
  • hdc       –      half double crochet
  • inc        –      increase
  • KS         –      knot stitch
  • lks        –      locking stitch
  • lp          –      loop
  • ls          –      loop stitch
  • MC       –      main color
  • och       –      overlaid chain
  • pat st   –      pattern stitch
  • pc         –      popcorn stitch
  • pm       –      place marker
  • qtr        –      quadruple treble
  • rem      –      remaining
  • rev dc  –      reverse double crochet
  • rev sc  –      reverse single crochet
  • rf          –      relief stitch
  • rnd      –      round
  • RS       –      right side
  • sc        –       single crochet
  • sc2tog –      single crochet two together
  • Sl st     –      slip stitch
  • sp         –      space
  • st          –      stitch
  • tch       –      turning chain
  • tr          –      treble
  • tr2tog  –      treble two together
  • WS       –      wrong side
  • yo         –      yarn over

These are pretty standard abbreviations that you will find in most American written patterns.  When starting a new crochet project, I would recommend reading through the pattern to familiarize yourself with the abbreviations used.  Most of the time, you will find a stitch guide within the pattern or pattern book itself showing you or telling you exactly how to make a certain stitch or cluster.

One of my favorite books to use as a reference is The Complete Photo Guide to Crochet by Margaret Hubert.  Within the pages of this book are wonderful colored pictures of stitches, tools, tips, techniques and some patterns.  I like to have it readily available especially if I’m working on a new pattern and have to refresh myself on how to do a certain stitch or planning a new project.

Should a pattern use a new stitch for you, why not practice that stitch over and over again with some old yarn (making swatches) so that you will have it mastered and looking perfect for your special crochet project.  This would be a super time to encourage crocheting to a young child; you both could practice the new stitch/cluster together.  What a wonderful and creative way to spend an hour or so one-on-one making your own swatches!!!

HAPPY CREATING!!

Disclaimer:  This post contains affiliate links – “small commission earned”