Tag Archive | applique

Ups and Downs of Making a Fabric Yo-Yo

Fabric yo-yos are one of the easiest embellishments to make for your special project.  They are also a great way to use up some of those scraps that you have stashed away.  Also, they are a fun thing to do with your child to create a new look.

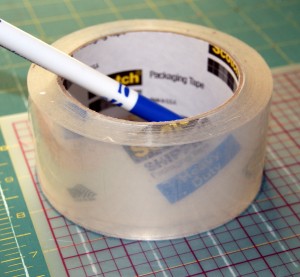
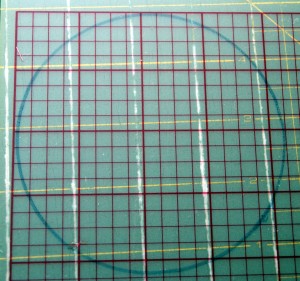
The yo-yo pattern is a basic circle.  Your circle pattern needs to be twice as wide as you want your finished yo-yo plus a 1/4″ seam allowance.  Once you have determined the size of your yo-yo pattern, draw and cut it out on a piece of heavy stock card paper or use plastic template material found in quilting supplies.  Use a compass to make your circle or trace around something you might have on hand, (a drinking glass, a CD, a tin can) or purchase a  yo-yo maker or a quilter’s template for circles.  Here I used a roll of packing tape!!

Next trace your pattern onto the wrong side of your fabric.  Some fabric choices that work best for making yo-yos are cotton, light weight denim, flannel, wool, light weight corduroy, and felt.  Remember, you will be gathering up your fabric circle to form the yo-yo, so it is best to use lighter weight materials.  Cut out your yo-yo with scissors or a rotary cutter.  Remember, if working with a child you might have to do the cutting.

Now you will be folding in your 1/4″ seam allowance onto the wrong side of your fabric with gathering stitches.  You can usually just eyeball your 1/4″ seam allowance, however, if you want to insure your seam allowance is consistent, you can sew a line of stitching 1/4″ from edge of circle and then fold in on that stitch line.  I like to knot one end of my gathering stitch at the beginning and I strongly recommend using a heavy/strong thread for this step.   I have had great success with Dual Duty by Coats and Clark.  Also, keep in mind that short gathering stitches will create a larger, more open center on your yo-yo and longer gathering stitches will make tighter center.  Something to keep in mind when determining what look you want for your finished yoyo.
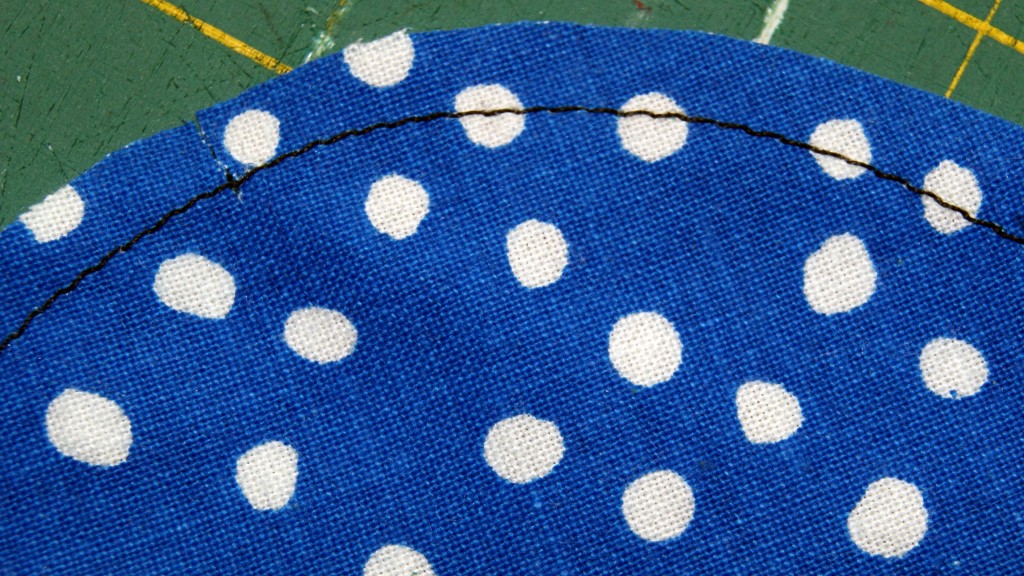

To begin the gathering, pull the knotted end of thread out about 3-4″ and continue gathering from the other end until you have it as tight as you want.  Once gathered, tie a tight square knot (right over left and then left over right) with your thread for a secure closure.  Flatten and smooth out your finished yo-yo.  Sew on buttons in the center for flowers, make a smaller yo-yo and sew on top of the larger yo-yo for a dimensional effect, make streamers with yarn or threads to hang from the yo-yo itself, let your imagine run wild.

Yo-yos make wonderful appliques (add fabric stems and leaves for flowers), decorate a headband, use them for pins or pocket accents,  or add them to your jeans for a fun look too, the idea list is endless.

HAPPY CREATING!!

Disclaimer:  This post contains affiliate links – “small commission earned”
Finishing Touches to your Applique

Now that you have your applique design attached to your garment or home decor project, you can further enhance your look with decorative stitching.

One way that I really like to finish the look to my design is a very narrow zigzag stitch or satin stitch.  I adjust my sewing machine to have a short stitch length (2.5 on my machine, Pfaff 7570) and a very narrow (.30) stitch width.  I don’t like to see any spaces between my stitches when I do the satin stitch.  I want my stitches touching each other but not stitching on top of each other.  You probably will want to do a sample swatch to determine what stitching looks best for your applique.

Of course, if the satin stitch isn’t your cup of tea, just a simple zigzag along the outer edges looks great too.  A blanket stitch is another nice finish you can do on your applique or if your machine has some built-in decorative stitches now would be a great chance to use some of them.

Another hint to help keep your applique design looking great is to maybe use some tear away stabilizer underneath.  The stabilizer works wonderful especially if you are stitching your design onto a fabric that has a loose weave to it.   It will help keep everything from becoming distorted or stretched out of shape.  You can easily find stabilizer at your local fabric store.

Using appliques is really a fun way to personalize your items.  Also, is a really nice touch to make your handmade gift truly unique!!

  • TIP:  Keeping a small spiral bound notebook readily available stored within your sewing basket is a great way to write down important details like your stitch width and length that you use for appliquing.  As often as I think I will remember that info, it just doesn’t happen for me.  This way I don’t have to experiment and saves much time!!

HAPPY CREATING!!

Disclaimer:  This post contains affiliate links – “small commission earned”


How to use Fusible Adhesive for Appliques

Getting your applique design ready to be placed on your garment is fun and exciting because you are almost completed with your project and can start visually seeing your creation.

I personally like to us a pellon paper-backed product called Wonder Under.  It is an excellent fusible web that works for just about any type of fabric for making appliques on wearable or home decor projects.  Wonder Under will come will good directions on how to use it but here are a couple of hints to help you have a truly successful outcome.

When you open your Wonder Under, you will feel one side is smooth like thin paper and the other side you can feel a slight roughness which is actually the adhesive side.

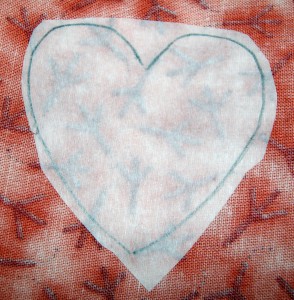
Your first step will be to trace your applique design onto the smooth paper side with a nice sharp pencil.  Cut out the design leaving about 1/8 inch extra Wonder Under from your pencil lines on the outer edges.  Doing this will ensure that you have the fusible adhesive covering your entire applique right to the edges of  the fabric.

Pencil traced applique design onto paper side of Wonder Under

Now you are ready to iron your applique design onto the WRONG SIDE of the fabric that you want to make the applique from.   Most of the time, I keep my trusty iron on the cotton setting unless I am really using a fine, delicate fabric.  I also use a pressing cloth that I place over my applique design before I place the hot iron onto the fabric.  An old cotton tea towel, smooth cloth napkins or muslin fabric works great as a pressing cloth for all my projects.

Personally, I really enjoy using these white, cotton kitchen tea towels as a pressing cloth.  You can see through them easily, they are large and leave no lint.

Because my iron is always set with the steam feature on, I leave it that way for pressing the Wonder Under to my fabric.  Never can remember if the directions tell you not to use steam but I have no problems leaving it on.  I just don’t give an extra burst of steam when pressing the applique design.

Pressed design onto WRONG side of applique fabric

Now place your iron onto your applique design and hold it in place for about 5 seconds.   Remove the pressing cloth and check out how the Wonder Under looks like – is it adhering.  If you feel like you need to apply a little more heat, just cover your design again with the pressing cloth and hold the hot iron onto your applique for maybe another 3 to 5 seconds.  Sometimes when using a thicker fabric for the applique design (like denim), you will need to allow for a little extra heating time.  I will do the first pressing and check things out and if I feel like I need a little more heat, flip your applique design over and press from the opposite side of your fabric.

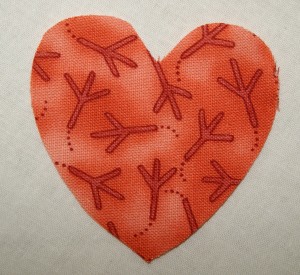
Let cool to the touch and cut out your applique design following your pencil marks.  Lift a corner of the Wonder Under and slowly remove it from your fabric.  You will have a smooth flexible feel to the wrong side of your fabric that is now going to be your applique.

Right side of cut out applique design

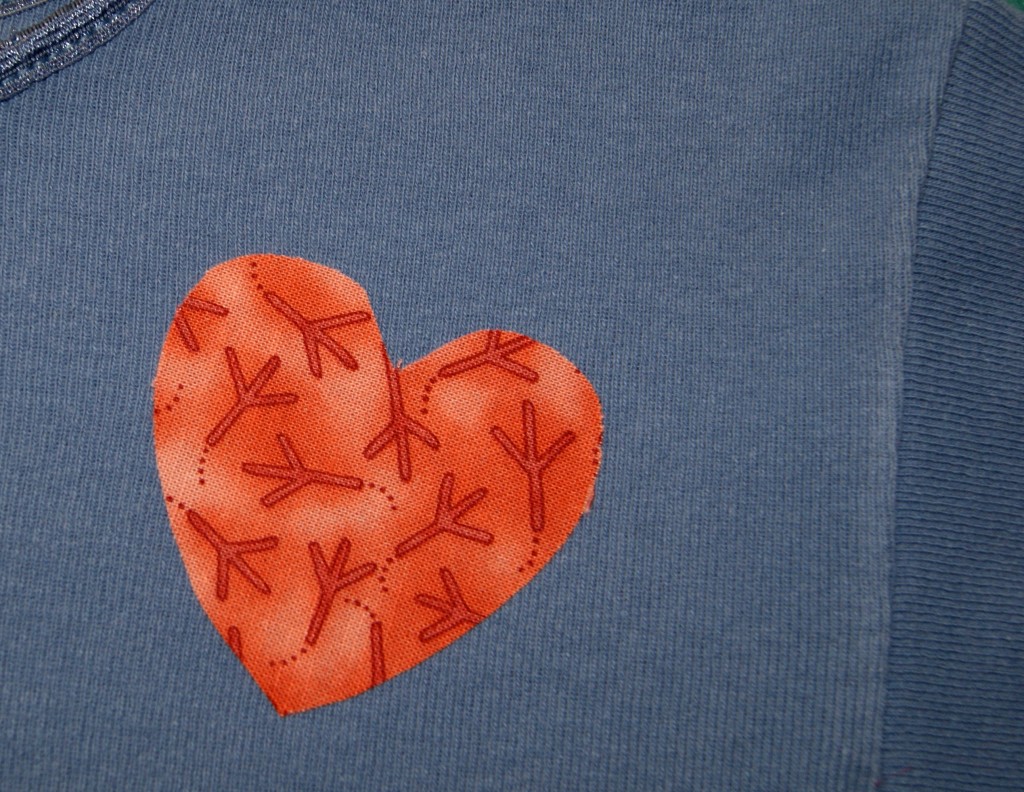
Now for the fun part, place your applique design with the adhesive side down (wrong side of  applique fabric to right side of project) and centered onto the right side of your garment.  Press the applique design onto your garment following the same directions as above using the pressing cloth and holding in place for about 5 seconds.  Viola!!

Ironed applique design onto shoulder of T-shirt

If you cut your design out using Pinking Shears or used a tightly woven fabric like twill, canvas, denim, felt or fleece (which either doesn’t fray or very little fraying occurs) your applique design could be set to go.  But a narrow, close, zigzag stitch gives a professional finish look and helps to keep the fraying to a minimum.  Also, applying a little fray check to the edges of your applique helps with the fraying issue too.  If using fray check, apply that to the edges after you have cut out your applique, iron on to your project (pressing cloth recommended), and then sew a narrow, close together, zigzag stitch.

Next blog will be about sewing suggestions for your applique.  In the meantime,  have fun designing appliques and think of all the different uses for them.  Appliques really personalize your project and are a very workable craft to do with a child or young teenager to help them update their room.  The ideas are endless.

  • TIP:  Don’t forget to look at cookie cutters too for great applique designs and ideas!!

HAPPY CREATING!!

Disclaimer:  This post contains affiliate links – “small commission earned”

Applique Placement Techniques

Once you have selected the applique design you want to use, there are several ways to make your design workable for your particular project.  Here are a few considerations that I keep in mind to make sure my applique placement will look perfect.

For me the size of the applique is very important in relationship to the item that it is going to be displayed upon.  A simple rule of thumb to help you keep your applique design in proportion to your project is to create your own grid.  For example, if you are placing your design on your favorite T-shirt, fold the shirt in half (top to bottom) to find center.   Press it lightly with an iron so you have a crease line.  Now, fold the top down to that crease line and fold the bottom up to the center crease line and lightly press again.  You will now have three crease lines on the front of your T-shirt basically running east and west.

Do the same thing again folding from the sides of your T-shirt.  Fold in half and press lightly to form a vertical center line, now bring the left side to the center crease and press lightly, then bring the right side of the shirt to the center crease line and press lightly.  You will now have three creased lines running north and south.  Now you have a T-shirt grid to help you center your applique and visually see how it will fit.

I like to have my applique design extend from the center up to the top crease line nearest the neck and touching the lower crease line towards the bottom of the T-shirt.  I also like it to extend from the center towards each left/right side crease line.

If using a design from a coloring book page, place the paper pattern on your shirt and see how it fits between your grid lines.  Need to change the size – fold in your paper pattern from center the same amount vertically and horizontally to decrease the size or cut your pattern through the center vertically and horizontally and spread it apart the same amount.  You want to be careful not to distort your design too much so you probably don’t want to decrease or increase by more than 1/2″ inch.  If the design you want to use really needs more than that to fit your item, it’s probably best to take it to a print shop and have it reprinted to the size you need.

Of course, if you have used a design from the web, see if can be resized at the site or maybe copy and paste it to a program you have so you can do resizing that way.  Or if all else fails, print it out and resize like a coloring book page.

You can always trace a design you have found maybe from a magazine using a light box or taping the page to a large window and use the sun as light for tracing purposes and resize it to fit your T-shirt during this process.  Also, using a light box gives you the ability to redraw your design a little smaller or bigger to fit your grid area.

Making your own grid system works great for many applique projects (towels, pillow cases, tablecloths, napkins, pockets) and really insures your placement is exactly how you want it.  If placing an applique design onto a small area, like a collar or cuff, I basically eyeball my placement spot.

HAPPY CREATING!!

Disclaimer:  This post contains affiliate links – “small commission earned”

Deciding upon an Applique Design

There are a lot of things you can do with a simple applique whether it is a purchased design or one created by yourself.  It is a quick way to update a piece of clothing to give it your own personal look and feel.

Making your own applique design doesn’t have to be labor intensive.  There are many ways to help you create that very special look you want.  Flipping through a basic coloring book is a quick resource idea for animals, trucks, planes, flowers, hearts, etc.

When searching for an applique design for your T-shirt,  keep in mind proportions and details.   You don’t want your applique to be too big or too small for your shirt  and you will find it an easier process if the design is more simple.

Of course, you can’t beat searching through internet sites either for that perfect design.  Twistynoodle is a wonderful site with 100’s of free coloring pages for kids which can be turned into an applique design too.

Fonts are another great source to get that unique alphabet letter you might want.  Of course, the internet offers a lot of  free selections like Dafont or 1001 Free Fonts to help you make that perfect design selection.

Again, select a coloring book page with that special character your little one might love.  Or search the web for their favorite character and see if you can draw a simple likeness to use as an applique design.  Free applique, planet applique or laughing lizards are sites specializing in designs too.

Have your child help you in the design process, especially if you are making it for them.  It really will be more special to him or her if they played an active role in creating their unique look.

HAPPY CREATING!!

Disclaimer:  This post contains affiliate links – “small commission earned”