HAPPY CREATING!!
Disclaimer: This post contains affiliate links – “Commissions Earned”Archives
Ideas for Knitting Nancy “Tail”
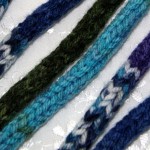
I haven’t actually researched the correct terminology for the knitted cord that is created from completing your loops on a Knitting Nancy which really look similar to an I-cord; however, I still like to refer to it as my “cat’s tail”!! 🙂
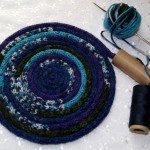
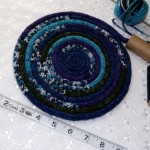
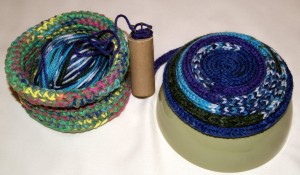
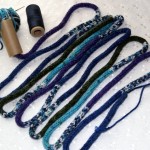
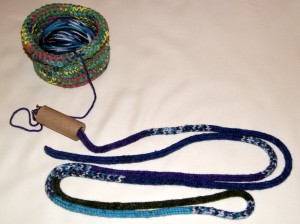
Presently, my cat’s tail measures 76 inches or 193.04 cm and it is stirring all kinds of ideas as to what I want to create. I can definitely curl itself around and make a super trivet to protect my table from a hot dish. If I make the trivet, I could combine it with my hot pads and dish clothes for a cool, handmade hostess gift.
Also, have given some thought to designing a unique wrapped necklace. Leaving long loops and covering the joined area with a really one-of-a-kind tubular bead. Hmm, maybe I will just have to keep the necklace for myself if I end up making that idea!!
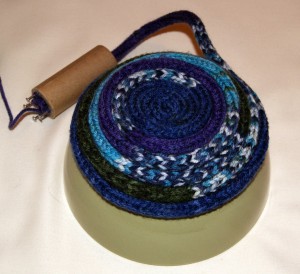
I’ve been into yarn bowls too and I think I could take a ceramic bowl and wrap the tail around the outside of it for a size pattern, stitch together, and then maybe create a unique loop edge as a finishing touch.
I know whatever I design, my “cat’s tail” still needs to be longer, I am planning to have a finished length of 160 inches or 406.4 cm. So when I really need some down time that doesn’t require any counting of stitches or decreases/increases or watching my gauge, I just sit with my favorite cup of tea and go round and round with my spool knitting. Only having to untwist my tail periodically to keep it smooth. It makes for a very relaxing time for me. 🙂
HAPPY CREATING!!
-
Tip: I will use a coordinating DMC floss (2-3 strands) as my sewing thread when I begin to stitch my cord together. Will probably have to do some pinning also to hold my coils in place.
- Disclaimer: This post contains affiliate links – “small commission earned”
Yarning with a “Knitting Nancy” spool
Using a knitting nancy or spool knitting is a great tool/technique to introduce a youngster to the wonders of yarn. It is a very easy yarn method to create a nice knitted or braided cord that could be designed for bracelets, trivets, coasters, etc. It is really an awesome technique that anyone would find fun to do!!
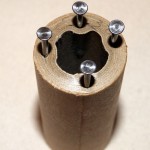
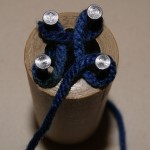
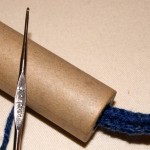
I have actually recycled a thick cardboard thread spool that formally held 1200 yards of mercerized cotton thread for machine quilting by Coats and Clark. The spool is 1″ in diameter with the opening being 1/2″ in diameter. The length of the spool is 2 3/4″ long. I like this size because it fits a child’s small hand really well. You can purchase knitting spools too.
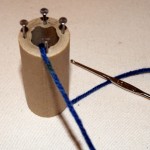
I hammered in four brads using ones that had a large flat head to them. It helps to keep the yarn from sliding off the brad when making your loops. Once you have your spool ready, select your yarn. I would recommend using a 4 ply worsted weight yarn and a metal crochet hook size 5 (1.90mm).
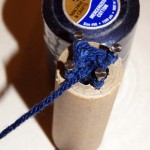
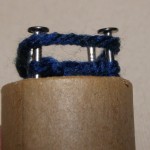
To begin, take your yarn and drop it through the hole and let it hang out about 2 or 3 inches from the bottom. Now to “cast” on your loops, you will be turning the spool in a clockwise direction but going around each brad in a counter-clockwise direction one at a time.
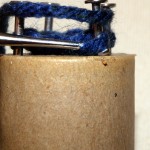
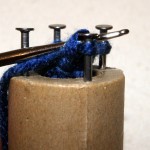
After you have made your loop on each brad, you take your yarn and place it right above the first loop made and with your crochet hook, lift the bottom loop up and over the yarn and brad. Leaving one loop on the brad. Spin your spool in your hand slightly and do that same thing again on the next brad. Keep turning the spool in your hand, make another yarn wrap and continue lifting the bottom loop up and over the top yarn on each brad. Before you know it, you will have a great icord, braided loop or “cattail” coming out of your spool at the bottom.
Now just keep making your loops until you have your “tail” as long as you want it to be. Once you have reached the desired length, you will need to bind off your work from the knitting spool.
When you are ready to “cast off” don’t make a yarn wrap, just grab the loop of the last stitch made and lift it onto the brad to its immediate left. Lift the bottom loop over that loop, now grab the remaining loop left on that brad and lift it onto the brad to its immediate left. Continue doing this until you only have one loop left on the last brad. Cut your yarn and carefully lift the last loop off the brad and place your cut yarn through the last loop and pull snuggly securing all your stitches. Now you have a wonderful knitted tube that can be used for a wide variety of creative projects!!
I have discussed this technique before but have updated my pictures to help you see the process better!! 🙂
HAPPY CREATING!!
Disclaimer: This post contains affiliate links – “small commission earned”
,,,
Knitted Baby Beanie
I really, REALLY, love to crochet but I did make a New Year’s Resolution to practice my knitting techniques this year too. So here it is May already and I thought I had better try something before the year escapes me.
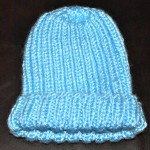
I’ve been crocheting little newborn beanies for a local hospital that just opened a new maternity ward and thought this would be a great place to begin a knitting project. I looked through my books and magazines for a simple pattern but nothing grabbed me. Finally I found a cute idea on Flickr for a stretchy ribbed newborn pattern, done in the round!! What really made me decide that this was the pattern for me was the fact that it will stretch easily to fit many different sized heads!! I want to thank Shandeh for sharing her pattern on Flickr. I made one change and that was that I cast on 76 stitches rather than her recommended 68 using 8″ dpns, size US #6 (4.00mm). I think I knit a little tight and felt the extra stitches gave my hat a better size.
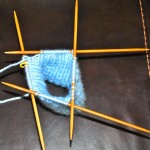
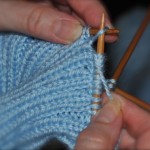
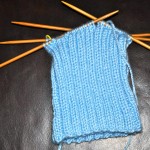
This was my first attempt at knitting with Double Pointed Needles (DPNs). Actually had to look up that abbreviation, told you I was really a crochet fanatic!! Also, I knitted my beanie using 4 dpns because I was having issues with laddering (another new knitting term for me). But wasn’t going to let that stop me!! I was a little like Edward Scissorhands in the beginning but got my rhythm going quickly. Found that if I made sure the two dpns that I was knitting from were on top of the two needles that were just holding my stitches, it was much easier to knit the ribbing pattern.
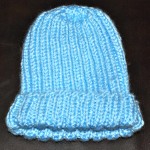
The entire pattern is just a knit 2, purl 2 ribbing that you do for a total of 6 inches. Then you start decreasing. First decrease round is knit2tog, purl2tog, leaving 38 stitches. Then knit a round. Next decrease round is knit2tog, leaving 19 stitches on your needles. Complete another knit round. Third decrease round knit2tog, with 10 stitches remaining on your needles (including the one stitch left over). Cut your yarn leaving about 8″ tail, attach your darning needle and weave your needle through the last 10 stitches and pull tight. Push darning needle to the wrong side of your beanie and weave in the loose end. Now your beanie is ready to be donated or for your new arrival!!
I really like the finished look of this little beanie and I am now working on enlarging the pattern because this would be a great beanie for toddlers too!!
HAPPY CREATING!!
Disclaimer: This post contains affiliate links – “small commission earned”
,