The Hook Says it All

What exactly is a crochet hook?  They have been defined as a needle with a hook at one end used for drawing yarn or thread through knotted loops.  Whereas in knitting, you use two needles to complete a project, in crocheting you basically use only one hook to make your stitches.

The size of a crochet hook is measured by the thickness of the tool’s shaft which will ultimately relate to the size of the stitches created.  So in a nut shell, the larger and thicker the crochet hook, the larger and thicker your stitches will be. With that in mind, you will more than likely need a thicker yarn when crocheting with a larger hook.

You will find several different systems used to determine the size of a crochet hook.  The American (letter/number system), Continental (metric system) and UK system.  Check out Crochet Hooks You for a very informative crochet hook conversion chart, click on sitemap and then click on chart.   Most of the time, the more common aluminum hooks are imprinted with both the letter/number size and the numeric metric size.  This is useful because some patterns say to use a size G or specify a 3.25mm crochet hook.  Just remember, the higher the number or farther down the ABC ladder, the larger the hook.  Oddly enough, steel hooks are really the opposite.  The higher the number, the smaller the hook.

Karp Styles Crochet & Knitting is a wonderful website giving you intricate details about various hooks and their qualities.

I know it is important on some patterns for you to be exact when it comes to your hook size and yarn weight so that your gauge matches with the pattern requirements and your crochet project fits perfectly. However, depending upon the pattern and the outcome you want, it can be fun to experiment using different size hooks with different weights of yarn.  Keep in mind, if you take a thread pattern and want to use a 3ply yarn even if you use the recommended hook size, you will probably need to purchase more yarn than what the pattern calls for.  Don’t be afraid to crochet “out of the box”!!

Crochet hooks are available in a wide variety of materials too; aluminum (probably the most common and readily available), plastic, acrylic, steel, wood (bamboo, rosewood, birch, and other exotic woods). Laurel Hill Online has a wide selection of handmade crochet hooks.

If you are a beginner or are wanting to teach a child how to crochet, probably a large sized aluminum hook (N – 9.00mm) would be a good one to start with.  They are light, have a large tip for grasping the yarn, and the yarn will work off the hook with minimal effort.

However, if you’re a crochet “junkie” like me, then maybe it is time to treat yourself to an exotic wood crochet hook or put that request on your wish list.

HAPPY CREATING!!

Disclaimer:  This post contains affiliate links – “small commission earned”


Fun with Felt

Felt is one of those great materials that can be used for all kinds of crafts and/or projects.  It is a great medium to use with children because it doesn’t fray or ravel, it is very colorful, soft to the touch, glueable, sewable, etc.

I like to use it to help teach young children some basic sewing stitches too.  Felt can be purchased in several different colors and it is already cut into perfect squares and ready to be crafted into something fun.  For a very simple sewing project, let the child select the two pieces of felt they want to work with and just have them whip stitch the two pieces together.   You could also have them put two pieces of fabric together and do a straight stitch, either very long stitches or short stitches will work.  What stitches you show the child, will depend on the age of the little one and their coordination abilities.

If you are working with an older child, let them cut the felt into shapes, like circles or triangles and then sew these together.  Or cut out different colored ovals and circles and stitch together to form a flower. You could have them do a straight stitch along the outer edges of the felt shapes before they are sewn together for a more textured and colorful flower design.  Let imagination take center stage!!

These are activities that should be supervised by an adult.  Remember, don’t use a regular sewing needle, too sharp and too small.  There are actually plastic yarn needles available that will sew through felt and are perfect for little ones.  If you are working with children 7 or older, you could probably use a metal yarn needle or tapestry needles.  These also have the larger eyes with blunt tips too.

There are lots of choices available for your thread selection too.  You could use bright, colorful DMC floss or a ball of crochet thread or even a skein of yarn probably a size 3 or smaller.   Using bright, cheery felt squares with colorful thread makes for a fun craft project.  When using DMC floss, I would suggest using three strands to sew with.

Don’t forget to embellish your finished sewing project.  Felt is a great material to glue things on it.  You can either cut up felt scraps to make eyes, hair or geometric designs or use pompoms, big plastic buttons, cotton balls, construction paper designs; the list is endless.

Enjoy your activity, be creative, expose your little ones to sewing mediums and maybe an artist interest will develop in the process.

HAPPY CREATING!!

Disclaimer:  This post contains affiliate links – “small commission earned”


Sewing Must Haves

Having the right tool for the right job is always a plus even for sewing projects.  I’m sure anyone who does crafting or sewing, even the very casual sewer, has the very basic items readily available; like a good pair of scissors, needle and thread.

Here are some worthwhile tools that I’m sure you will find helpful to give your sewing projects that professional look and feel.   A well equipped sewing room always has a seam ripper at hand, maybe even two.  You will just have those moments when it will be necessary to utilize the seam ripper and this tool does make fast work of taking out thread.

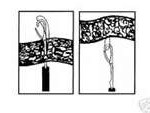
Another great tool to have at your disposal is a knit picker.   You know how your favorite sweater will get a snag and you end up with a pulled thread, well the knit picker makes fast work of pulling that loop to the wrong side of the material and you cannot tell that there was ever a snag.

Fray check is another one of my personal favorite sewing aids.  The name says it all!!  This liquid, when dry, helps to keep fabric and/or threads from fraying.   Easy to use and is machine washable and dry cleanable.

Sewing snips are a convenient item to have for cutting threads.  They are lighter than a pair of scissors and  you use only one motion for snipping those threads.

A needle threader, tweezers and a soft measuring tape are very useful items to have readily available too.  A turning/stuffing tool is super nice to have when you have to turn a corner to the right side or getting batting into small areas.  Actually, I have had success using a knitting needle or a chop stick to help make a crisp corner or pushing that little bit of batting into place.

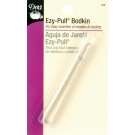
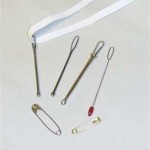
Elastic  threaders or a bodkin are great to use to help pull elastic through a casing.   Safety pins are a must too and can also be attached to the end of elastic for threading through a casing.

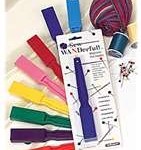
A couple of more unusual items to have in your sewing basket are a telescopic magnet and a magnifying glass. The magnet is a great tool to help pick up those pins that you know are going to spill or to find that one illusive pin that dropped onto the rug and you can’t see it.  Speaking of can’t seeing, the magnifying glass gives you that extra oomph when looking at very small, detailed work.

These little sewing aids are not only perfect for the seamstress/crafter but also having them available in a little bin in your closet or desk drawer at work for those times when a clothing mishap presents itself would be an unexpected pleasure!!

HAPPY CREATING!!

Disclaimer:  This post contains affiliate links – “small commission earned”

The Scoop on Cotton Fabrics

For me, the best part of sewing is going to a fabric store and touching, looking at and then selecting my fabric needed for the project that I am planning. I have found over the years that some cotton fabrics have succumb to that new marketing of same old container but actually less product inside.

You use to always pick up your bolt of cotton fabric and it was 44″-45″ wide, however, now look closely because most of the time your cotton widths are now 42″-43″ wide.  Unfortunately, patterns still give yardage requirements for the 44″-45″ wide fabrics and depending upon your project, you might need to purchase more yardage than what is recommended.  It can be a little frustrating but knowing this fact, always check the end of the bolt to verify your fabric width size.

As a rule of thumb, if making clothing you might need to purchase about an extra 1/4 of a yard of your selected cotton fabric to insure you have enough for all your pattern pieces.  Before I cut out any pattern pieces, I always wash my cotton fabrics in cold water and place in the dryer at a medium temperature.  This way I feel I have reached the maximum shrinkage of that piece of fabric, especially if you are making children’s clothing because busy moms just want to through that item into the washer and dryer without any worries.  You really don’t want to spend the time and effort making a wonderful piece of clothing and wash/dry it and have it shrink a couple of inches.

Surprisingly, some cotton fabrics could shrink 2 – 3 inches after completing the washing and drying process.  That’s why I usually purchase a little extra to allow for the narrower width and possible shrinkage.  Nothing more upsetting than to find out you don’t have enough fabric when laying out your pattern pieces.  Even for quilting, because I solely use cotton fabric, I will buy a little extra for that same purpose of shrinkage and narrower fabric widths.

In rare instances, a 1/4 of yard extra might not be enough especially if you are using a one-way design fabric, which means all your pattern pieces need to go in the same direction.  Pattern design and size requirement of the finished item are specific measurements to look at when determining  your yardage needed.  Be sure to check with the individual who is cutting your fabric if you have any questions about the yardage requirements needed for your specific project.

I still LOVE to sew with cottons.  It makes up wonderfully in clothing, crafts, home deco projects and more.   There are many wonderful colors and designs available in cottons fabrics too.  Because it really has a great weave to it, you can just make a small clip and rip your  fabric to get a true straight of grain edge to work with.  Cottons are really a great fabric to work with too especially if you are a first-time sewer or helping a child sew a project.

You don’t just have to go to the big box fabric store either to purchase great cottons.  A couple of my favorite on-line fabric stores are fabric, thousands of bolts and fabric shack.  I still find it fun and amazing to be able to purchase fabric in my pjs!!!!

HAPPY CREATING!!

Disclaimer:  This post contains affiliate links – “small commission earned”


The Mystery of Yarn Unraveled

Since I had a comment about yarn, I thought I would take a minute and briefly highlight some facts about crocheting/knitting yarns.  It is so much fun to go to a store and just look and, of course, touch the various skeins of yarn that are on the shelves.  There really is a little more thought needed when purchasing yarn especially for a pattern or project that you have in mind.

When you look at a skein of yarn, there should be a yarn symbol with a number in the center.  Those numbers actually tell you the diameter or weight of the yarn and then you will find a number telling you the yardage/grams/ounces which is how much yarn is in that particular skein.  So you pick up a skein of that luscious purple that you think will make a wonderful scarf and you read that it is a number 4/100 yards.  So you are really purchasing a medium diameter or worsted weight yarn with 100 yards available for your use.   The Standard Weight Guidelines is a great website to check out for all the industry standards used on the labels of various yarns. https://www.craftyarncouncil.com/standards/yarn-weight-system

A simple review of yarn categories and weights is this:

(0) is a LACE weight perfect for shawls or extra find projects

(1) is SUPER FINE  fingering yarn mainly used for socks and/or baby items

(2) is FINE good for baby and sport yarn

(3) is LIGHT good as sport, light worsted for clothing

(4) is MEDIUM worsted weight for afghans and clothing

(5) BULKY for scarves, hats

(6) SUPER BULKY crafts, rugs

On the labels, you will find the company’s recommendations for what the yarn should be used for and what needle size to use.  When just starting out, I would stick with the pattern recommendations for both needle size and yarn diameter/weight to help you get the correct finished size.  Make sure you purchase enough skeins to complete your project using the yardage/gram information.

As you become more proficient, the needle size might be different based on how tight or loose your stitches are (which is called your gauge, a whole new blog) and you will find that you will either use a smaller size or larger size needle(s).   Also, it can be very creative and fun to take a pattern and use a different yarn than what is suggested, the results can be very interesting.  You just need to remember that when changing anything about a pattern, you will have to readjust your yardage amounts which means you will either need to buy more or less skeins of yarn.  Of course, having left overs is always a plus for those small items just needing to be made.

HAPPY CREATING!!

Disclaimer:  This post contains affiliate links – “small commission earned”