Tag Archive | fabric

Let’s Take a Nap??

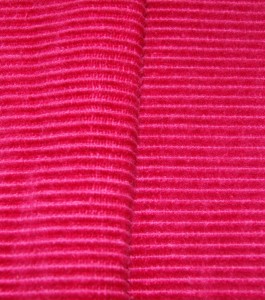
Not really, let’s just briefly discuss sewing using a fabric that has a “nap”.  A fabric with nap is a type that usually has a “pile” which means that it has gone through a process to bring the fiber ends to the surface.  Good examples of a fabric with nap are:  Velvets, Corduroy, Terry Cloth, Brushed Denims, Suede, Flannel and Fur.

You can actually run your hand along the fabric and see a difference in shading and design with a napped fabric.  When reading a pattern, it will state the yardage  *with nap  and  **w/o nap.  Most of the time, depending upon the design of the pattern, you will always need more fabric to complete your project if you are using a fabric with a nap.

The reason for this is because YOU MUST LAYOUT your pattern pieces with them all RUNNING in the SAME DIRECTION.  If you don’t cut out all your pattern pieces in the same direction, your garment will not have a cohesive look to it and you will see unusual color/ shading differences.

Personally, when I am laying out pattern pieces using napped fabric, I like to have the direction of the nap heading South or brushing down from the top to the bottom.  You will see that if you rub your hand along the fabric from one cut end to the other cut end, one direction feels smooth to the touch and when you go the opposite direction it will have a slight rough feeling.

Another factor to keep in mind, is that fabric with “nap” is probably better suited using a more simple or less intricate design.  Especially a fabric like Velvet, which is heavier or thicker in weight and will have a somewhat crushed look to it if there is a lot of top-stitching or lots of small design accents.

  • TIP:  If using a bulky fabric with nap that has facings, it might be helpful to use a lighter weight fabric for the facings to help eliminate some of the bulk.  Select a fabric that blends good with the main fabric and has the same type of washing or drying cleaning abilities too.

Remember to always do your pattern adjustments, if any,  prior to cutting out your fabric.  So next time you are planning to do a new “snoozing”, I mean sewing project, check out fabric with “nap” and see if it will work for your design.

  • TIP:  Double check your fabric for any “one-way” designs because again you will want to pin your pattern pieces so they are all going in the same direction so your fabric design will all be running the same way too.


Brushing fabric from left to right, rough to the touch on left side/smooth on right

 HAPPY CREATING!!

Disclaimer:  This post contains affiliate links – “small commission earned”


A Scrappy Moment

If you love and enjoy sewing and quilting projects as much as I do, you know that you always have a ton of SCRAP fabrics leftover.  I just have the hardest time throwing those little scraps away.  I tell myself that surely I can find another use for them.   In the meantime, I neatly (as best as you can neatly store scraps) place them into a large plastic storage bin waiting for just that perfect project.

Actually. what really ends up happening is that storage bin has become the greatest place for little fingers to rummage through and get their creative juices flowing.  Needle and thread is not always required but sometimes glue is a must!!

A lot of those little scraps turn into baby doll clothing and accessories, especially for Barbie and her friends.  Take a simple rectangle of fabric, cut two small circles for arms, take a narrow strip of another scrap for a belt and viola you have a coat, or a beach coverup, or a dress whatever design fits the moment.   Make a temporary bed for your doll by laying out another square or rectangle of fabric placing it on the floor then fold up another scrap for a pillow.   A wonderful opportunity to be creative, not only with a simple design but also with color and texture.

One of my favorite scrappy projects is to let your little one select several different colored scraps (blue, green, yellow, red,) and make a mosaic picture.

Simple supplies needed in addition to your scraps:  Scissors, Glue and Construction Paper (or any paper that you have on hand, a good time to recycle a brown paper bag).

Depending upon the age of your child, you will need to cut or help them cut out random shapes and sizes from all the colors of  fabric that they selected.   Don’t worry about fabric fraying, that is what makes it one-of-a-kind.   Let them draw a picture or a shape or just a doodle design onto the paper.  Now for the FUN part, take a fabric shape and glue it onto the drawing.  Continue gluing fabric pieces until you have a completed masterpiece!

If you have a collection of ribbons, yarns, beads, buttons that are looking for a place other than on a shelf, these items make great additions to your mosaic picture.  Please keep in mind the age of your creative little one, you don’t want to use teeny tiny items with very small children!!

  • TIP:  If your child is older,  a simple gluing method is to pour some glue into a plastic, disposable bowl, thin down with a little water, and use a paint brush to adhere the glue to your fabric shape.

HAPPY CREATING!!!

Disclaimer:  This post contains affiliate links – “small commission earned”