


mysticmeems’ photostream on Flickr.
Pumpkins galore!!
Disclaimer: This post contains affiliate links – “small commission earned”
mysticmeems’ photostream on Flickr.
Pumpkins galore!!
Disclaimer: This post contains affiliate links – “small commission earned”
I found this fantastic free pattern on Knit Picks by Hannah Maier, I believe it can be found also on Ravelry. It is actually two patterns – one for knitting and one for crocheting.

I created the crochet version, which was called the Clove Pumpkin. The yarn that I chose was Lily, The Original Sugar ‘n Cream cotton. I crocheted one using a Size H hook and the other one I used a Size E. I didn’t vary from the directions given but wanted to add a leaf to my pumpkin as well as that little curly Q feature you sometimes see on a real pumpkin. So I spent an evening designing this little leaf that I really like.
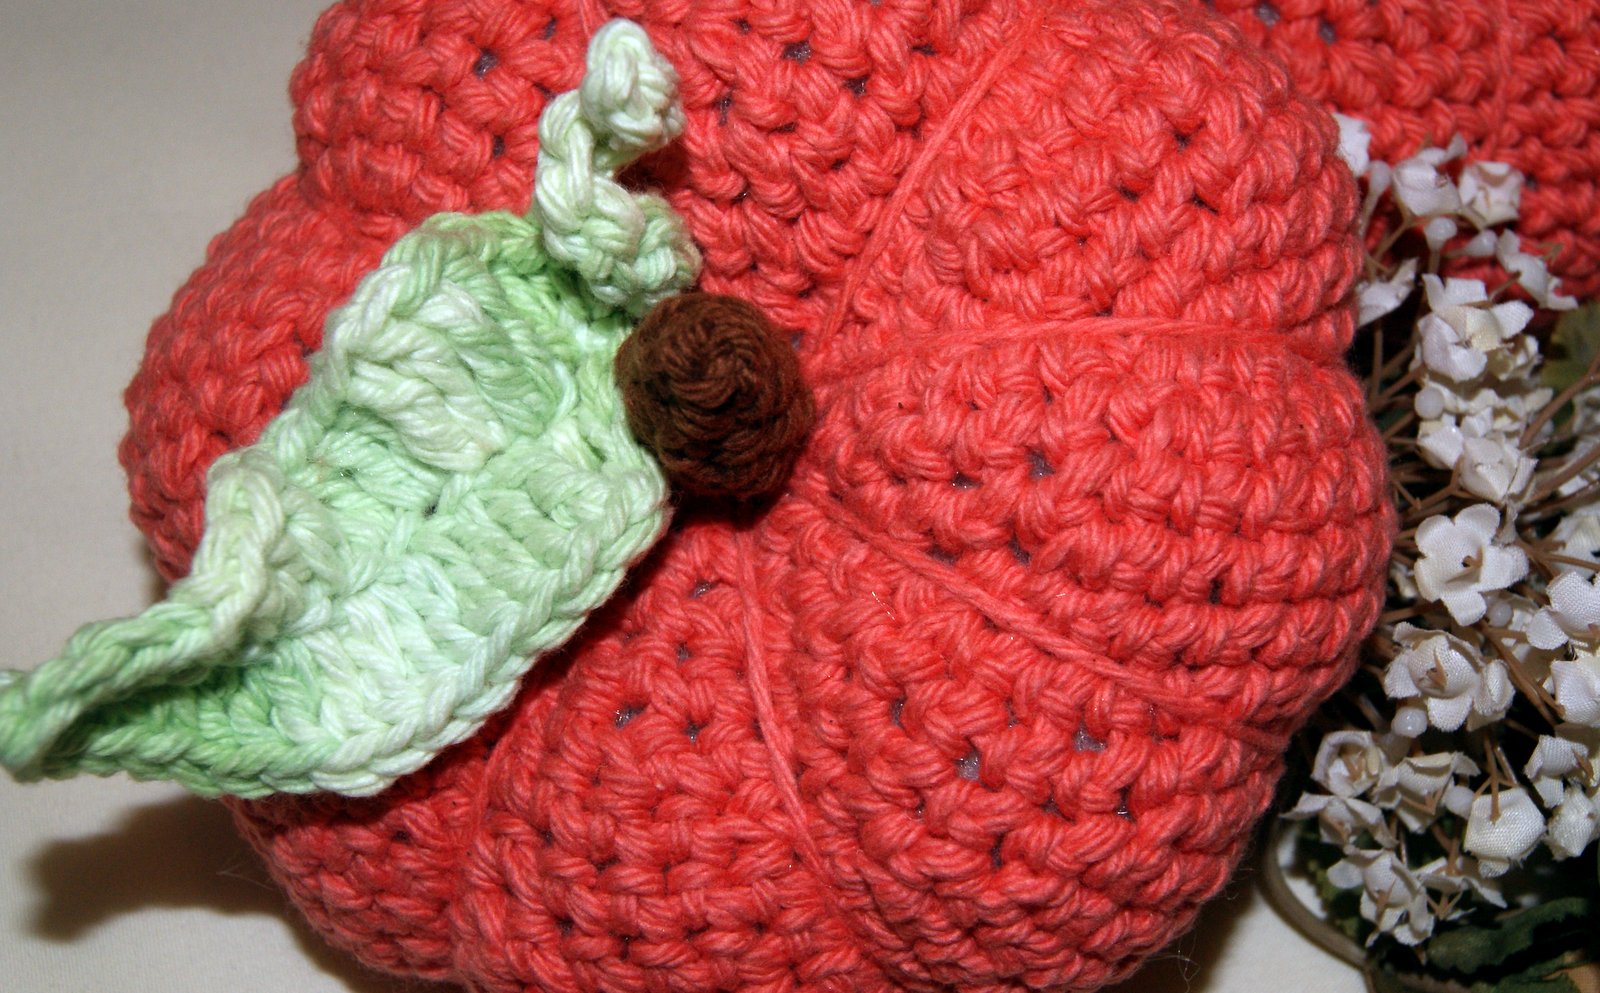
Here are the directions for the leaf: I used the same yarn type as I did for the pumpkin and made my leaf with a Size H crochet hook. In the smaller version, I used a Size E hook for my leaf.
Chain 22, skip first two chains then SL (slip stitch) in next 9 chains. In next chain complete 1 HDC, 1 DC, 1 TRB, in next chain – 2 TRB, next chain – 2 TRB, next chain – 2 HTRB, next chain – 2 HTRB, next chain – 2 DC, next chain – 2 DC, next chain – 1 HDC, next chain – 1 HDC, next chain – 1 HDC, last chain – 3 SC.
Now you want to basically reverse that stitch pattern on the back side of the chain stitches. 1 HDC, 1 HDC, 1 HDC, 2 DC, 2 DC, 2 HTRB, 2 HTRB, 2 TRB, 2 TRB, last chain 1TRB, 1DC, and 1 HDC. Viola, you end up with this really cute leaf. I just stitched it to the center of the pumpkin along with the stem. 
Also, in my smaller version, I created 8 pumpkin ridges just for some variations. I have been placing them around my house and will use some for a table centerpiece for Thanksgiving!!
Thank you Hannah Maier so much for sharing such a cute pumpkin pattern. Love it 🙂
HAPPY CREATING!!
Disclaimer: This post contains affiliate links – “small commission earned”
I haven’t actually researched the correct terminology for the knitted cord that is created from completing your loops on a Knitting Nancy which really look similar to an I-cord; however, I still like to refer to it as my “cat’s tail”!! 🙂
 Presently, my cat’s tail measures 76 inches or 193.04 cm and it is stirring all kinds of ideas as to what I want to create. I can definitely curl itself around and make a super trivet to protect my table from a hot dish. If I make the trivet, I could combine it with my hot pads and dish clothes for a cool, handmade hostess gift.
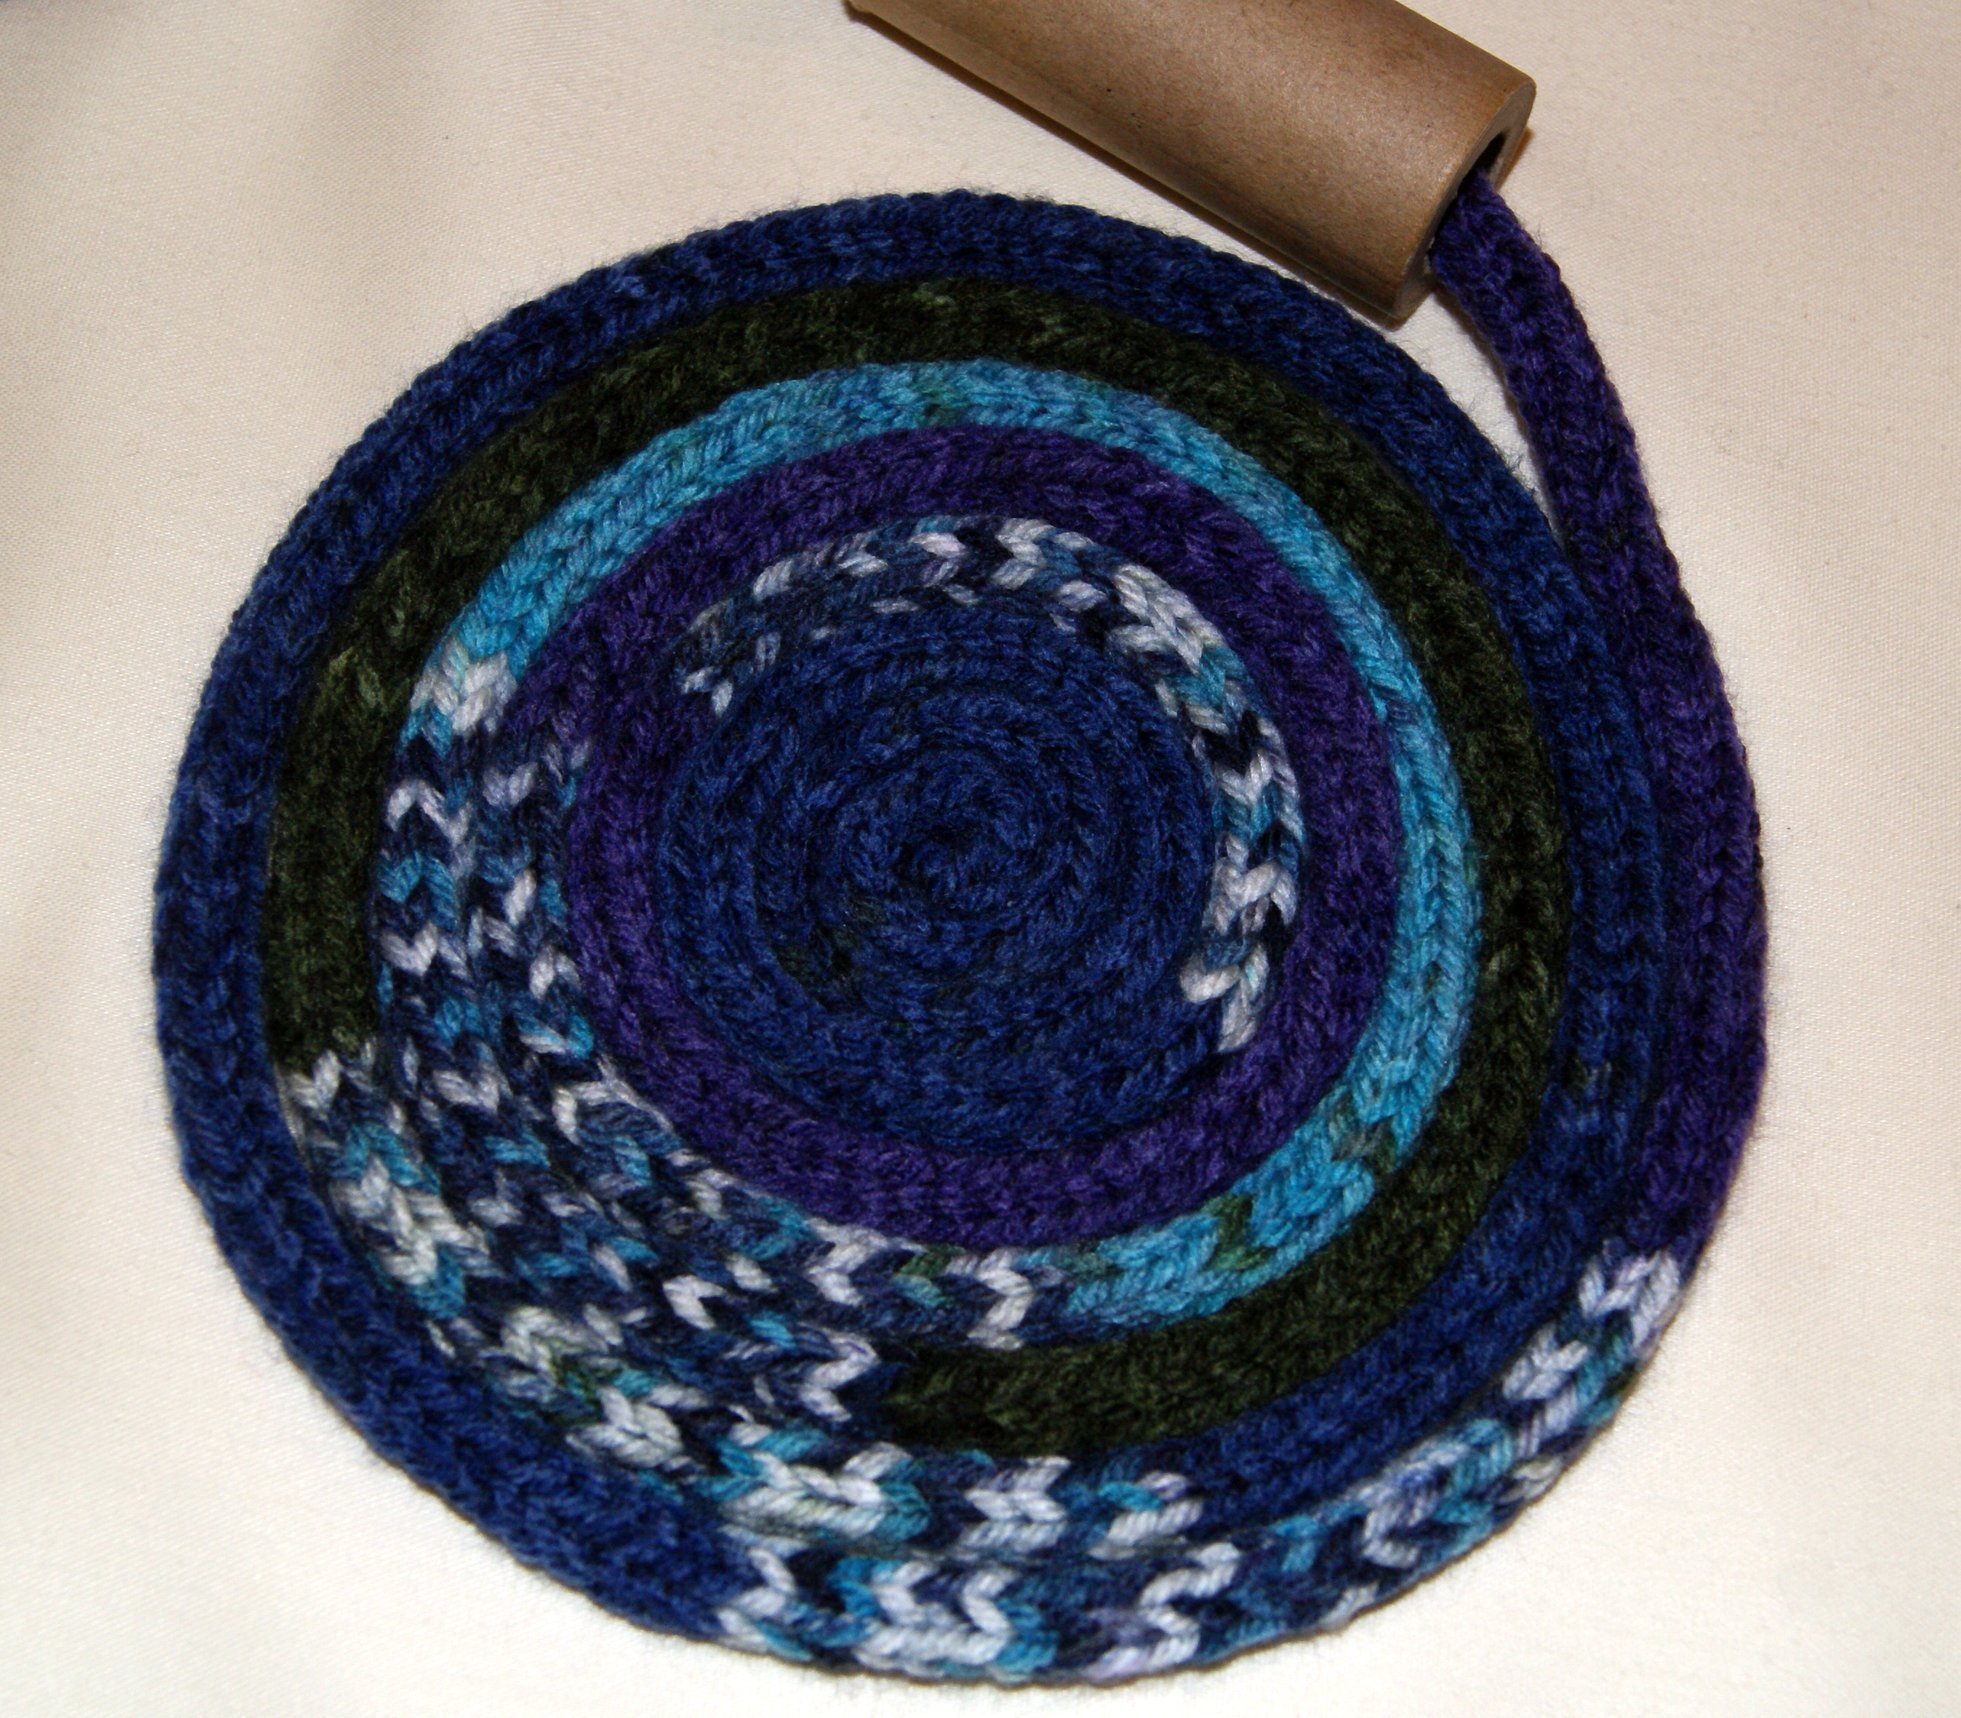
Also, have given some thought to designing a unique wrapped necklace. Leaving long loops and covering the joined area with a really one-of-a-kind tubular bead. Hmm, maybe I will just have to keep the necklace for myself if I end up making that idea!!
I’ve been into yarn bowls too and I think I could take a ceramic bowl and wrap the tail around the outside of it for a size pattern, stitch together, and then maybe create a unique loop edge as a finishing touch.
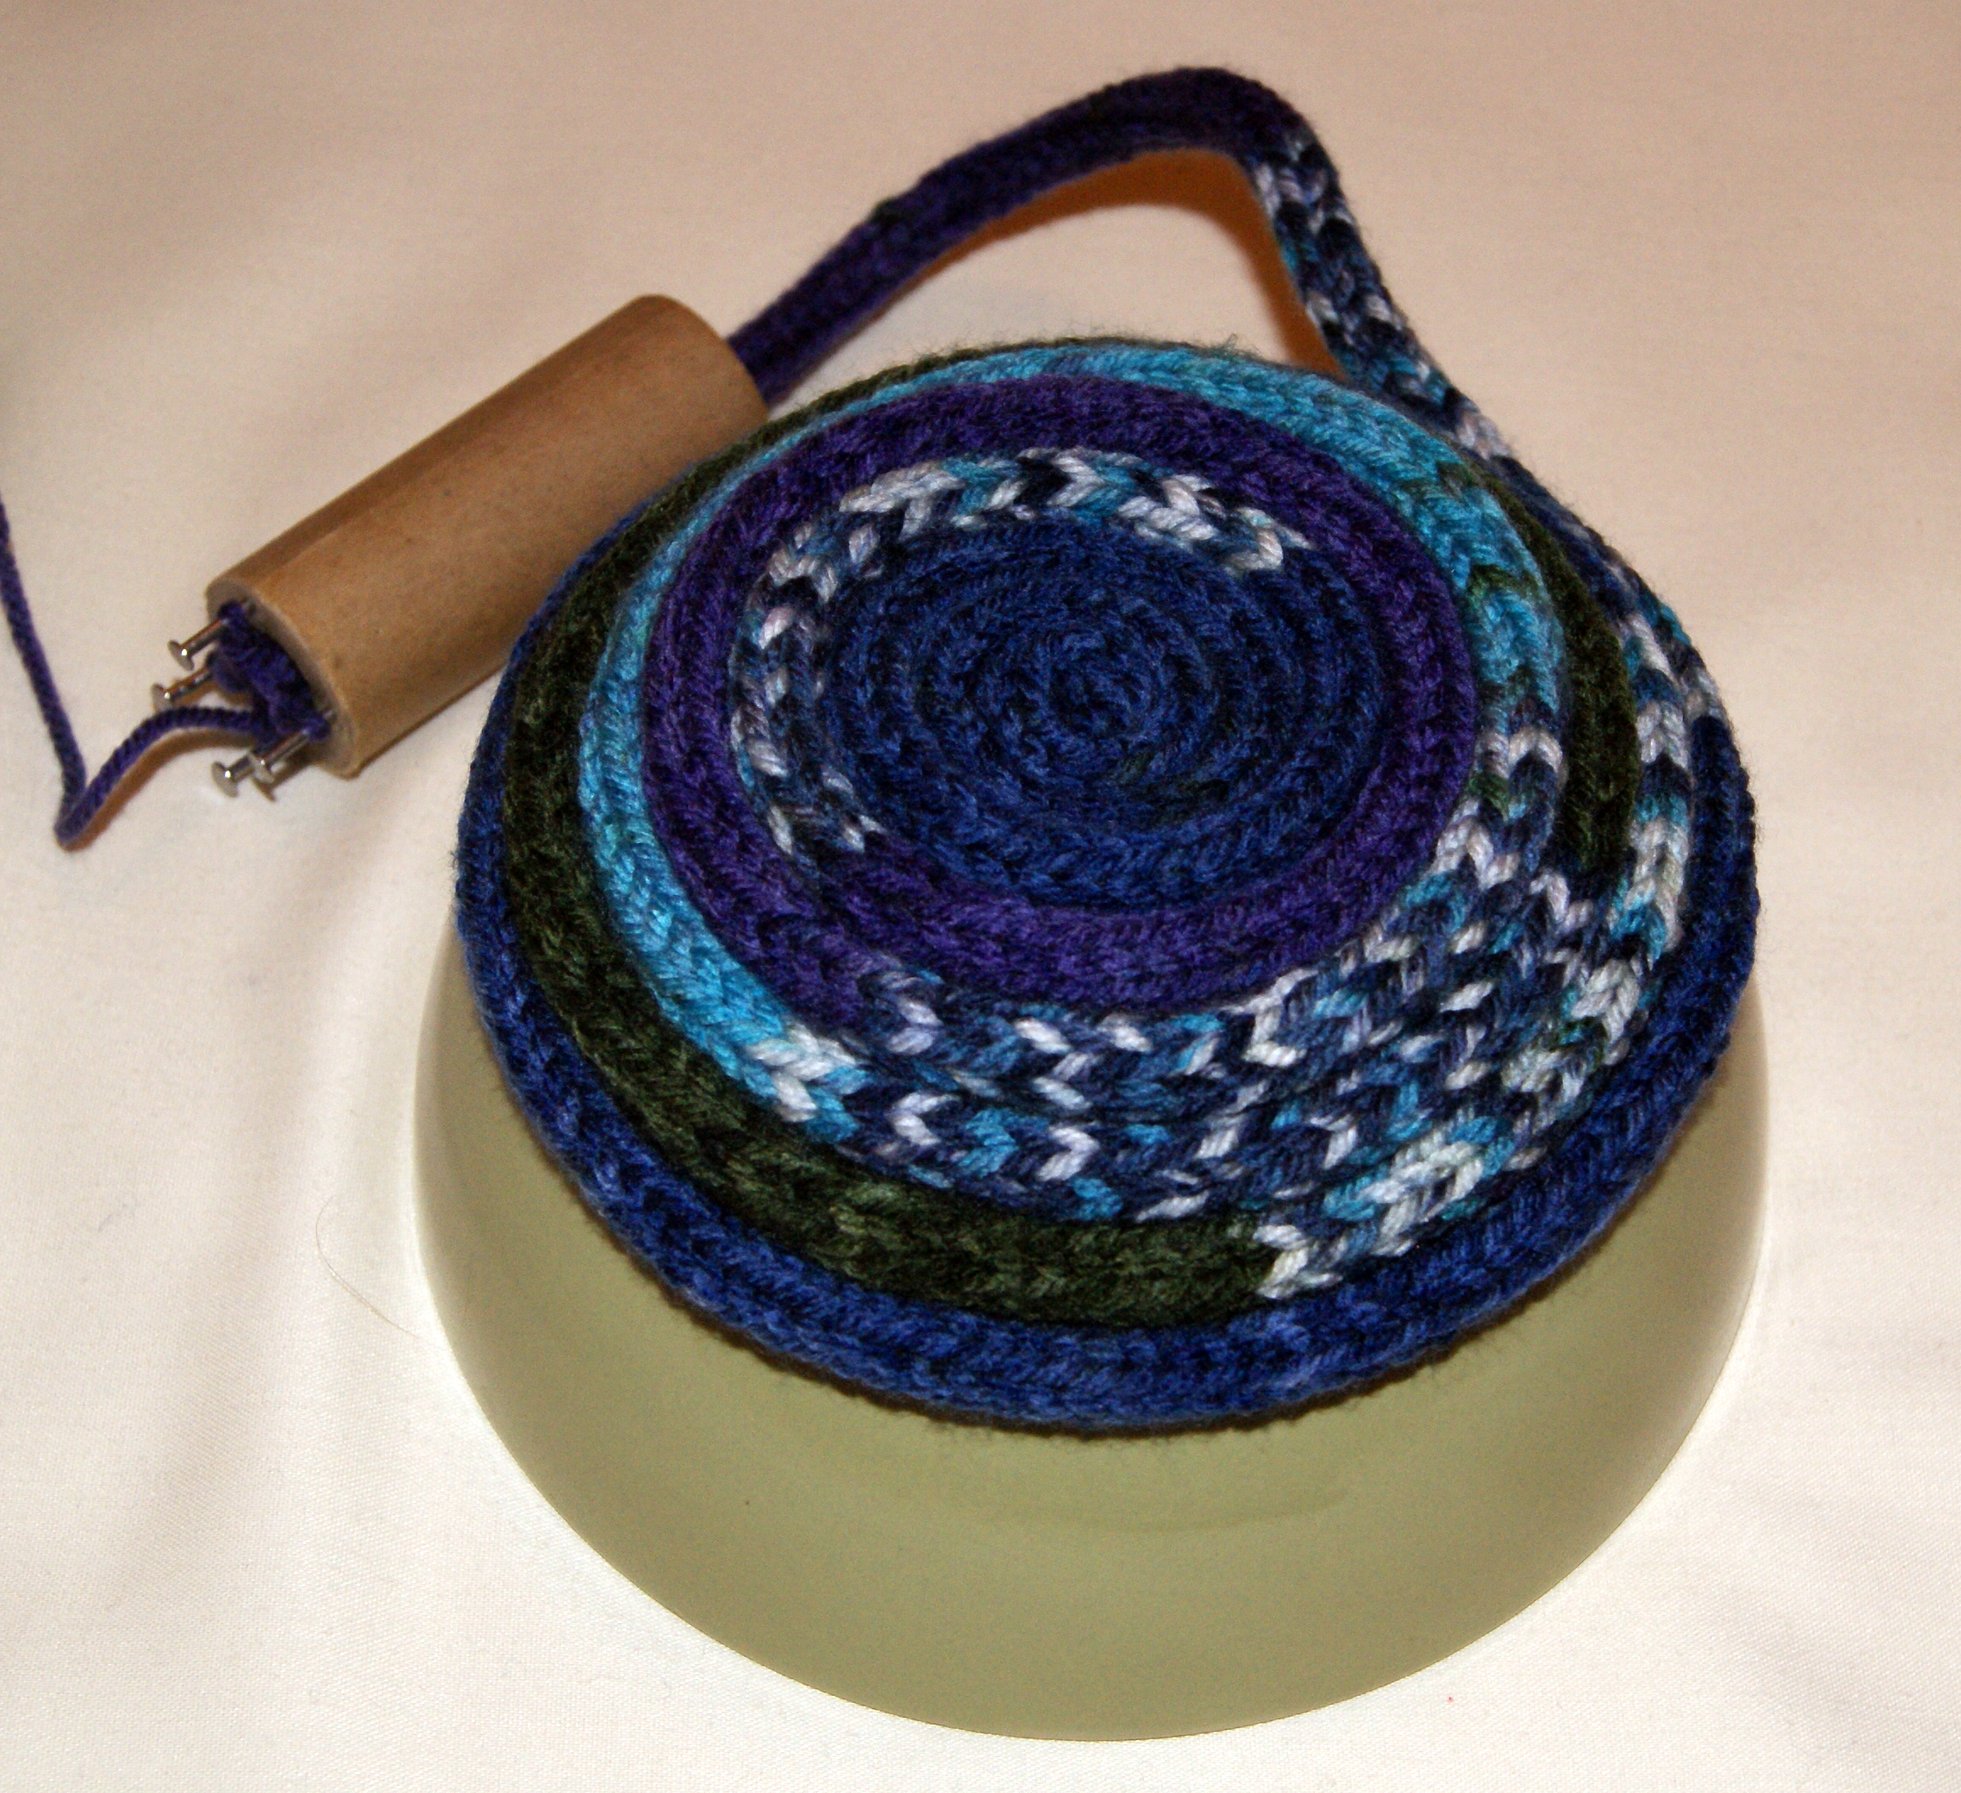

I know whatever I design, my “cat’s tail” still needs to be longer, I am planning to have a finished length of 160 inches or 406.4 cm. So when I really need some down time that doesn’t require any counting of stitches or decreases/increases or watching my gauge, I just sit with my favorite cup of tea and go round and round with my spool knitting. Only having to untwist my tail periodically to keep it smooth. It makes for a very relaxing time for me. 🙂
HAPPY CREATING!!
Using a knitting nancy or spool knitting is a great tool/technique to introduce a youngster to the wonders of yarn. It is a very easy yarn method to create a nice knitted or braided cord that could be designed for bracelets, trivets, coasters, etc. It is really an awesome technique that anyone would find fun to do!! 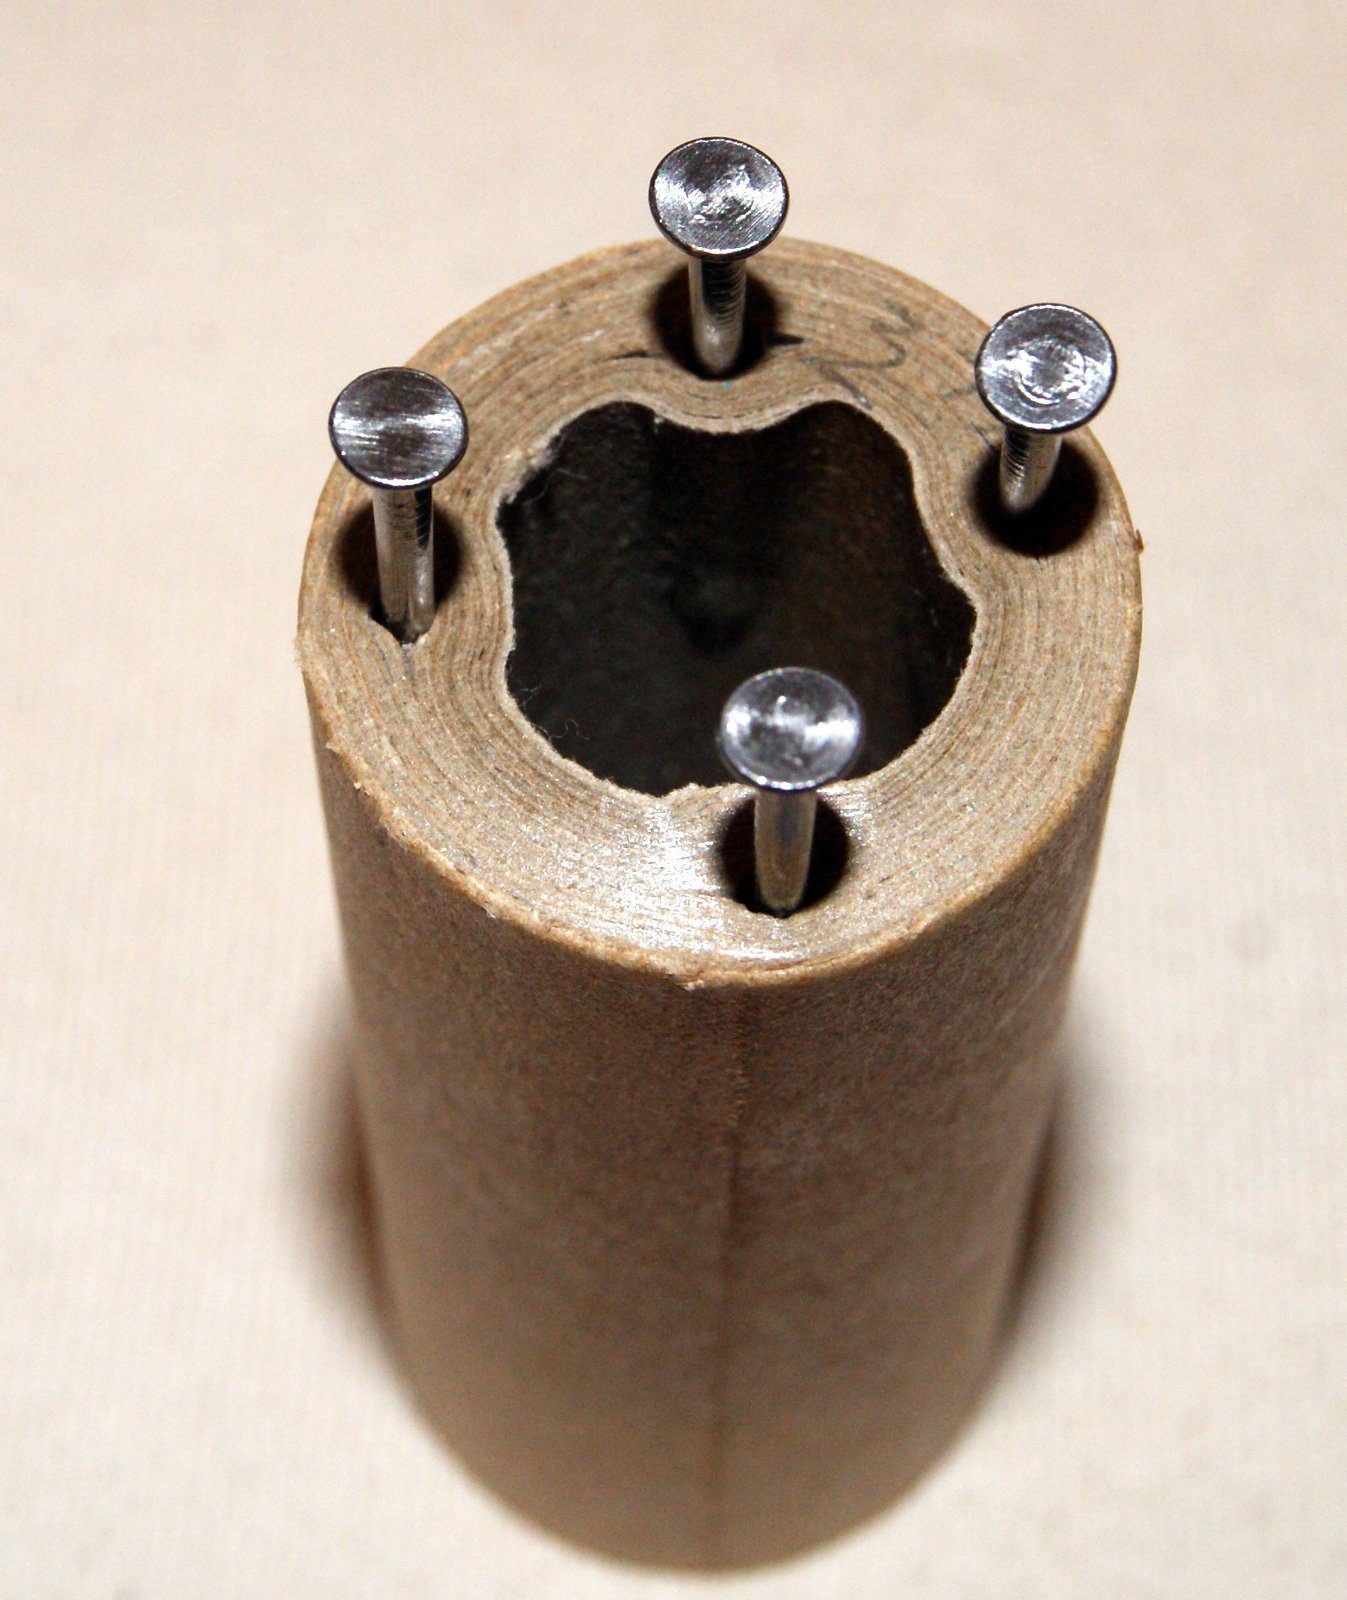
I have actually recycled a thick cardboard thread spool that formally held 1200 yards of mercerized cotton thread for machine quilting by Coats and Clark. The spool is 1″ in diameter with the opening being 1/2″ in diameter. The length of the spool is 2 3/4″ long. I like this size because it fits a child’s small hand really well. You can purchase knitting spools too.
I hammered in four brads using ones that had a large flat head to them. It helps to keep the yarn from sliding off the brad when making your loops. Once you have your spool ready, select your yarn. I would recommend using a 4 ply worsted weight yarn and a metal crochet hook size 5 (1.90mm).


To begin, take your yarn and drop it through the hole and let it hang out about 2 or 3 inches from the bottom. Now to “cast” on your loops, you will be turning the spool in a clockwise direction but going around each brad in a counter-clockwise direction one at a time.
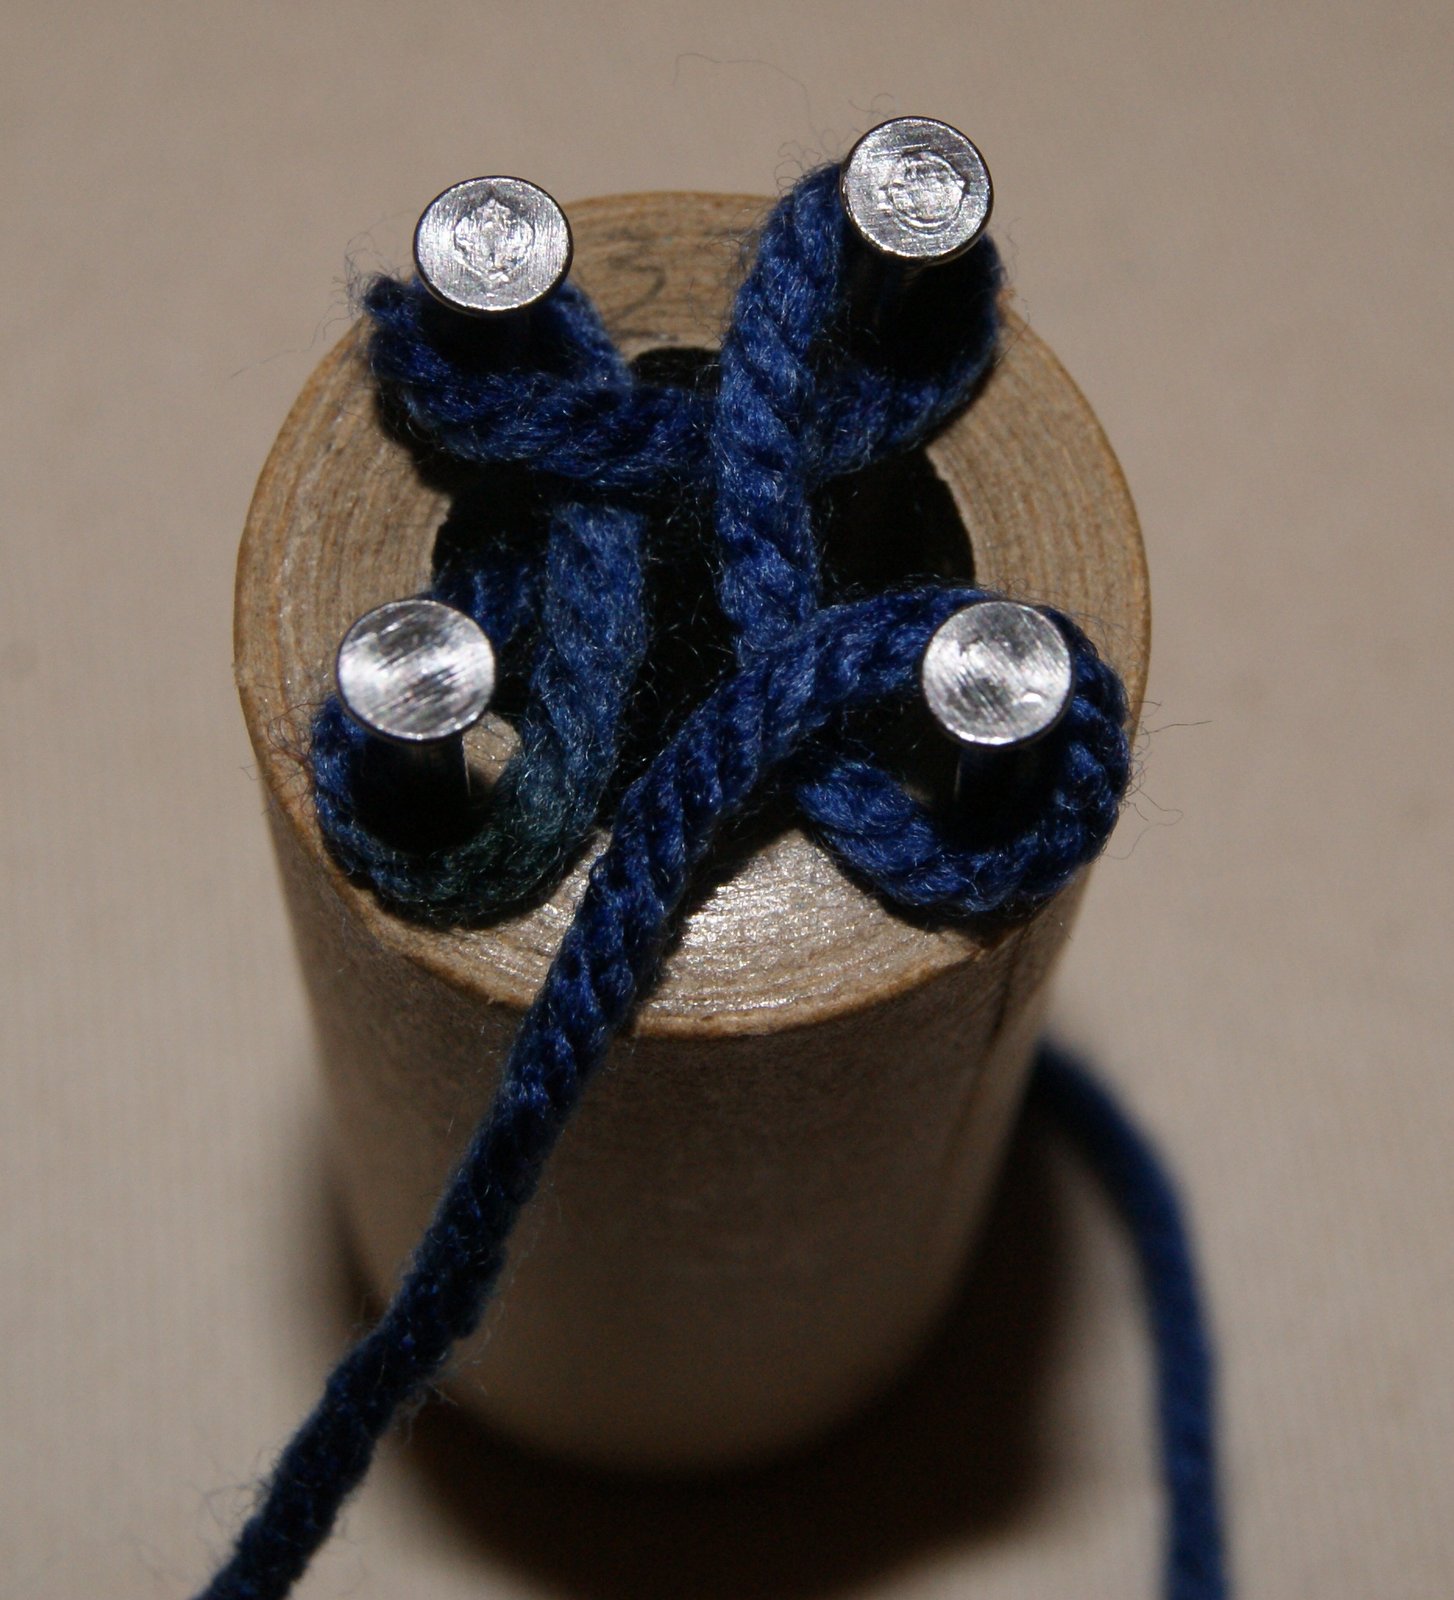
After you have made your loop on each brad, you take your yarn and place it right above the first loop made and with your crochet hook, lift the bottom loop up and over the yarn and brad. Leaving one loop on the brad. Spin your spool in your hand slightly and do that same thing again on the next brad. Keep turning the spool in your hand, make another yarn wrap and continue lifting the bottom loop up and over the top yarn on each brad. Before you know it, you will have a great icord, braided loop or “cattail” coming out of your spool at the bottom.


Now just keep making your loops until you have your “tail” as long as you want it to be. Once you have reached the desired length, you will need to bind off your work from the knitting spool.
When you are ready to “cast off” don’t make a yarn wrap, just grab the loop of the last stitch made and lift it onto the brad to its immediate left. Lift the bottom loop over that loop, now grab the remaining loop left on that brad and lift it onto the brad to its immediate left. Continue doing this until you only have one loop left on the last brad. Cut your yarn and carefully lift the last loop off the brad and place your cut yarn through the last loop and pull snuggly securing all your stitches. Now you have a wonderful knitted tube that can be used for a wide variety of creative projects!!
I have discussed this technique before but have updated my pictures to help you see the process better!! 🙂
HAPPY CREATING!!
Disclaimer: This post contains affiliate links – “small commission earned”
,,,
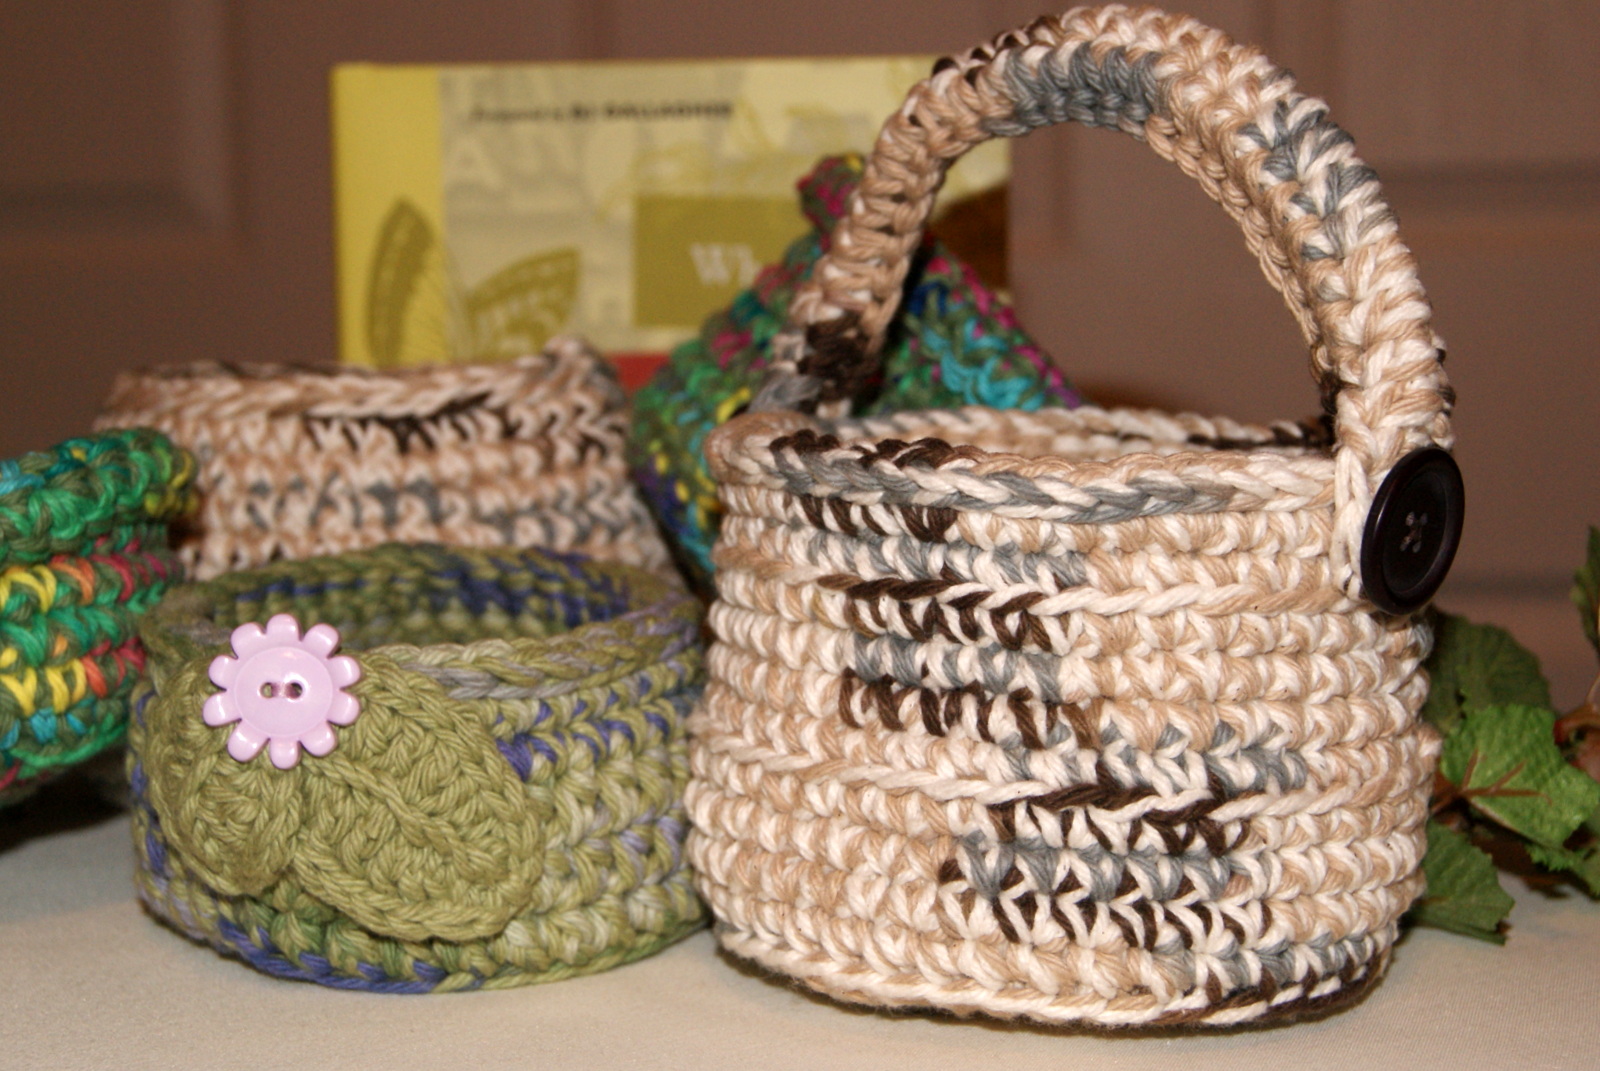
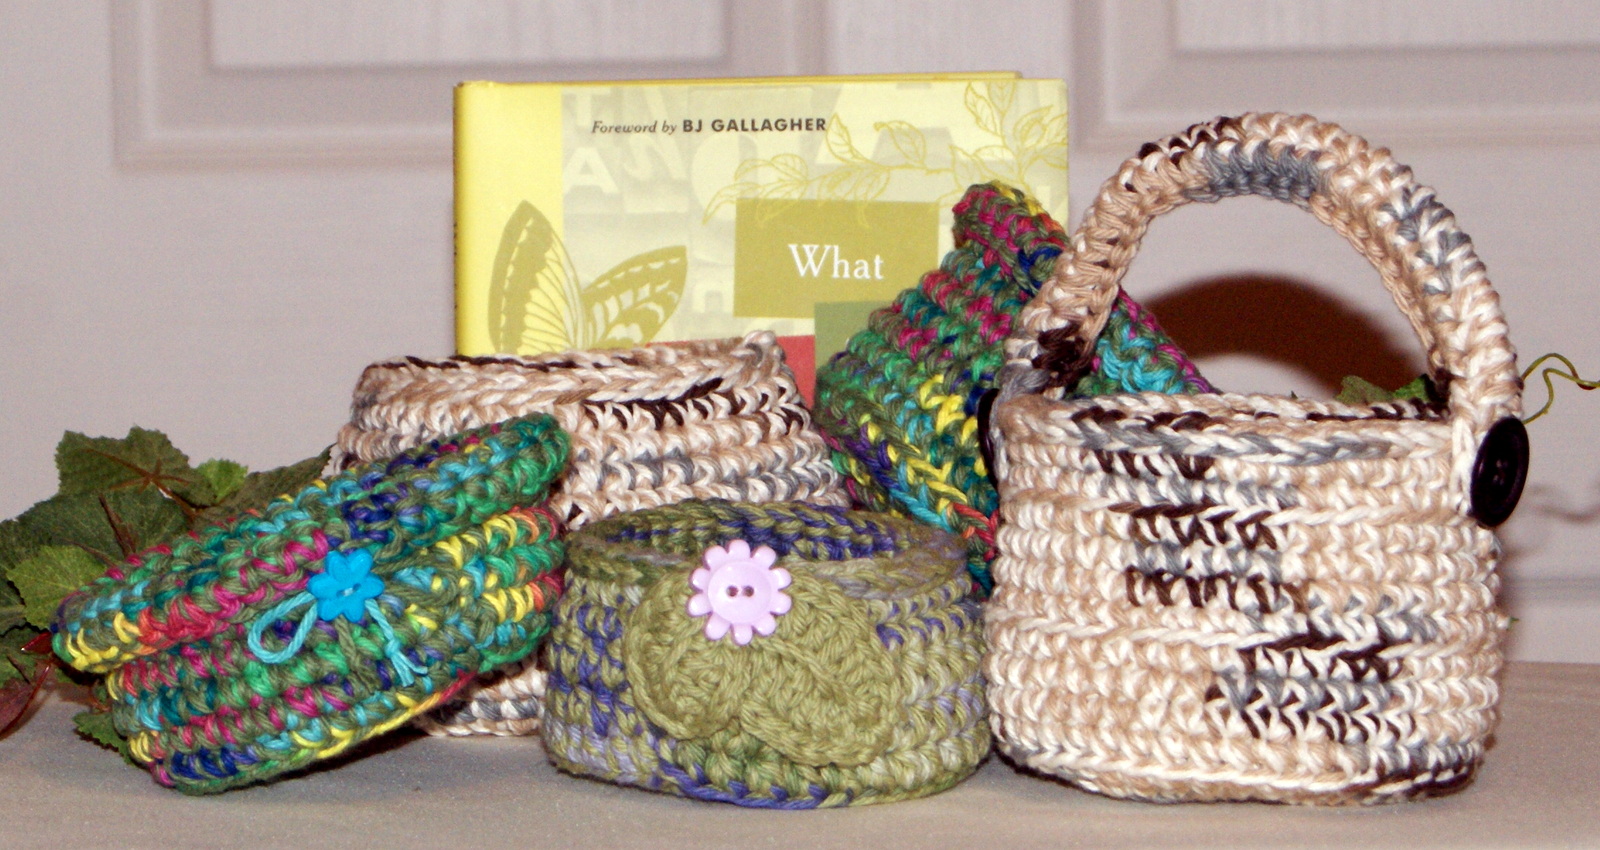 I really “love” making these little crochet bowls or as I like to refer to them as my crochet pottery!! You have lots of creativity to give your finished bowl its own personality.
My yarn of choice is Lily Sugar ‘n Cream but any 100% cotton yarn will work. To give some added durability, I crochet with two strands of cotton yarn. Either two different colors or two strands of the same color depending on the look I want. And sometimes when using two different colors, I end up with a combo totally unexpected!! I like to crochet with a size H or I hook when making these little gems.
Because of the thickness of the yarn, I begin by crocheting 2 chains and in the 2nd chain from the hook, I will make 6 SC stitches. Then I continue with the circle pattern (2 SC in each stitch, next row – 1 SC in next stitch, 2 SC in next stitch; next row – 1 SC, 1 SC, 2 SC continue increasing in this format) until my circle is to the finished diameter that I want for my bowl.
Once I have my diameter, I no longer make any increases, just SC around the diameter until I reach my desired height, your work will begin to curl up. If you want a little separation between the bottom and the bowl sides, then the first crochet row of no increases, make your stitches in the back loop only. This will give you a slight ridge that you can use to shape the bottom of your bowl. Then continue making your stitches in both loops for the rest of your bowl.
After you have reached the desired height of your bowl, on the last row use a one size larger hook and do SL stitches all around the edge and then fasten off. Weave in your ends. You might need to turn your bowl right side out. You want the thread ends from your beginning 2 chains to be on the inside of your bowl. Anyways, that is the look I like so that my outside bottom is smooth.
Now the fun begins!! You can decorate your bowl with buttons, ribbons, lace, crochet leaves and flower appliques, etc. Also, you can be creative in using different stitches within your bowl itself.
These are super little gift items too. Great for keys, cell phones, coasters, potpourri, paper clips, cotton balls, hair barrettes, yarn ball holder, etc. 
It is really a super easy pattern and perfect for a beginner. Hope you will share some pictures as I would love to see some of your “crochet pottery”!!
HAPPY CREATING!!
Disclaimer: This post contains affiliate links – “small commission earned”