Tag Archive | Crochet

Using the “magic” loop technique in a pattern

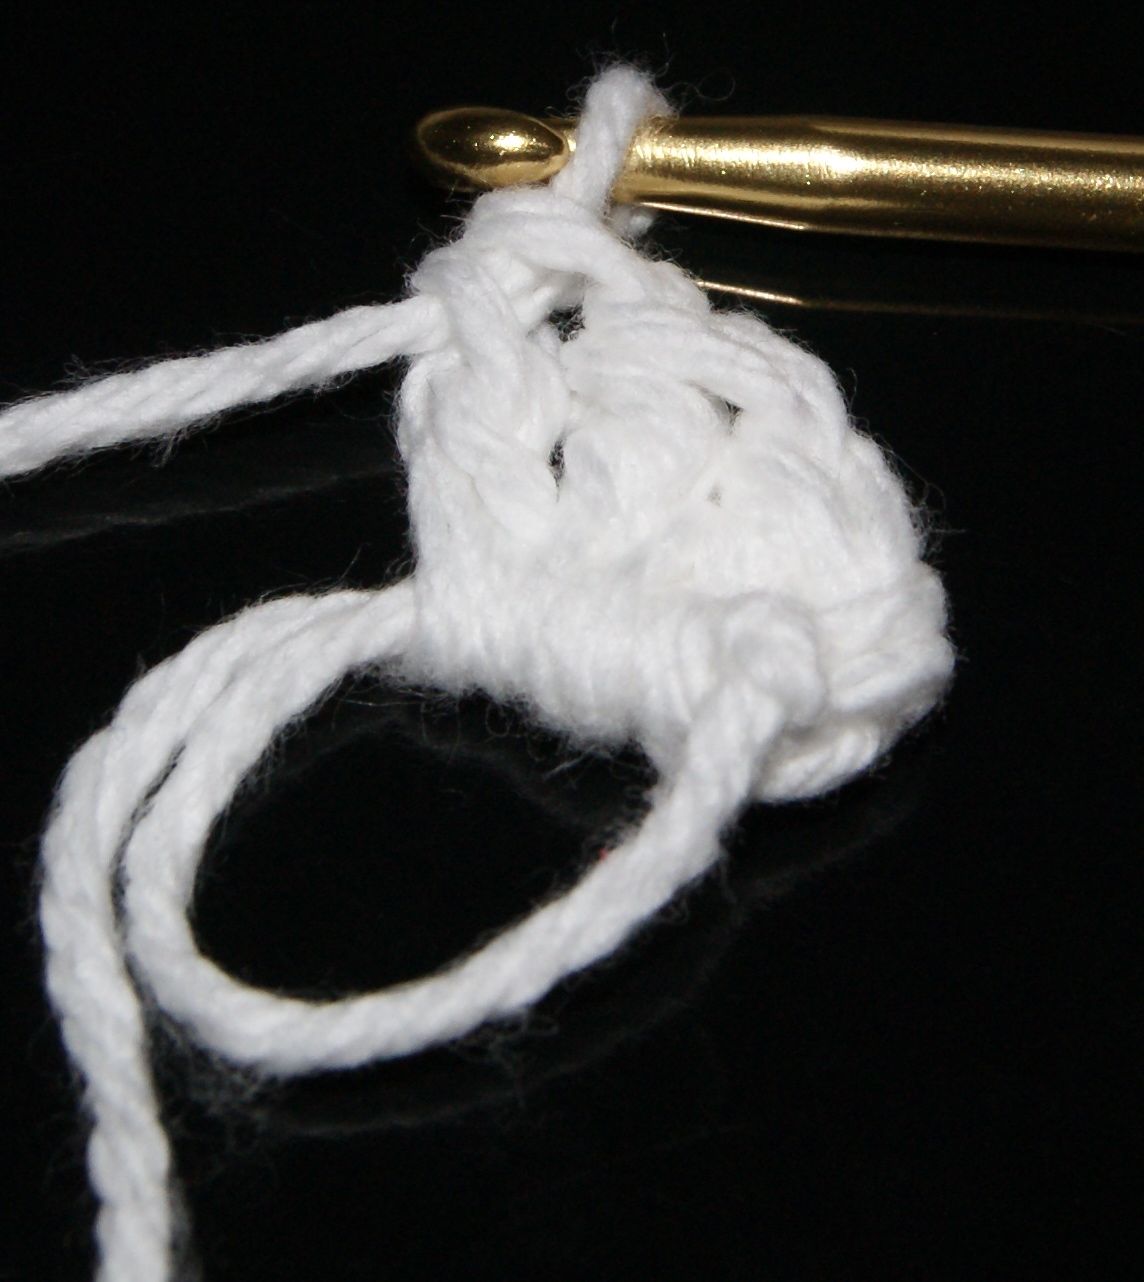
My newborn crochet pattern could also be created using the “magic” loop technique.  Just make your loop and crochet your 12 DC (double crochet) in the center of the loop, join with a SL (slip stitch) in the first DC and continue to follow pattern with round 2. SONY DSC

HAPPY CREATING!!

Disclaimer:  This post contains affiliate links – “small commission earned”

How to crochet The “Magic” Loop

I really like the “magic” loop crochet technique.  There are many patterns that begin the project with this technique but you can also convert a pattern that begins with a joined circle to a magic loop if you so desire.

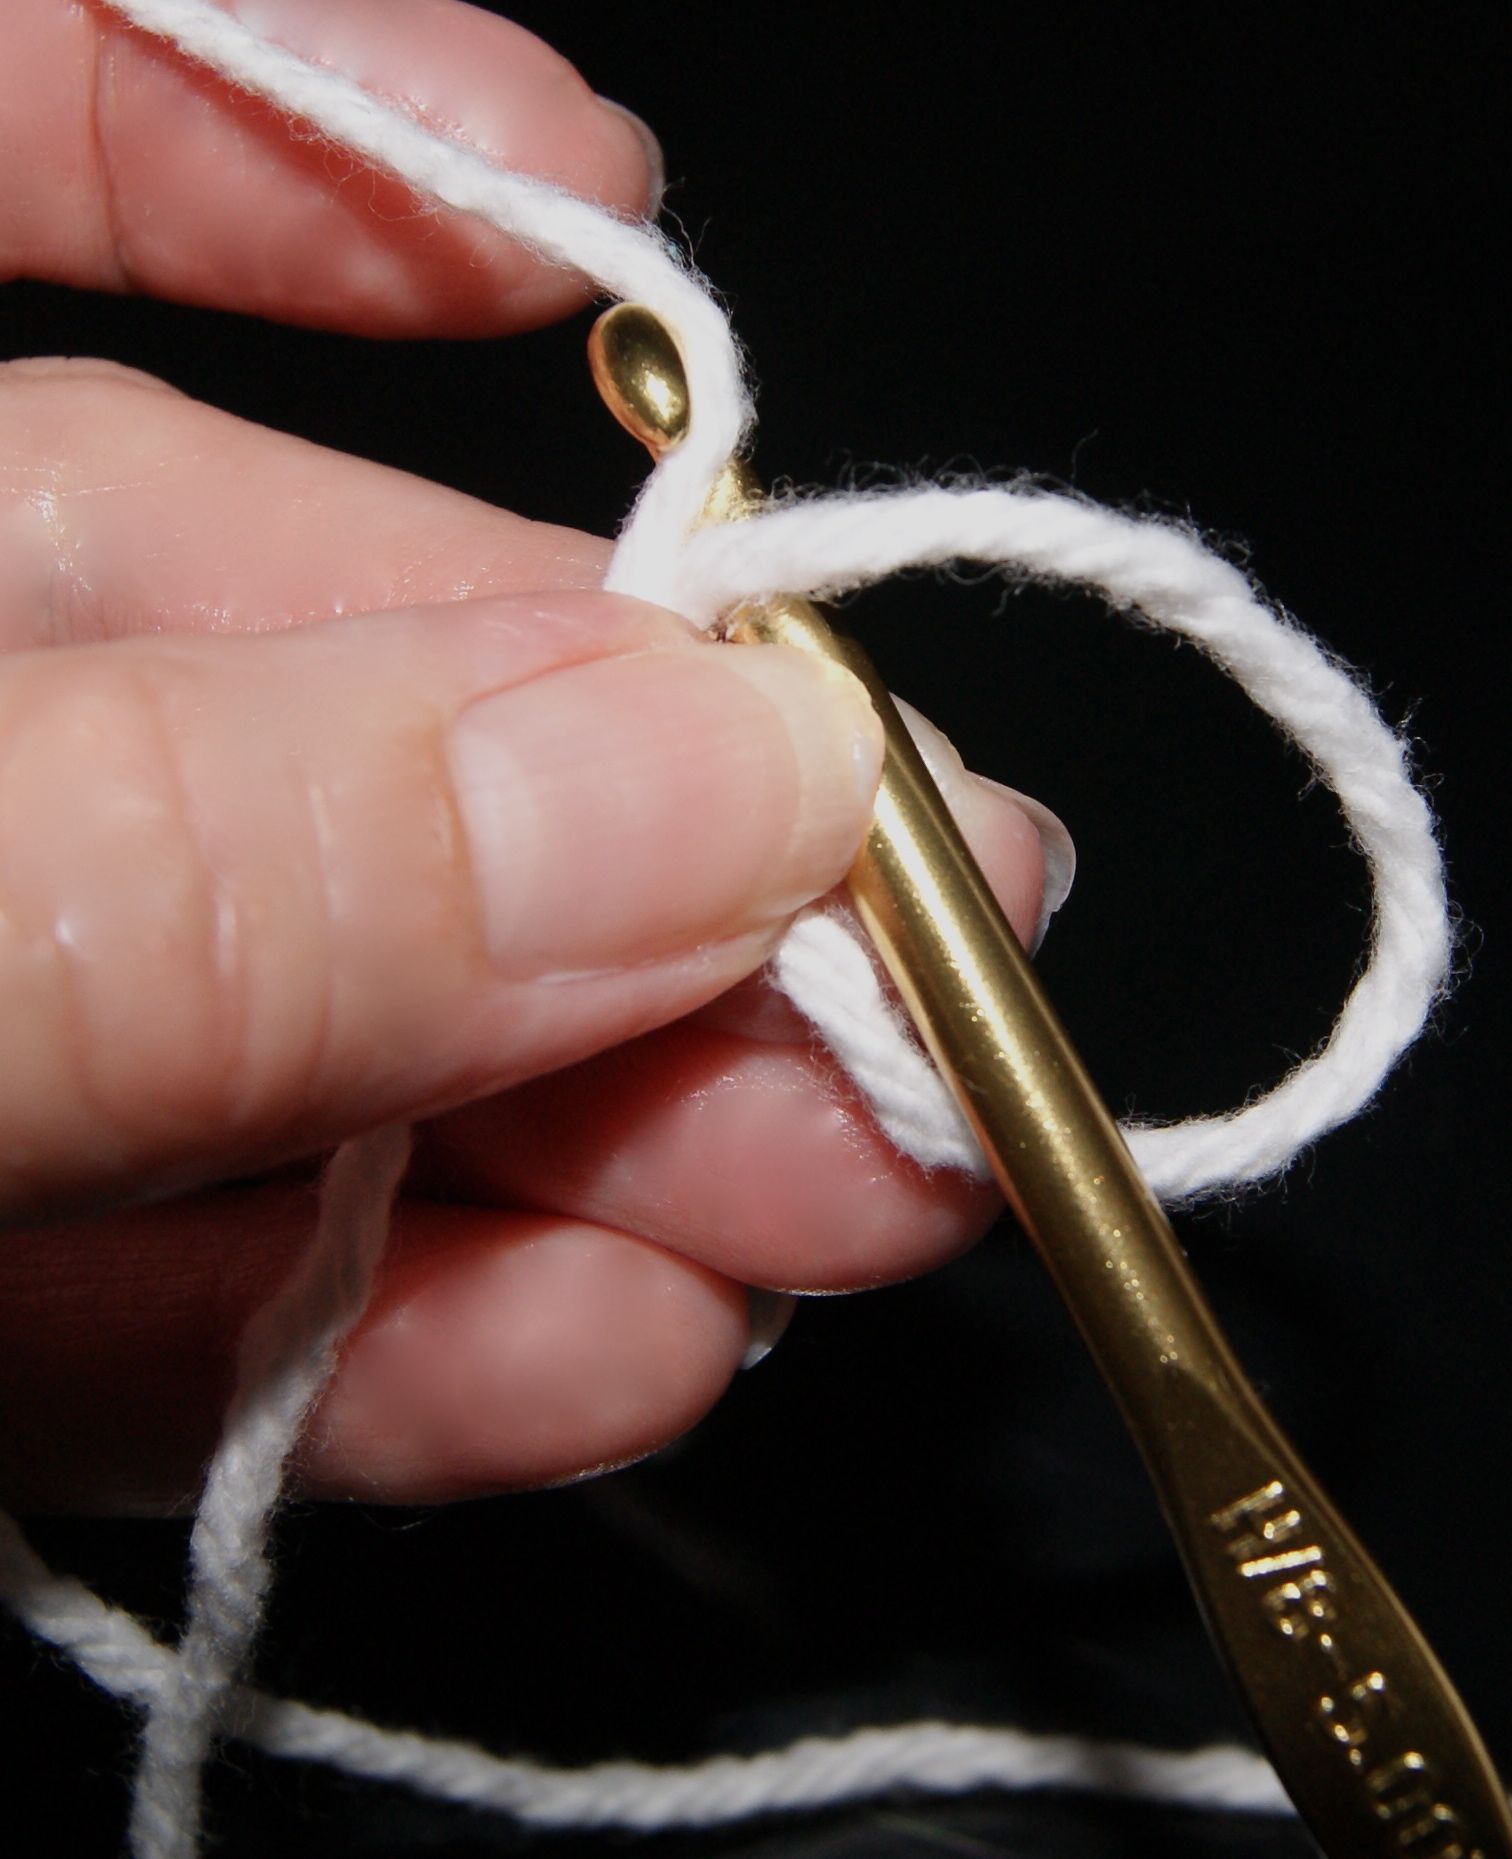
Here’s my version of a magic loop with close up pictures which I hope will help those of you learning to do this technique.  This is how I weave my yarn through my fingers to get ready to make the loop.  SONY DSC

Now you want to form the circle or “loop” that you will be crocheting inside of.  You need to form a counterclockwise loop with the tail or end of yarn heading down and on the bottom side of the loop and the yarn pulling from the skein off to the side and on top of  the loop.  Hold this loop join between your middle finger and your thumb to keep in place ready to make your first stitch.

counterclockwise loop

counterclockwise loop

SONY DSCInsert your crochet hook through the loop and pick up the yarn pulling from the skein and pull it through the opening of the loop.   Yarn over and pull through completing first stitch which is actually your slip knot.  Be sure to keep holding the loop (the tail yarn and loop) between your middle finger and thumb so it doesn’t come apart.   Now crochet your pattern designated circle stitches.  I am showing double crochet (dc) stitches inside loop.  Once you have a completed dc, your loop is pretty secure and it isn’t necessary to keep holding it securely between your middle finger and thumb.  One thing you want to make sure of is to keep your tail yarn (which will be the yarn you will pull to tighten your loop) along the outside edge of the loop.  It will want to twist around the loop as you make your stitches and it won’t be easy to close the loop if twisted.

picking up first loop

completed first dc, untwisted yarn tail to keep along outer edge of loop

completed first dc, untwisted yarn tail to keep along outer edge of loop

pulling loop through magic loop making slip knot

pulling loop through magic loop making slip knot

completed 3 dc

completed 3 dc

Finish the required stitches according to your pattern, my sample I am showing 6 dc stitches inside loop, now you will join with a slip stitch (sl) into your beginning stitch.  Not the first loop which was actually a slip knot but your first actual stitch.  Once you complete the slip stitch (sl) join, pull securely on the tail yarn to close the loop as tightly as you want it.

joining into 1st dc with sl stitch

joining into 1st dc with sl stitch

completed "magic" loop

completed “magic” loop

Now you are ready to begin your next round according to the directions of your pattern.  I personally really like to do the “magic” loop and I hope you find these directions helpful too.

HAPPY CREATING!!

Disclaimer:  This post contains affiliate links – “small commission earned”

Newborn/Preemie Crochet Pattern

Just discovered a fellow crocheter from Ravelry  (a wonderful crochet/knit site) who has been busy making my newborn/preemie crochet beanie pattern and donating them to her local hospital.  Way to go Loz!!

Check out her website http://xloz68x.wordpress.com/ to see her cute beanies!!

Let me know if anyone else has been making these too!!  They really are easy and loads of fun to make and for a wonderful cause.

HAPPY CREATING!!

SONY DSC

Disclaimer:  This post contains affiliate links – “small commission earned”

Crochet Beanies for Donations

We are having a beautiful Spring day and I thought I would take just a moment to share a picture of some of the baby beanies that I have made.  Hopefully, giving you some fresh ideas that can be made from this quick, simple pattern.   I am donating these to our local hospital’s maternity ward for the newest arrivals!!

Also, I did knit two preemie sized beanies from a free Red Heart pattern that I tweaked a bit.   If you are interested in that pattern, let me know and I will tell you what I did.

SONY DSC

As you can see, I used several different solid colored baby yarns, a variegated brown and pink baby yarn, two shades of pink for one and I made one by crocheting a solid blue baby yarn and a solid white baby yarn together.

Using different sizes of hooks and weights of yarn gives you a nice variety of shapes and sizes.

For my next batch, I think I will add some pompoms to the tops and/or little appliques.  Hope you have as much fun creating these beanies as I have!!

HAPPY CREATING!!

Disclaimer:  This post contains affiliate links – “small commission earned”


Crochet iCord

Knowing how to make a crochet iCord is another great technique to have within your stitch file.  It is a pretty simple repeat stitch pattern and you will find many uses for an iCord for your clothing, accessories, appliques, etc.

The basic concept is working with three chain stitches to form a tube.  So to begin you would crochet three chains stitches, then insert your hook in the second chain from hook, yarn over (yo) and pull through loop.  Repeat this step in the third chain from hook.

Made 3 chains, ready to insert into 2nd n 3rd chain from hook

Made 3 chains, ready to insert into 2nd n 3rd chains from hook
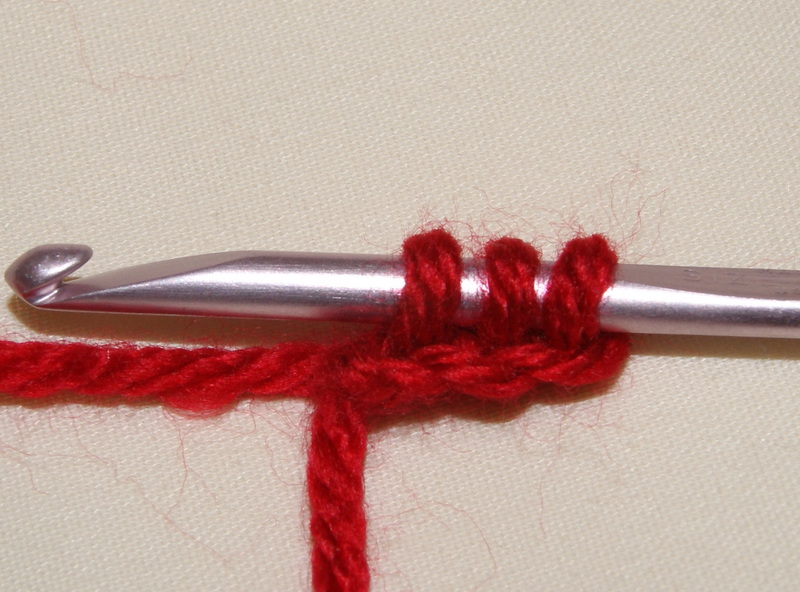
3 loops on hook, ready to begin making iCord

3 loops on hook, ready to begin making iCord

Now you want to slide off the first two (2) chains from your hook onto another holder like a knitting needle, chop stick, or a large tapestry needle.  I personally have success using a bamboo knitting needle.
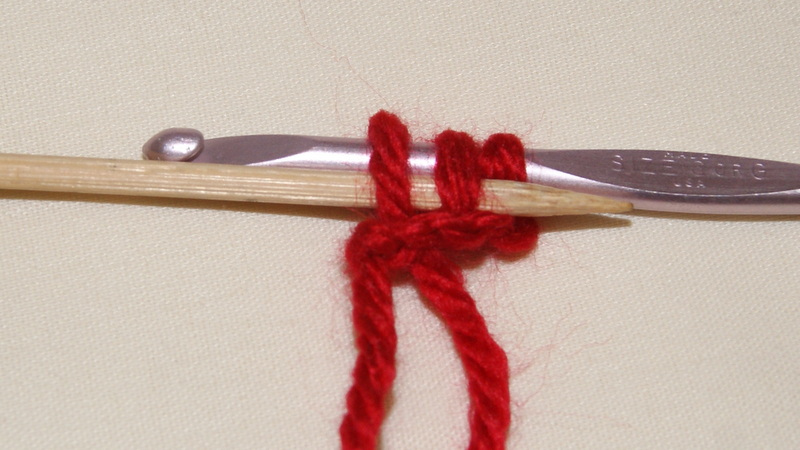
Sliding on to your holder, knitting needle
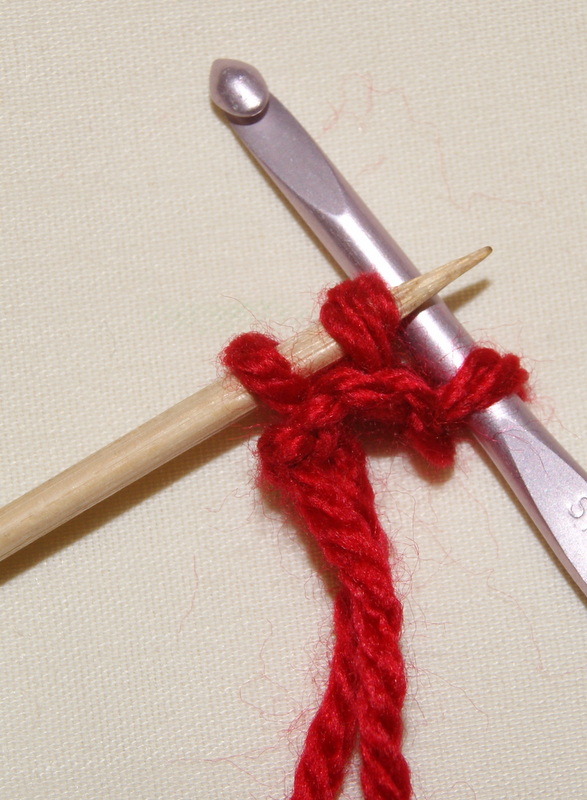
Sliding on to your holder, knitting needle

Two stitches on holder and one one crochet hook

Two stitches on holder and one on crochet hook


Once you have those two chains placed on your holder, you will begin making a chain stitch (*yo and pull through the loop) with the remaining loop on your crochet hook.  Now slide your 1st chain stitch loop back onto your crochet hook, make a chain stitch (*) and then slide your 2nd chain stitch loop back onto your crochet hook, and again make a chain stitch (*).
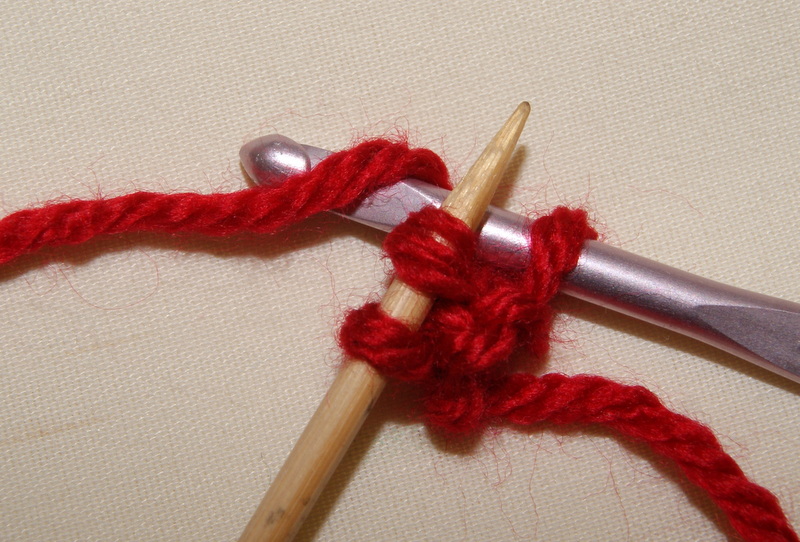
YO ready to make 1st chain with loop on hook

Ready to make 1st chain with loop on hook, YO pull through loop
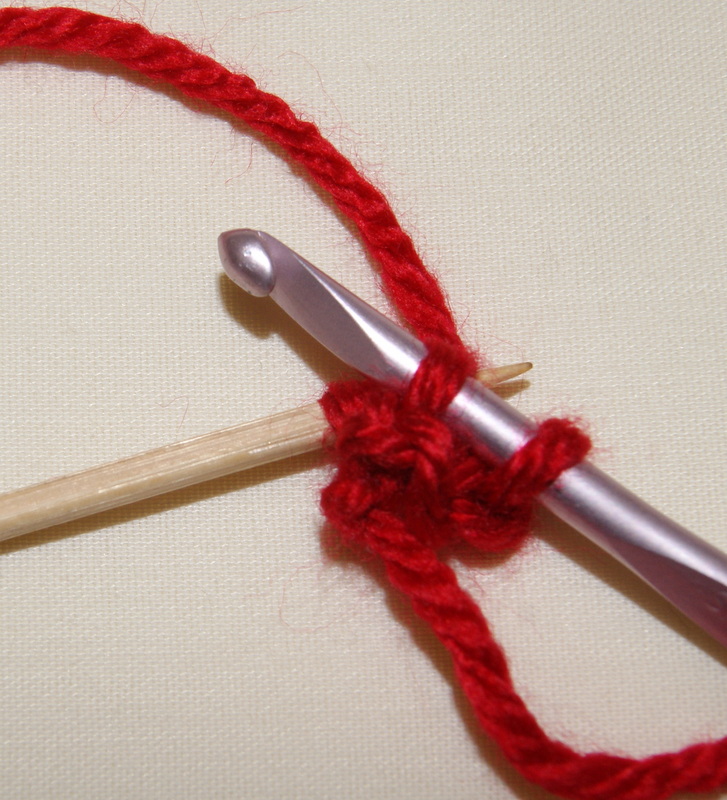
Sliding 2nd chain back onto crochet hook

Sliding 1st chain stitch loop back onto crochet hoo

You just keep repeating this process until your cord is the length that you want.  To fasten off, just do a yarn over and pull through the three loops on your hook, now cut your yarn and pull it through the last remaining loop on  your hook.
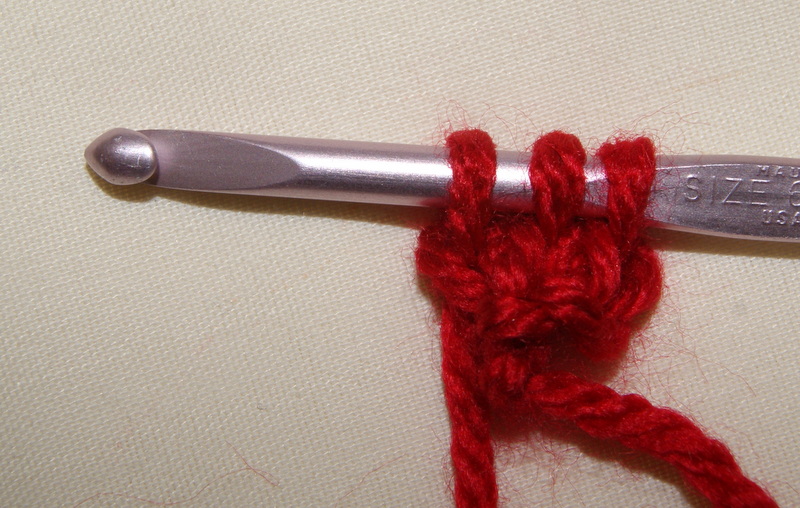
First row completed

First row completed

You can create different size iCords by varying your yarn weight and hook size.
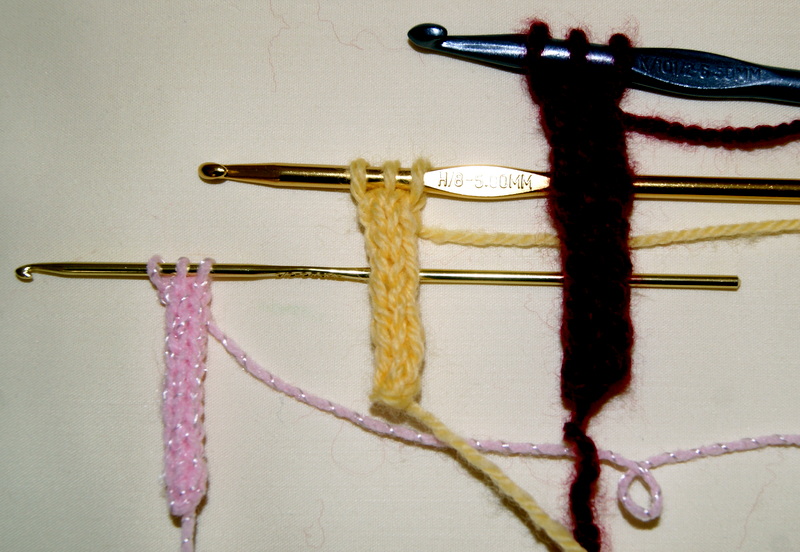
Various sizes of iCords you can make

Various sizes of iCords you can make

 HAPPY CREATING!!

Disclaimer:  This post contains affiliate links – “small commission earned”