Knitting Nancy Project

I have still been knitting on my “cattail” using my handmade knitting nancy spool.   It is a very easy, relaxing type of yarn craft that I will pick up for those times when I don’t want to have to concentrate to hard on a project or count stitches as I crochet. SONY DSC   
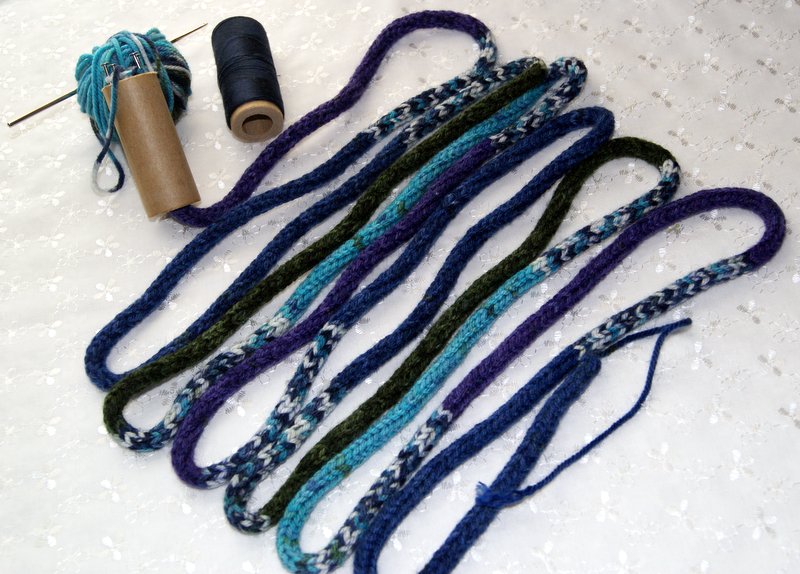
You can check out my Knitting Nancy blog to see exactly how to make a spool and how to start your yarn to begin forming your tail!  As you can see by the picture, my “tail” is quite long, presently measuring 131 inches or a little over 3 1/2 yards long.  My goal is to roll my tail into a circle to make a nice trivet or mat for a hot bowl to protect the dining table top. SONY DSC   
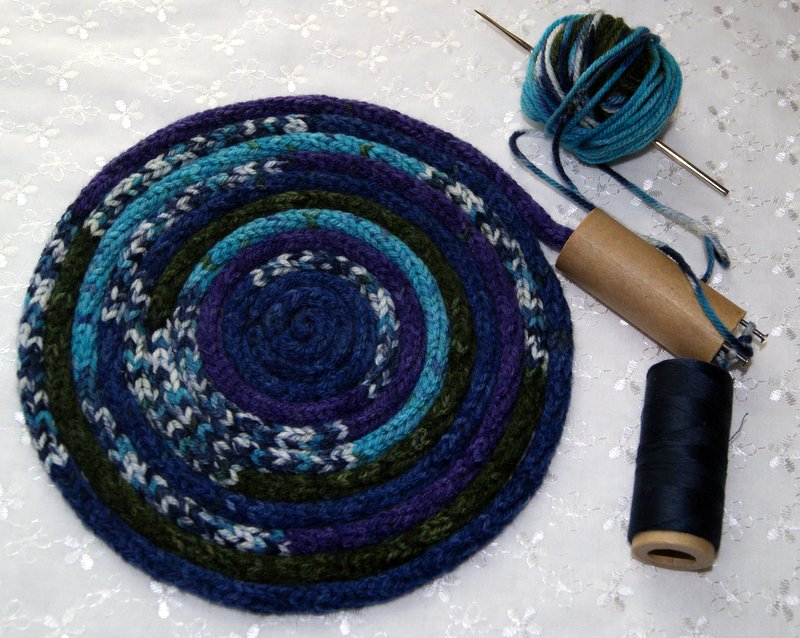
At present, it measures almost 8 inches in diameter and I think I will make it just a little wider but probably not more than 10 inches.  Of course, this will leave me with just enough yarn to make a small pom pom!!  Yarn scraps?? hmm – working on some ways to use them up because I just cannot bear to trash them or maybe I will find a local 4H group and donate all my tiny yarn balls to them.  Like that idea!! SONY DSC   Anyways I digress, my trivet will be sewn together with a nice quilting weight cotton thread.  Connecting Threads has some great collections of these threads in a wide variety of colors too, which are wonderful for machine or hand sewing projects. 
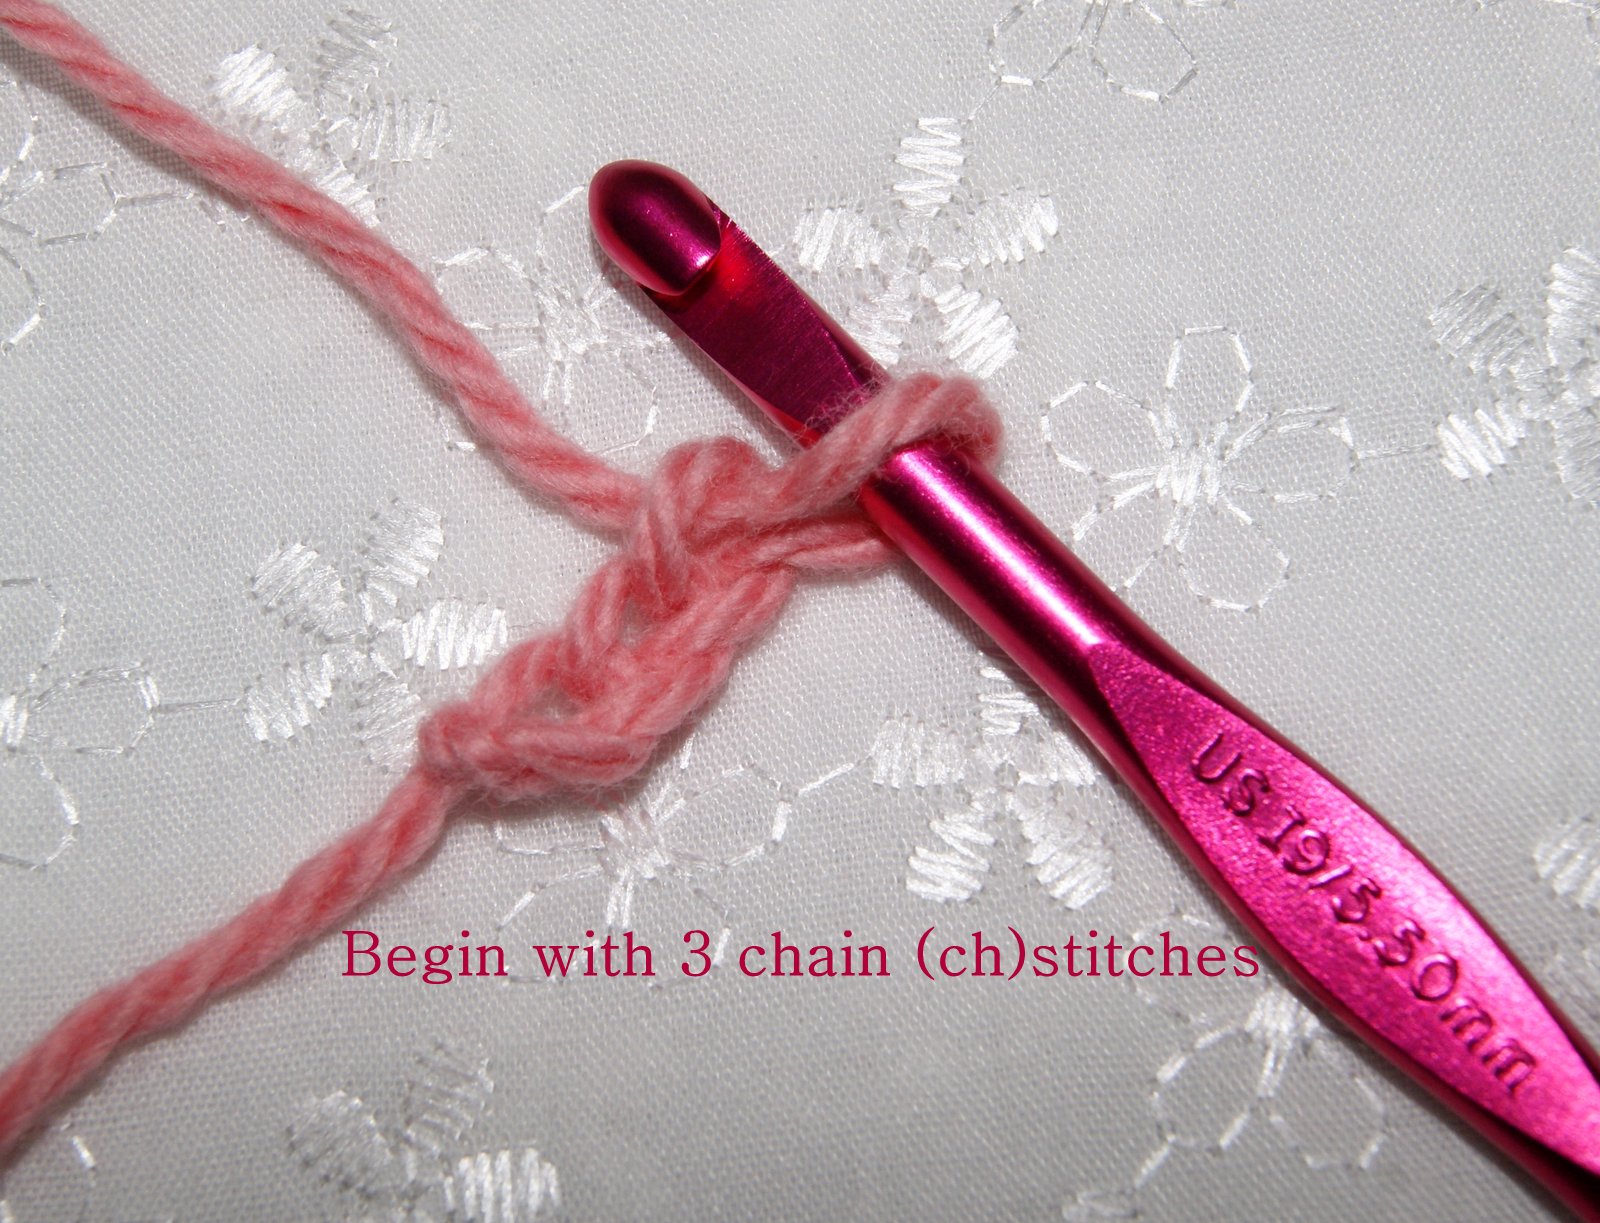
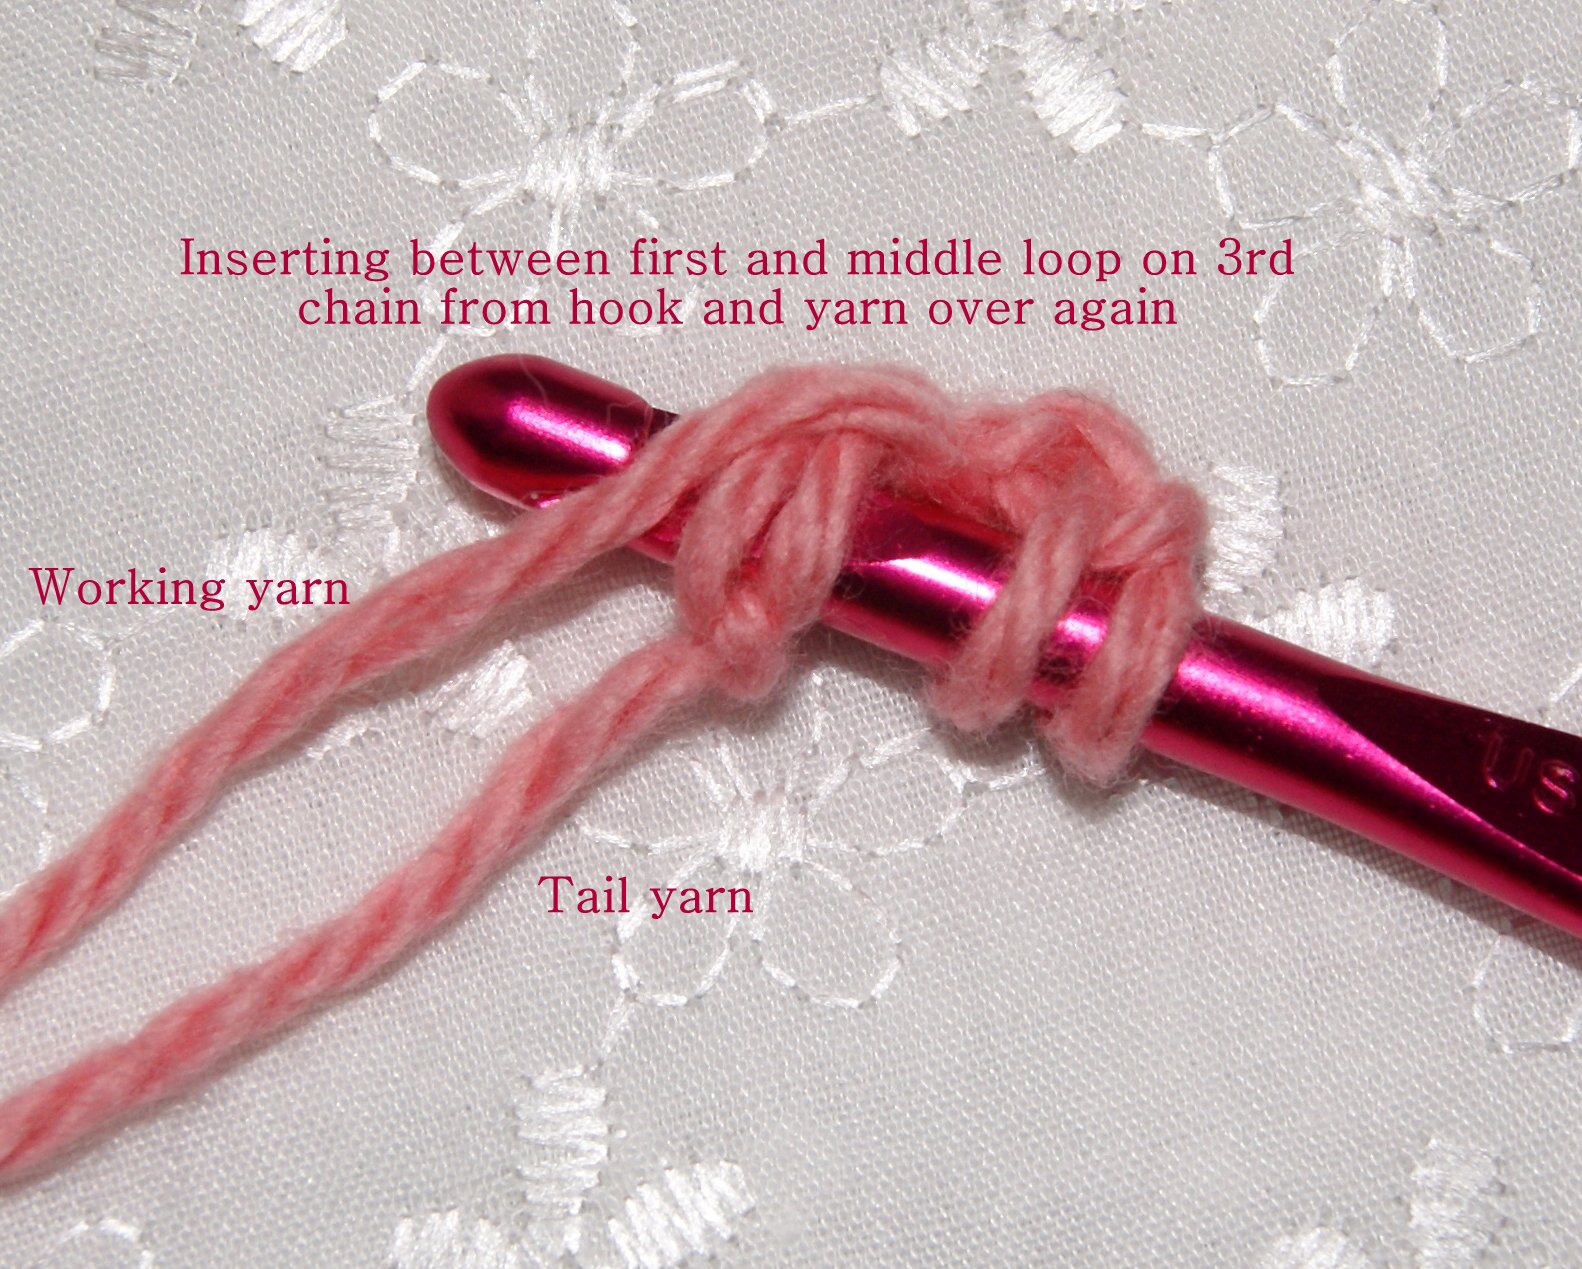
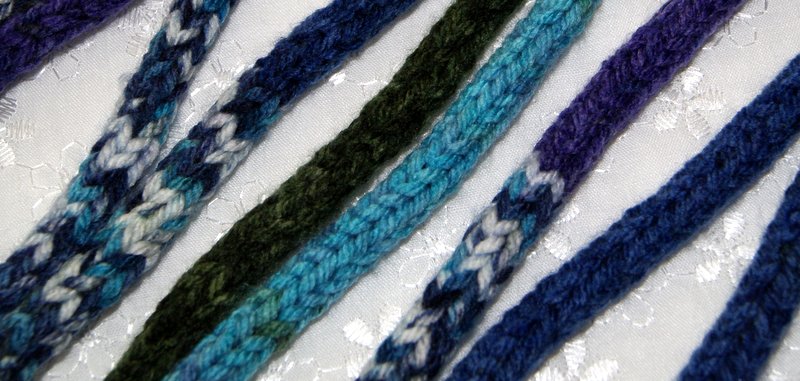
I think I started a new skein of yarn for this project, a category 4 yarn, worsted weight.  I just used a size 5 hook to lift my lower loop over the top loop to create the knit looking tail. SONY DSC When I am ready to bind off, I will do another blog with close up pictures so you can see the actual binding off process. Some fun ideas to use your “tail” for would be a set of coasters, cool bookmarks, glue some googlie eyes and make a snake for a little one, make three tails and sew together at one end and braid them for a bracelet or headband, placemats even a small rug. I’m looking forward to completing this one and having it ready for my kitchen table!!

HAPPY CREATING!!

Disclaimer:  This post contains affiliate links – “Commissions Earned”    

Mother’s Day Sachet

Looking for a quick little gift or need a favor for a wedding shower or maybe you just want to add an accent to highlight a pretty wrapped package then this sachet should work for you. SONY DSC I have just taken two of the Fun, Little Crochet Heart Applique pattern and crochet them together leaving an opening for stuffing.   I placed two hearts, wrong sides together and began at the bottom point with a Slip (sl) stitch.  Then I just made a single crochet (sc) in next stitch, chain (ch) 1, and continued in this pattern all around the two hearts {1 sc-1ch, 1sc-1ch}.  I did a Slip (sl) stitch in the deep curve area of the heart and then continued with the single crochet and chain pattern until I was back at my starting point.  Fasten off and weave in  your ends. **Remember to stop and leave a small opening and stuff your heart with a little batting or cotton balls that have been sprayed with a favorite perfume then continue crocheting until you reach your starting point. My sample was created using Lily Sugar n Cream 100% cotton yarn with a Size G hook.  I wanted a reversible look so I did a pink heart for one side, a white heart for the other side and joined creating my small ruffled edge with a variegated yarn. SONY DSC SONY DSCThis design lends itself to all kinds of possibilities depending upon the type of yarn you use and your hook size to create a larger sachet or pin cushion or smaller more dainty styles.  Also, adding some unique or vintage buttons or ribbons will really give your project that one-of-a-kind personal touch. 🙂

HAPPY CREATING!!

Disclaimer:  This post contains affiliate links – “Commissions Earned”  

Crochet Barbie Doll Sweater Dress

Needed to whip up a quick gift for someone who loves Barbies!!  I found this cute, easy to put on,  sweater dress pattern from crochet for Barbie and decided to give it a whirl. I just grabbed a small leftover ball of yarn from my basket and started crocheting away.  My yarn was a little heavier than the recommended yarn choice but, hey, living in the north where winter has been very cold this year, I thought Barbie needed to be dressed a little warmer!!   My biggest concern was that I wanted it to be easy to put on and take off for the little girl who was receiving this present. IMG_20130319_144959 IMG_20130319_145009IMG_20130319_150350 This little dress did meet that requirement so I continued making it.  I actually worked up a simple little ballet slipper as an accessory for the doll too and attached a pretty silk rose to the toe. IMG_20130319_150403IMG_20130319_150409 The gift was a hit so I’m sure I will now be expanding my crochet to include Barbie and her friends 🙂

HAPPY CREATING!!

Disclaimer:  This post contains affiliate links – “Commissions Earned”    

Repurposed Keepsake

Here’s an idea to keep on your bulletin board or where ever you might have future projects waiting to be made (under fabric and yarn, taped to a calendar, in a drawer, etc.)  Always working hard at staying organized but some of you know how that is!! IMG_20110831_183900

 Take a moment to click on the picture to see the entire Cat family!!

Anyways, I was working my booth at a craft show and got to talking with a very nice woman who had lost her husband about a year ago.  Some of my handmade merchandise is made from 100% cotton and she wondered if I would be willing to sew for her using fabrics provided by her.  To make a long story short, she wanted to give her children and grandchildren a keepsake made from her husband’s shirts.  In particular, she wanted cats. IMG_20110828_155918 So I found this cat pattern and she gave me several 100% cotton dress shirts as well as polo style and T-shirts.  I used her husband’s clothing to make these really adorable cats.  She said that some of the shirts were gifts given to her husband by their children and grandchildren.  So she was going to give back to them this remembrance cat made from the gift they had given to her husband.  What a touching keepsake!! Ribbon was added as a cute accent.  She was thrilled with how they turned out and I was touched each time I sewed one.  What a beautiful repurposing memory for all of them to treasure!!

HAPPY CREATING!!

Disclaimer:  This post contains affiliate links – “Commissions Earned”

HDC or DC chainless foundation tutorial

Here’s another tutorial on the chainless foundation stitch showing how to begin using the double crochet (DC) and/or the half double crochet (HDC) stitches.  There are only 2 differences when beginning a project with these particular stitches from the single crochet (SC) chainless foundation. The differences are that you begin your chainless foundation with 3 chain stitches for the HDC and 4 chain stitches for the DC.  Also,  you will yarn over before you insert your hook into the top of the 2 beginning chain loops.  Otherwise, you complete your stitches exactly the same:
  • Complete your required number of chain stitches 2 for SC, 3 for HDC, 4 for DC
  • Yarn over (skip this step for single crochet chainless foundation)
  • Insert hook in first and middle loops of last chain from hook
  • Yarn over and pull through those two loops
  • Yarn over and pull through first (top) loop completing chain stitch
  • Yarn over and pull through remaining two loops to complete SC or
  • Yarn over and pull through remaining three loops to complete HDC or
  • Yarn over and pull through top TWO loops, yarn over and pull through remaining two loops to complete DC
Here are pictures for the HDC, which I hope will help you if you are totally new to this technique: SONY DSCSONY DSCSONY DSC SONY DSCSONY DSCSONY DSC Here are examples pictures of completing a DC chainless foundation row: SONY DSCSONY DSCSONY DSC SONY DSCSONY DSCSONY DSC SONY DSCSONY DSC After completing steps to make your chain foundation stitch, yarn over and work the remaining stitches just like you would for a double crochet (dc) stitch. If your project wants you to work in the round, be sure to leave yourself a 4-5 inch tail for joining seams when making your beginning chain stitches.  This is a super stitch for ribbing on clothing, hats, etc.  I have designed a beanie pattern using the chainless foundation stitch crocheting the beanie from the bottom to the top.  Have been making these and donating them to my local hospital (new maternity ward) and Martin Head Huggers organization as chemo caps.   If interested in making chemo caps, you can click on this link for patterns and information www.headhuggers.org. SONY DSCSONY DSC

 HAPPY CREATING!!

Disclaimer:  This post contains affiliate links – “Commissions Earned”